Berry Icebox Cake
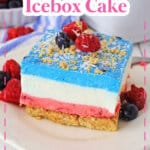
This Summer Berry Icebox Cake is rich, creamy, and delicious. A graham cracker crust is topped with layers of raspberry, blueberry, and plain no-bake cheesecake layers, creating a bright, summery flavor in every bite.
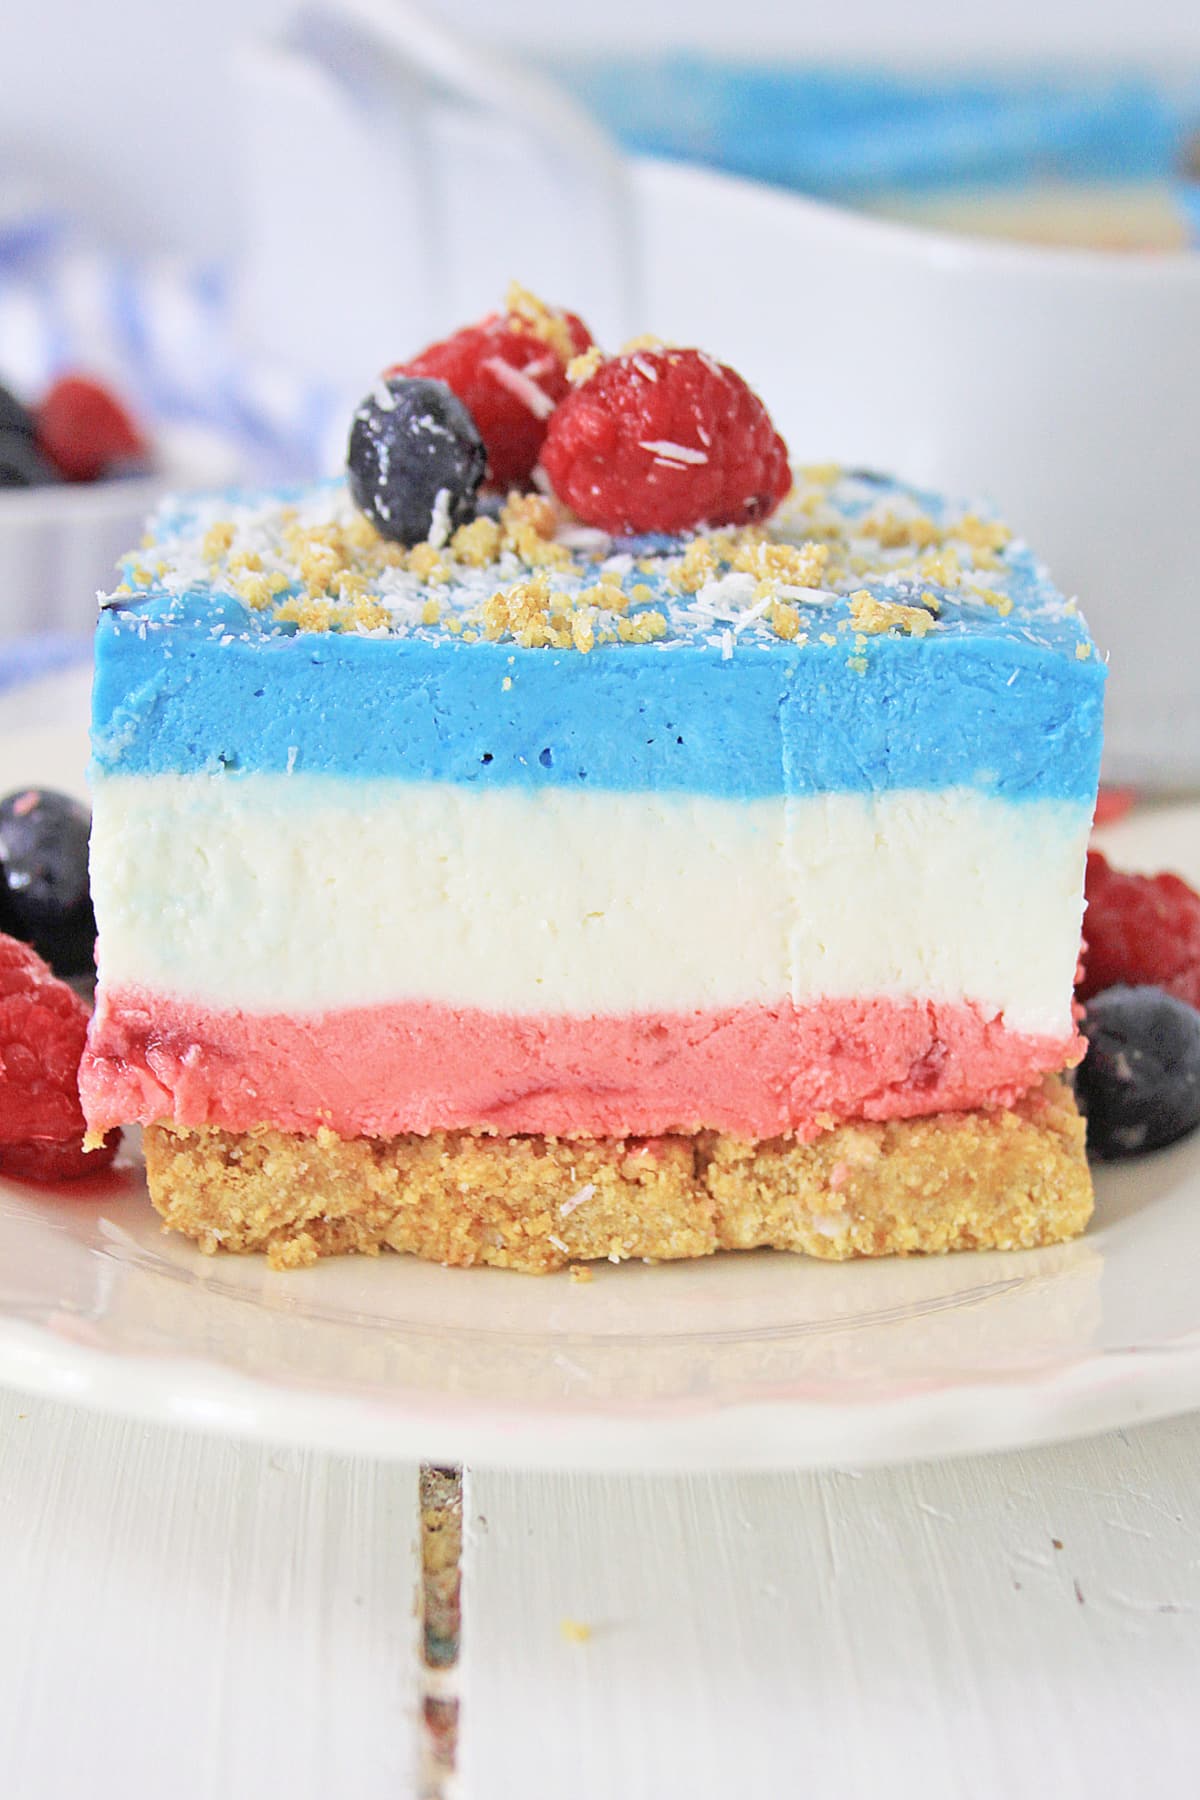
Icebox cakes are one of our favorite desserts to make because they’re so easy and delicious, and in the summer, they’re incredibly satisfying. We love this summer berry icebox cake because it has the rich flavors of cheesecake and berries, and its red, white, and blue color scheme makes it a great dessert for Memorial Day and Independence Day.
Table of contents
❤️ Why You’ll Love This Recipe
- It’s an easy, no-bake recipe even beginners can make.
- The bright flavors of fresh raspberries and blueberries make it a great summer treat.
- Its red, white, and blue colors make it a fantastic patriotic holiday dessert.
🛒Ingredients
As an Amazon Associate, I earn from qualifying purchases.
This recipe uses simple ingredients that you can find in your kitchen or your local grocery store. There’s nothing fancy whatsoever!
The ingredients needed to make this recipe are listed right here, but you can find their exact amounts in the recipe card at the end of the post.
For the Crust
- Graham cracker crumbs
- Sugar
- Butter – melted
For the Filling
- Cream cheese – softened
- Heavy cream
- Vanilla
- Sugar
- Unflavored gelatin
- Cold water
- Boiling water
- Fresh raspberries – rinsed and dried
- Fresh blueberries – rinsed and dried
- Neon dark blue food coloring gel
- Neon aqua blue food coloring gel
- Neon red food coloring gel
🔪 How to Make Summer Berry Icebox Cake
This icebox cake has a few colored layers, so at first glance, it might look complicated. However, when you break it down, the recipe is actually very easy to make!
Step 1: Make the Crust
Mix the graham cracker crumbs, sugar, and melted butter until fully combined. Then, press the mixture firmly into the bottom of a 9×9 dish lined with parchment paper.
Step 2: Make the Cheesecake Batter
In a stand mixer, mix the softened cream cheese, sugar, and cream on low with the whisk attachment until creamy. Then, add the vanilla and blend until smooth.
Step 3: Mix the Gelatin
Add 1/2 cup of water to a saucepan and sprinkle the unflavored gelatin over the top. Bring another 1/2 cup of water to a boil in the microwave and add it to the water and gelatin mixture. Stir until dissolved and no longer grainy.
Step 4: Mix the Gelatin and Cheesecake Batter
Add the gelatin mixture to the cheesecake batter in the stand mixer and mix until completely blended. Scrape down the sides of the mixing bowl and mix on high speed for about a minute until smooth.
Step 5: Divide the Batter
Divide the cheesecake batter into thirds, adding 1/3 to a bowl, another third to another bowl, and leaving the remaining third in the stand mixer.
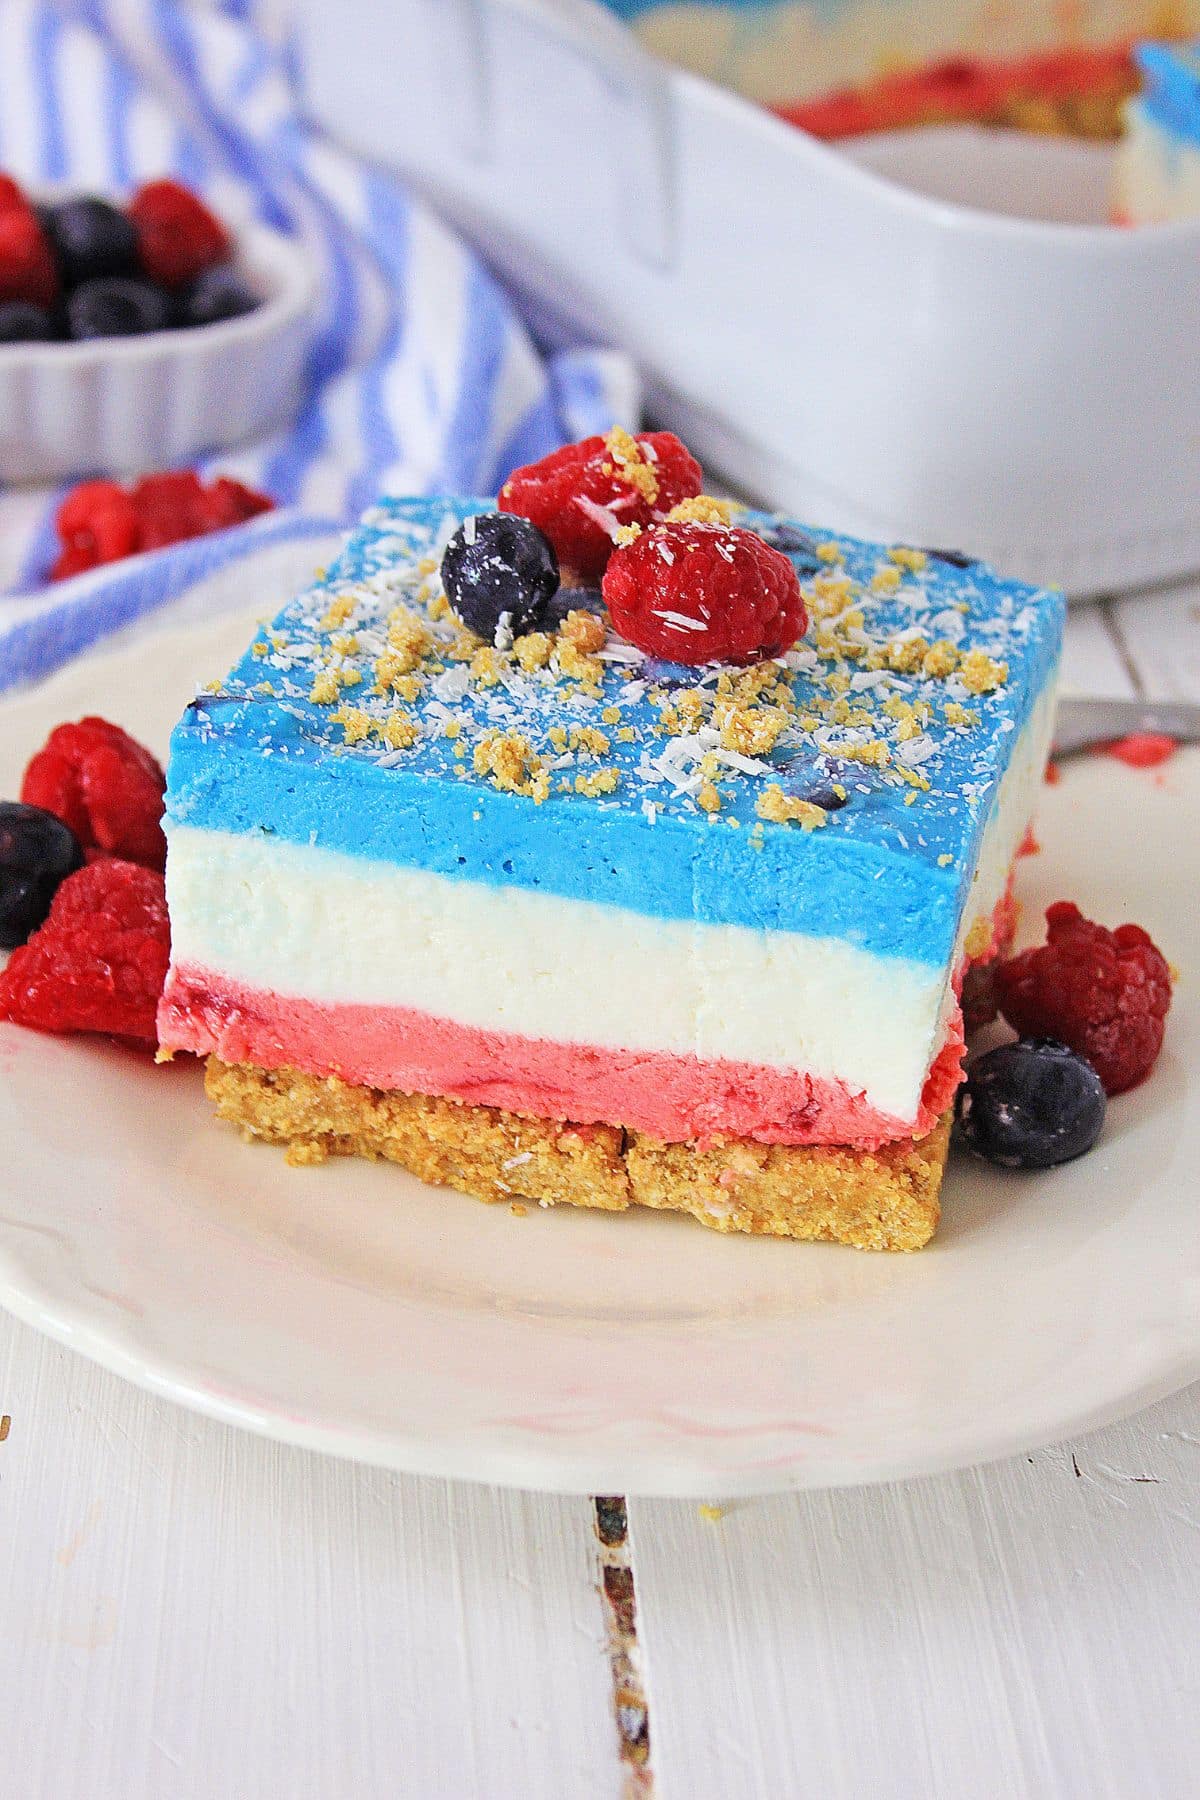
Step 6: Make the Raspberry Layer
Place about half the raspberries into one of the bowls and stir to blend. Then, add 4 to 5 drops of neon red food coloring gel and stir. Add more until you reach your desired color. Pour it over the crust and spread it into an even layer with a spoon. Place the dish in the freezer and chill for 45 minutes.
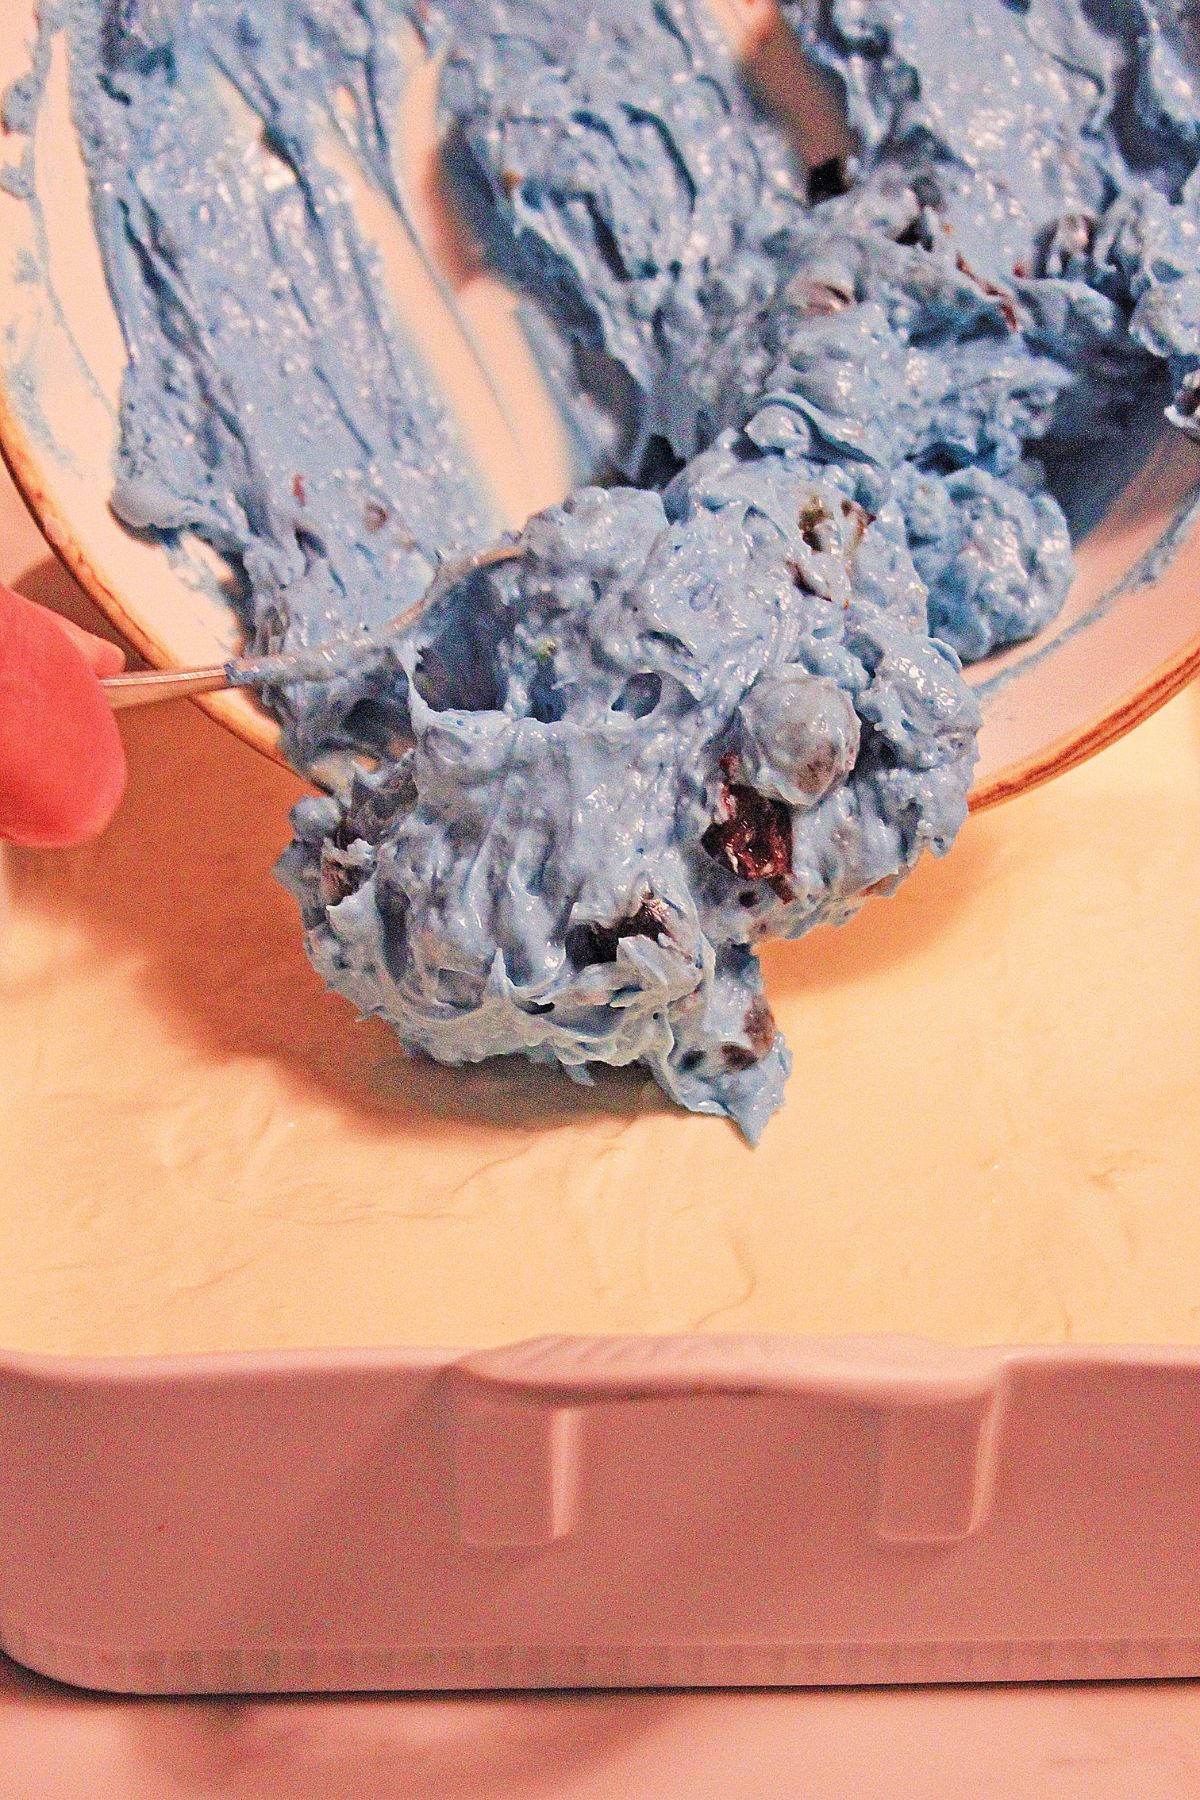
Step 7: Make the Blueberry Layer
Add about 1/2 the blueberries to the other bowl and stir. Then, add 2 to 3 drops of Neon dark blue food coloring gel and stir. Add 2 to3 drops of the aqua food coloring gel and stir again. Adjust with a drop or 2 of each until you reach your desired color. Place the bowl in the refrigerator.
Step 8: Refrigerate the Berries
Place the remaining berries back into the refrigerator until ready to use them.
Step 9: Add the White Layer
When the red layer has set, remove the dish from the freezer. Then, add the white cheesecake batter in a smooth, even layer over the red layer. Place the dish back in the freezer for about an hour or until set.
Step 10: Add the Blueberry Layer
When the white layer is firm, spread the blueberry layer evenly over the top of it and place it back in the freezer for another 15 minutes before serving.
Step 11: Serve
Slice the cake into 2×3 inch pieces and sprinkle them with crushed graham cracker crumbs and fresh berries. Enjoy!
📝Variations
- Use different food coloring gel colors for other holidays.
- You can make the crust with crushed Nilla wafers. Crushed pretzels make a great salty crust.
- Any brand of food coloring gel will work, but it must be food coloring GEL.
If you love fruity, sweet, and tangy recipes like this one, then try our no-bake orange creamsicle cheesecake.
🥄 Equipment
- Measuring cups and spoons
- Mixing bowls
- Microwaveable bowls
- Stand mixer
- Spatula
- 9×9 dish
🥫 Storage
Store this summer berry icebox cake in the freezer in an air-tight container or covered tightly with foil for up to a month.
What to Serve with Summer Berry Icebox Cake
Serve this delicious icebox cake as a sweet treat after a meal of summer classics like burgers, dogs, and barbecue. It’s also delicious paired with some fresh fruit and a bit of dark chocolate.
💭 Tips
- Be sure your cream cheese is fully softened to prevent little bits of raw cream cheese in the layers.
- Be sure your layers are fully set before adding the next layer to create clean lines between each color.
- Press the graham cracker crust mixture firmly into the bottom of the dish so it creates a uniform, cohesive crust that will hold together when the cake is sliced.
⁉️ FAQ
Do you have questions about this recipe? Here are the answers to the most commonly asked questions.
An icebox cake is a dairy-based dessert made with pudding, cheesecake, or another creamy filling alternated in layers with wafers like cookies or graham crackers. It can also refer to layered no-bake cheesecakes.
It’s important to allow each layer to fully set before adding the next layer. This prevents the previous layer from mixing into the new layer being added.
If you use liquid food coloring, it will make your batter too thin. Always use food coloring gel to keep the batter nice and thick.
🍽 More Recipes
Do you enjoy icebox cake? Then try these delicious recipes:
🧾Recipe Card
Want to make this recipe? Print the recipe card below, or pin this recipe so that you can find it later.
Berry Icebox Cake
Equipment
- mixing bowls
- 9×9 inch baking dish
- parchment paper
- Colander
- Paper towels
- Stand mixer
- Saucepan
Ingredients
Crust
- 2 cups graham crackers crumbs
- 1 Tablespoon sugar
- 1 stick butter melted
Filling
- 40 ounces cream cheese softened
- ⅓ cup heavy cream
- 1 Tablespoon vanilla
- 2 cups sugar
- 2 packages unflavored gelatin
- ½ cup cold water
- ½ cup boiling water
- 6 ounces fresh Raspberries rinsed and dried
- 6 ounces fresh blueberries rinsed and diced
- Neon dark blue food coloring gel
- Neon aqua blue food coloring gel
- Neon Red food coloring gel
Instructions
- Place the graham cracker crumbs in a bowl, add the sugar, and stir well.
- Place the butter in a microwave safe bowl, and melt in the microwave.
- Add the butter to the graham cracker crumbs, and stir well to coat crumbs.
- Reserve about 1/4 cup for garnish on top of dessert.
- Line the bottom of a 9 X 9 inch dish with Parchment paper, and press the crumbs into the bottom of the dish to form the crust.
- Set aside.
- Rinse the Raspberries, and blueberries under cold running water – in a colander, and lay on kitchen towels, or paper towels to dry.
- Softly pat any excess water from the berries.
- Place in the refrigerator to chill.
- In the mixing bowl of a stand mixer, place the softened cream cheese, sugar and cream, and mix on low with the whisk attachment until the cream cheese is smooth and creamy.
- Scrape down sides of the bowl, and blend until smooth.
- Add the vanilla, and blend until smooth.
- In a separate bowl, pour in the 1/2 cup of water, and sprinkle the unflavored gelatin over the water.
- Boil 1/2 cup of water in the microwave, and pour the boiling water over the gelatin.
- Stir until gelatin is dissolved, and no longer grainy.
- Add gelatin to mixing bowl, and mix on medium speed until completely blended.
- Scrape down sides of the mixing bowl, and mix on high speed until smooth, about 1 minute.
- Divide the cheesecake batter in thirds, leaving 1/3 of the batter in the mixing bowl.
- Set the mixing bowl in the refrigerator – this is the white layer.
- In the other two bowls; in one bowl, place about half the Raspberries, and stir to blend.
- Add about 4 or 5 drops of the Neon red food coloring gel, and stir. If the color is not bright enough, continue to add a drop or two, stirring between drops of color, until desired color is reached.
- Pour Red layer of cheesecake batter over the crust, and smooth evenly with back of spoon.
- Place the dish in the freezer.
- In the other bowl, add about 1/2 of the blueberries, and stir to mix.
- Add about 2 or 3 drops of the Neon dark blue food coloring gel, and stir.
- Add about 2 or 3 drops of the aqua food coloring gel, and stir to blend.
- Add 2 or 3 more drops of the dark blue color, and stir. If the color is not as bright as the color shown, add a drop or 2 more of the dark blue, and a drop or 2 of the aqua, stir well to blend, and continue until desired color is reached. Place the blue layer in the refrigerator.
- Refrigerate the remainder of raspberries and blueberries.
- Leave the dish in the freezer for about 45 minutes, or until the Red layer is firm to the touch.
- After the 45 minutes, making sure the red layer is firm to the touch, add the white layer, and place the dish back in the freezer.
- Leave the dish in the freezer for about an hour – or until the white layer is firm to the touch.
- When the white layer is firm to the touch, add the blue layer, spreading it out evenly over the white layer, and place the dish back in the freezer.
- Leave the icebox cake in the freezer until about 15 minutes before serving.
- Remove the dessert from the freezer, and let sit on the counter.
- When ready to serve, cut in 2 X 3 inch pieces, sprinkle a few of the reserved graham cracker crumbs on each piece, and top with remaining raspberries and blueberries.
- Serve, and Enjoy!
Notes
Disclaimer
Any nutritional data I provide is an approximation and actual dietary information can vary based on ingredients and proportion sizes.


