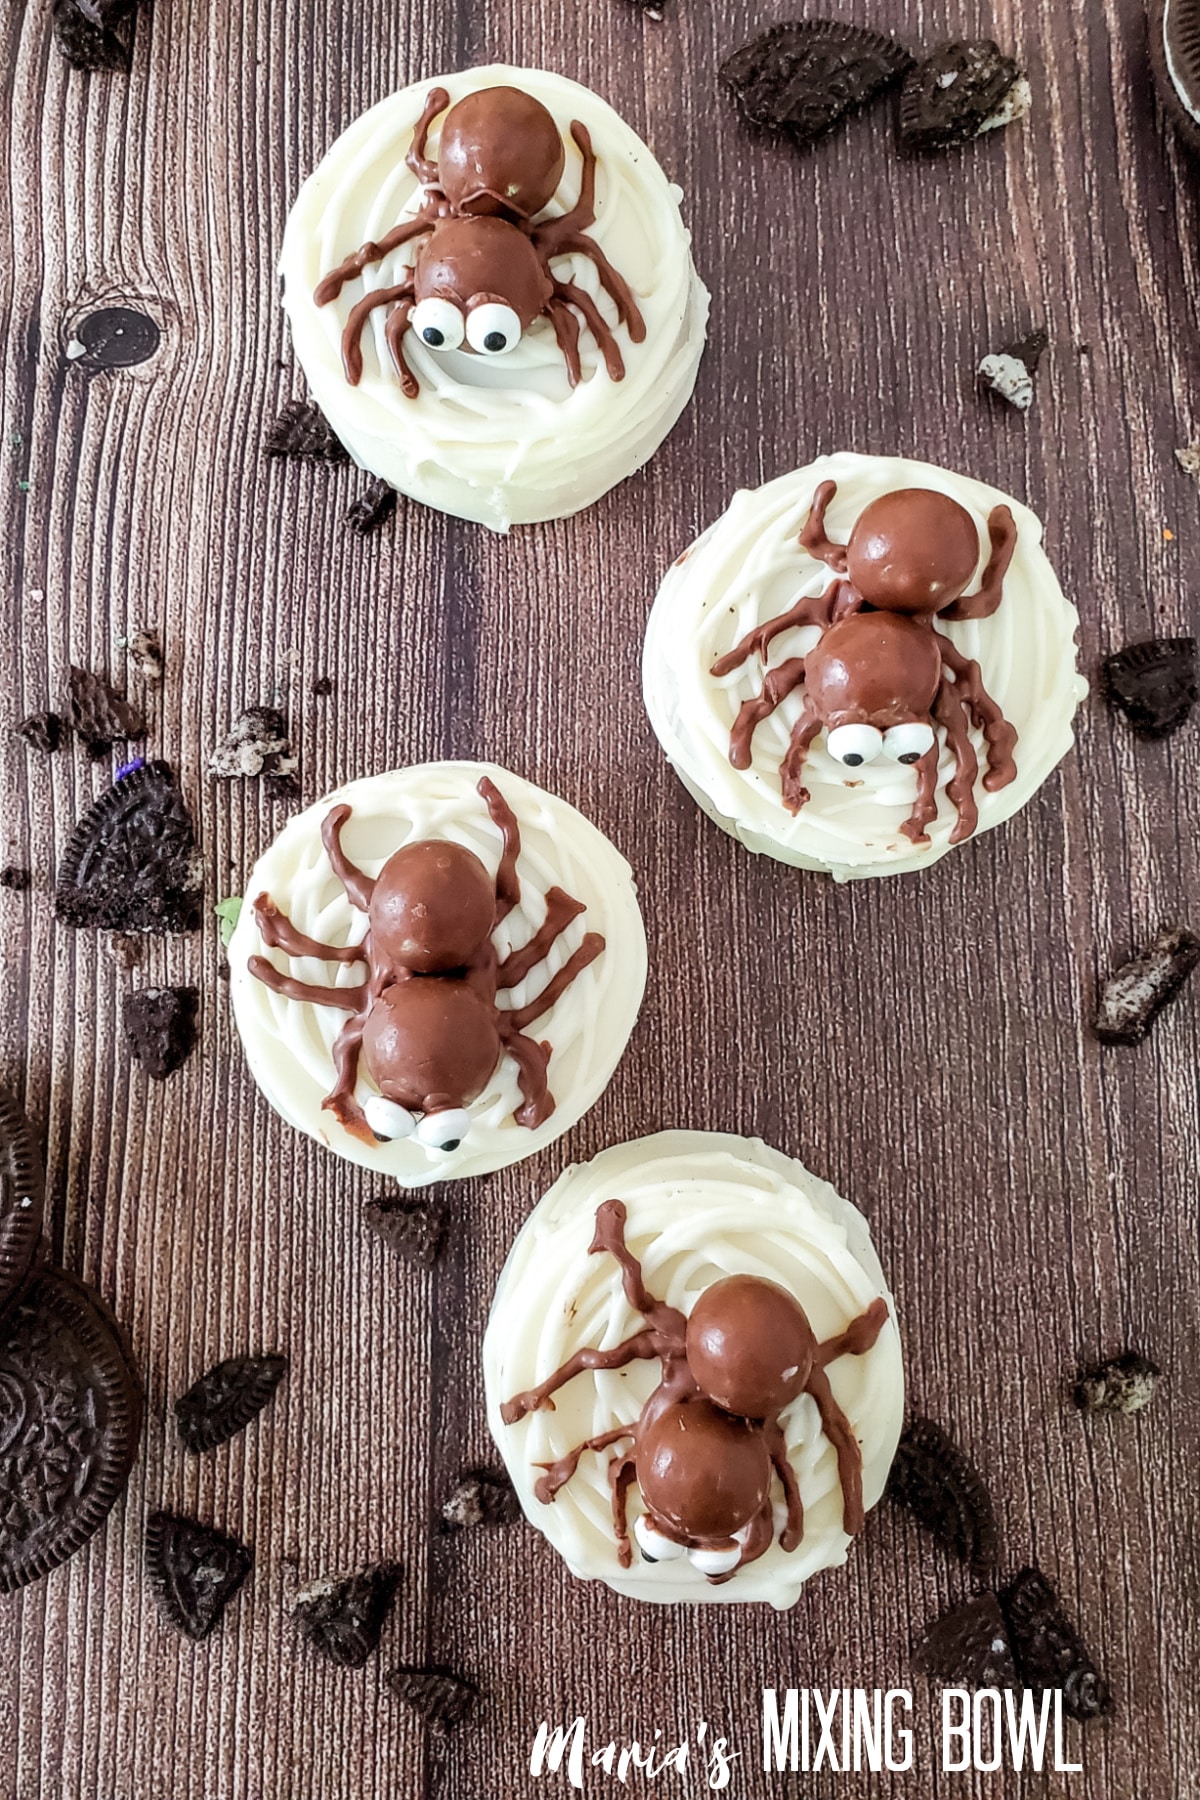
Chocolate Covered Oreo Spiders
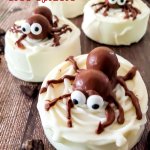
Chocolate Covered Oreo Spiders are delicious, easy, and make a great Halloween treat. They’re adorable as they are delicious.
As you might have noticed, we’ve really embraced the cuter side of Halloween this year, and these adorable Oreo spiders are the perfect example of that. These are tasty enough for everyone and so cute that they fit in with any Halloween gathering.
Table of contents
- ❤️ Why You’ll Love This Recipe
- 🛒Ingredients
- 🔪 How to Make Chocolate Covered Oreo Spiders
- 📝Variations
- 🥄 Equipment
- 🥫 Storage
- 💭 Tips
- ⁉️ FAQ
- 🍽 More Recipes
- 🧾Chocolate Covered Oreo Spiders
- 📌 PIN IT!!
❤️ Why You’ll Love This Recipe
- They’re absolutely adorable with just the right amount of Halloween spookiness.
- They are easy to make, but they don’t look it!
- They’re full of Oreo goodness along with delicious white chocolate candy.
- Everyone loves Oreos and they are great for your next Halloween party.
🛒Ingredients
The following are affiliate links. We are a participant in the Amazon Services LLC Associates Program, an affiliate advertising program designed to provide a means for us to earn fees by linking to Amazon.com and affiliated sites.
You only need a few simple ingredients to help you make these Halloween Oreos. Most of these ingredients can be found at your local grocery store or big box store.
- White candy melts or white chocolate chips
- Paramount crystals
- Oreo Cookies
- Chocolate chips or brown candy melts
- Malted milk balls
- Candy eyes
See the recipe card below for quantities.
🔪 How to Make Chocolate Covered Oreo Spiders
These cookies might look involved, but they’re actually very easy to make. It only takes a few simple steps.
Step 1: Melt the White Candy
Melt some of the chocolate in the microwave at 30-second intervals, stirring between each interval. Remove the bowl just before the candy is fully melted and stir until smooth.
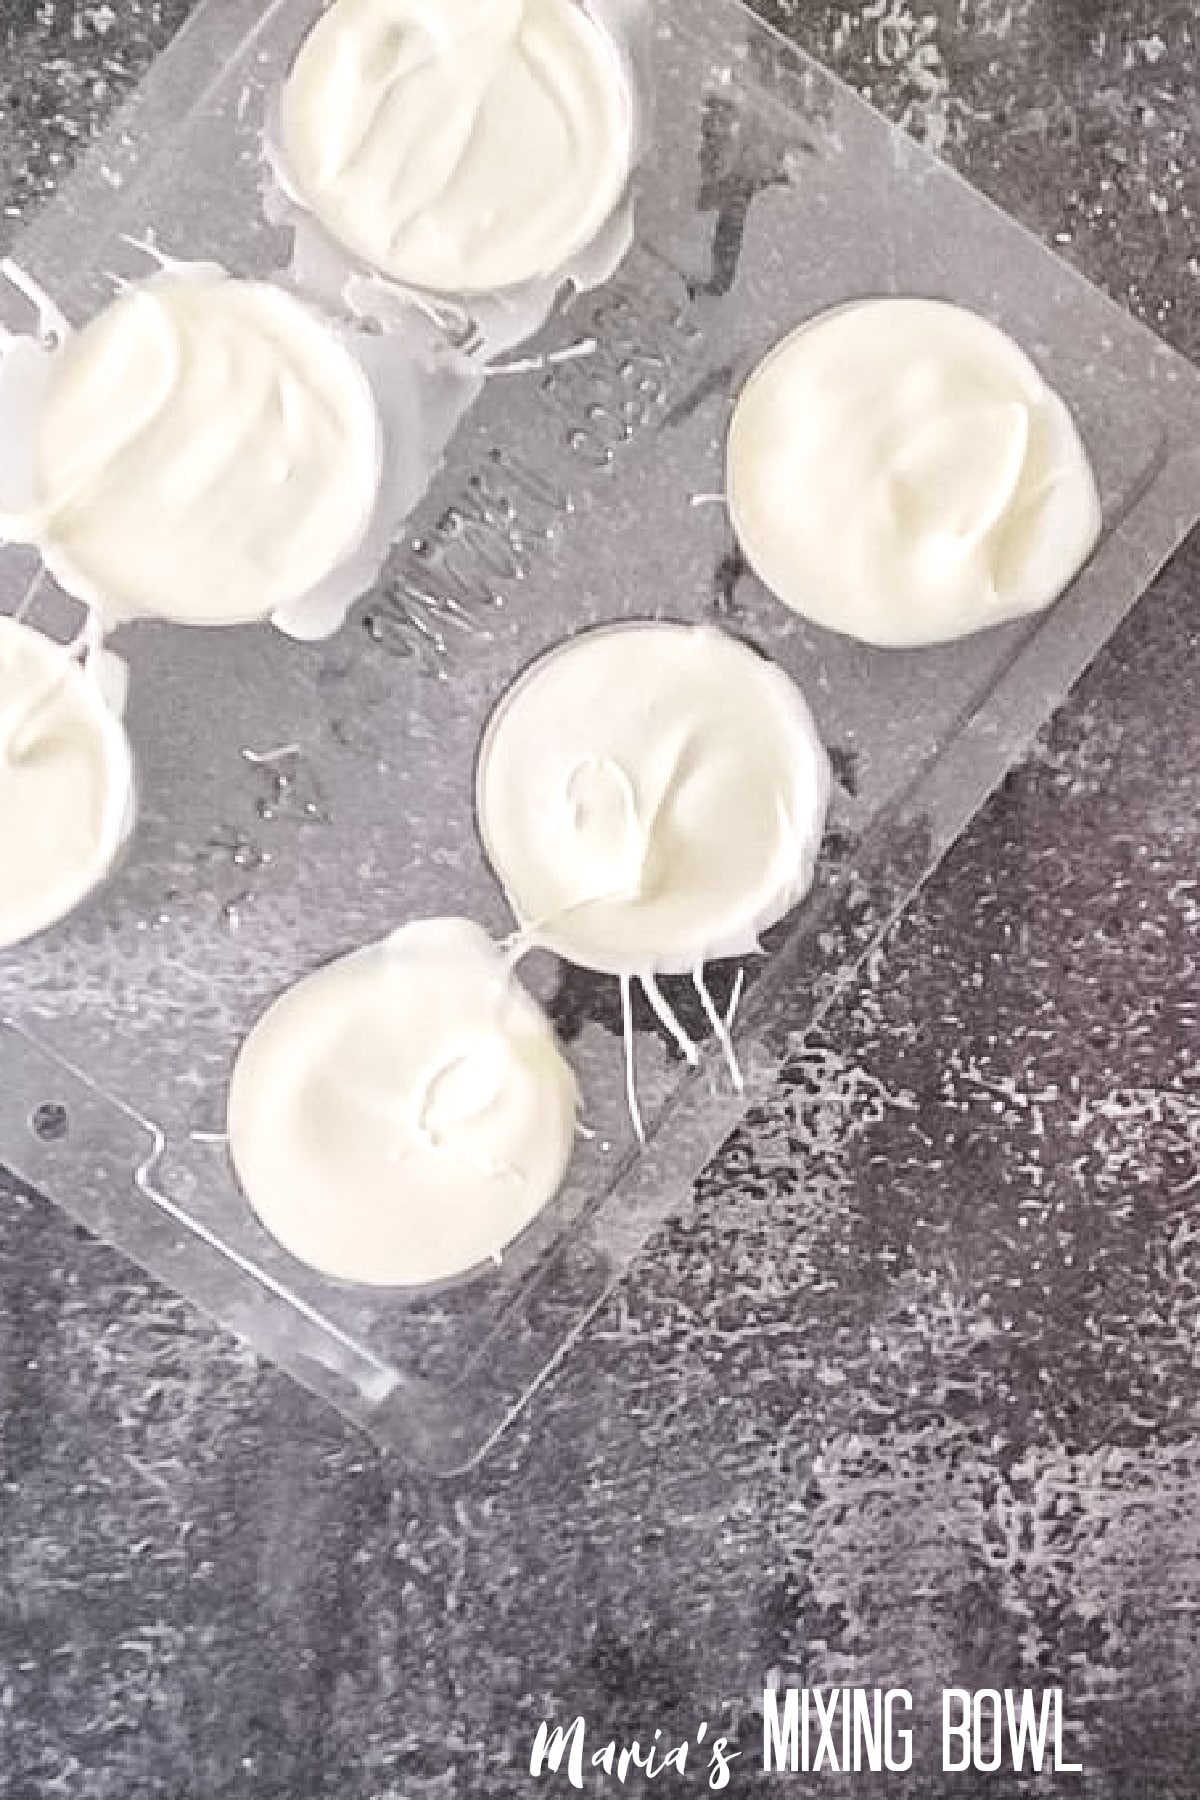
Step 2: Coat the Oreos
Add about 1/4 cup of candy melt into the bottoms of an Oreo candy mold. Then, place an Oreo in the center of the candy and press down slightly. Spread more chocolate on top, filling the mold. Set them aside for about an hour to allow the candy coating to set.
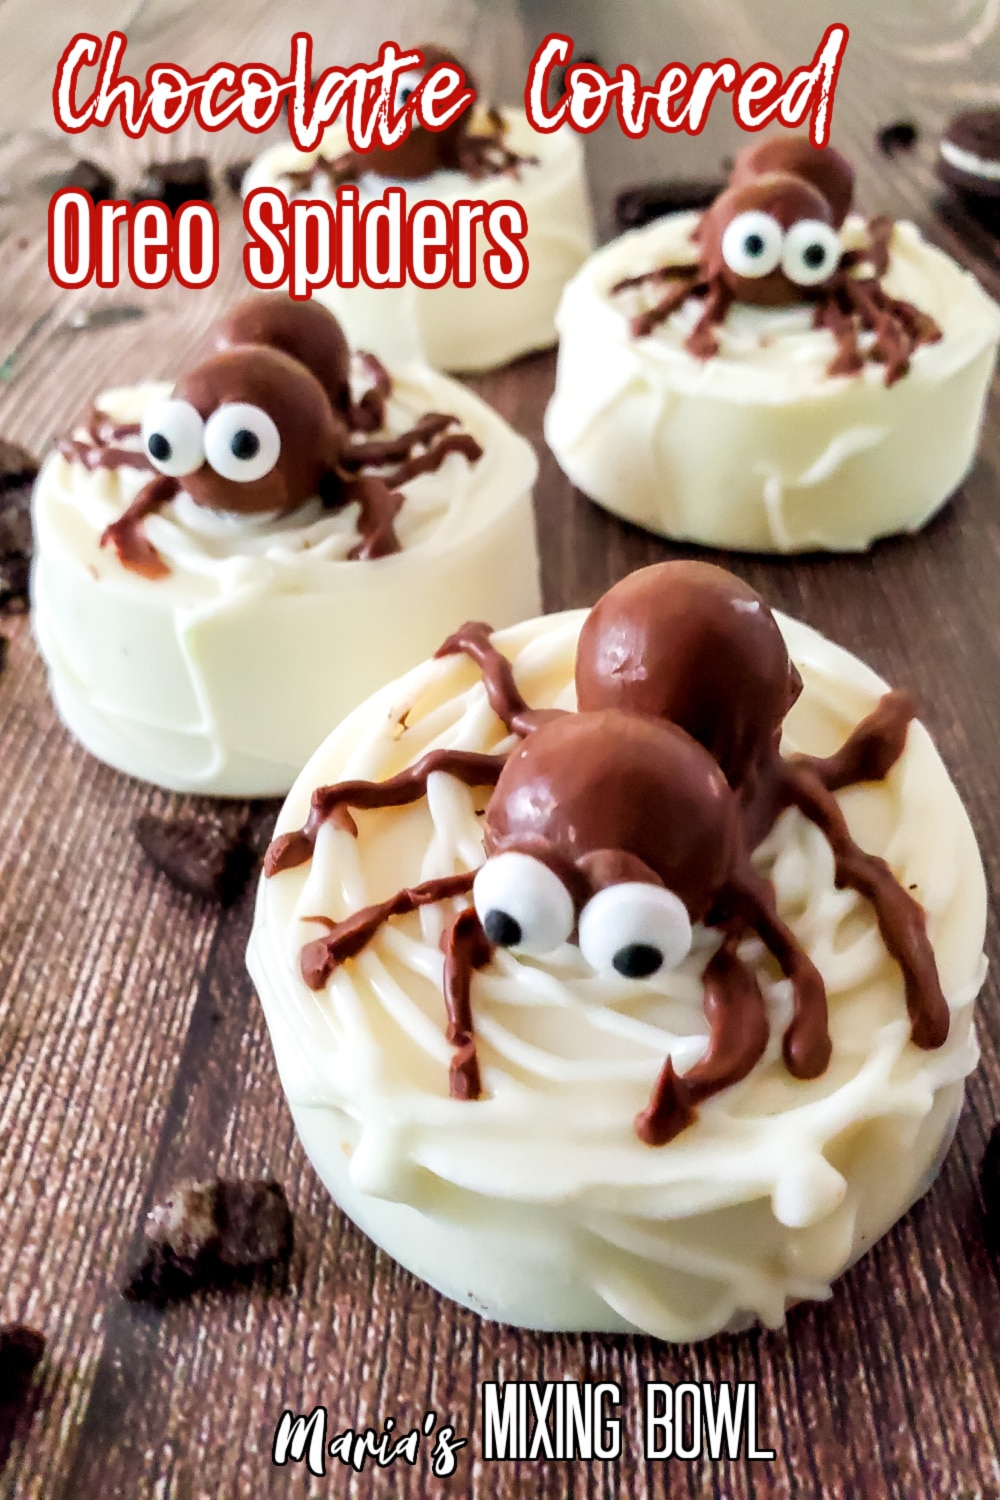
Step 3: Decorate the Oreos
Melt about 1/4 to 1/2 cup of white candy melt as you did in step 1 and add about 1 teaspoon of paramount crystals to thin it out. Place it in a piping bag and cut a small hole in the tip. Drizzle it all over the top of the Oreos to look like spider webs, allowing some to drizzle down the sides.
Step 4: Add the Spider Body
While the webs are still melted, place the malted milk balls on top and let the candy set for about an hour again. Then, melt brown chocolate and add paramount crystals to thin it up a bit.
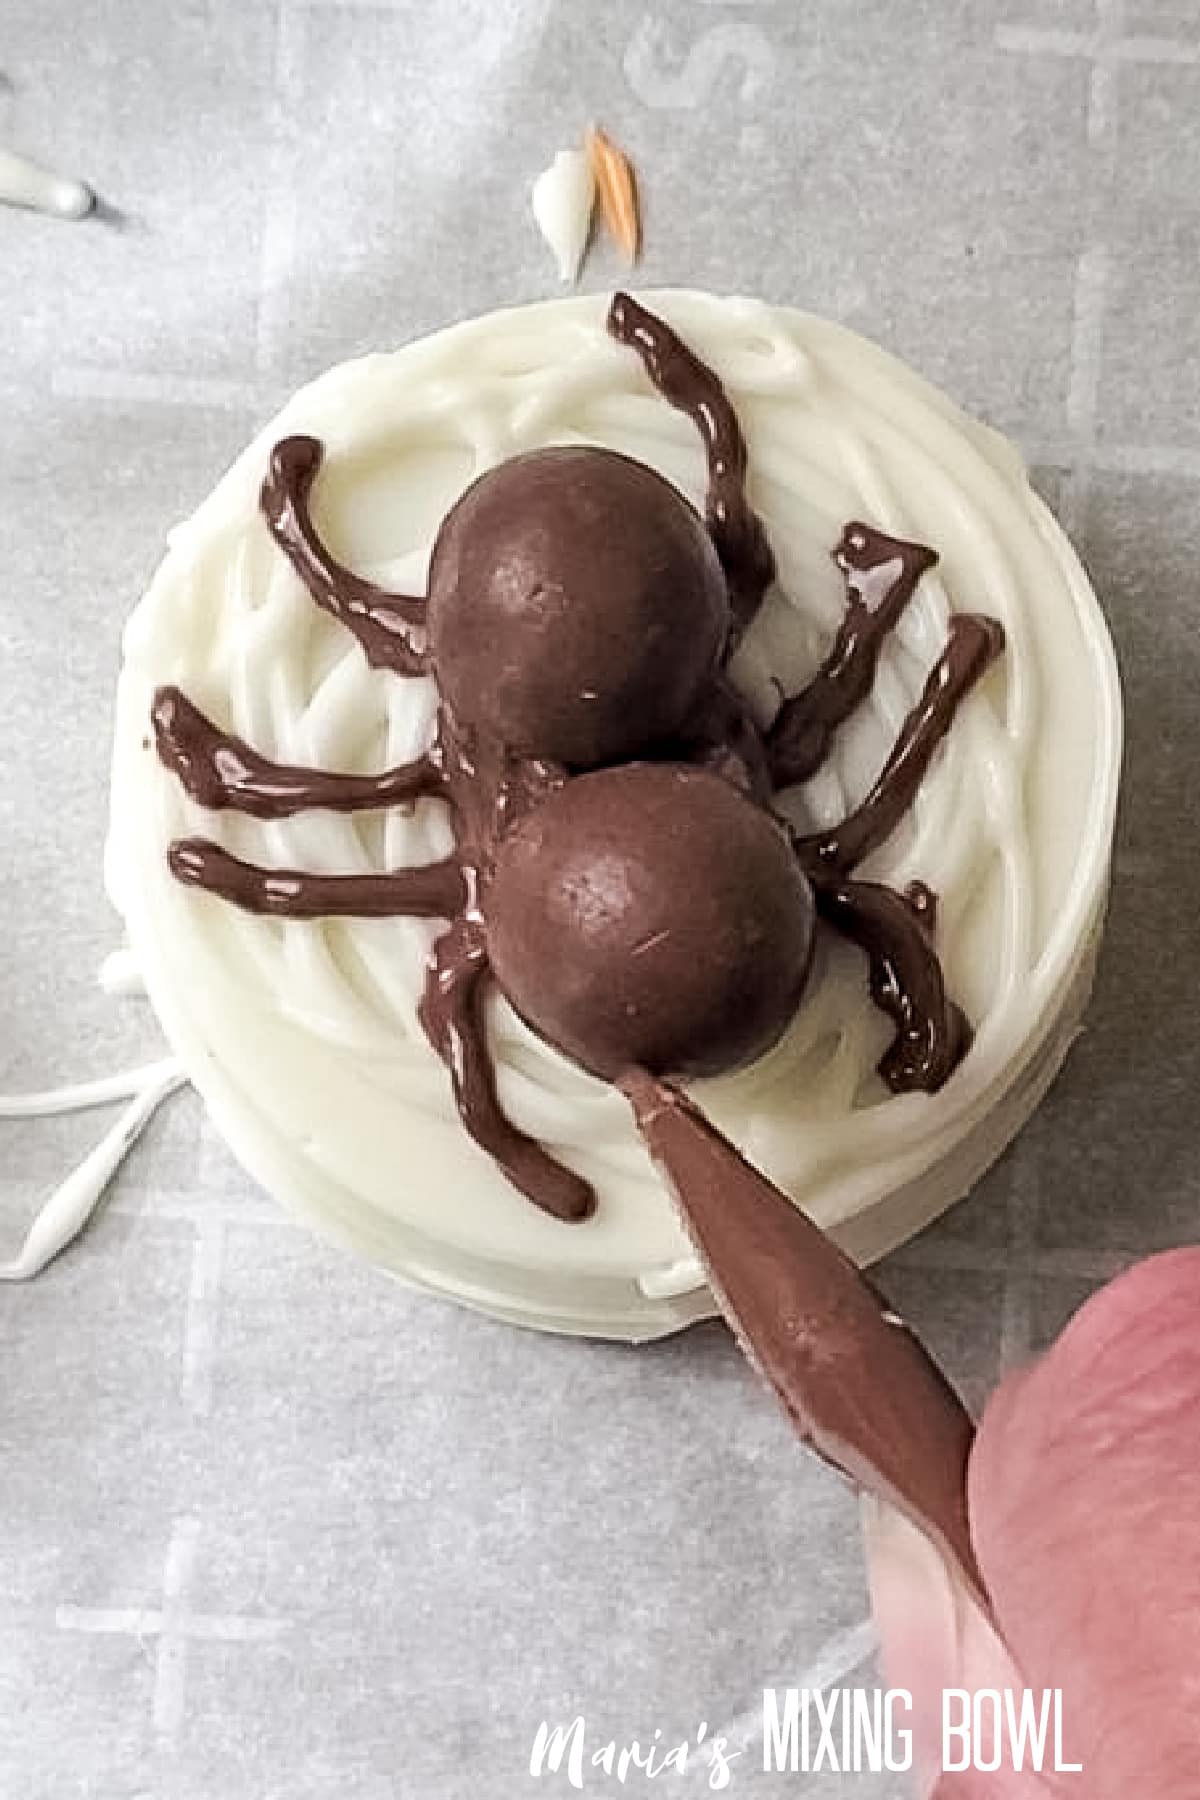
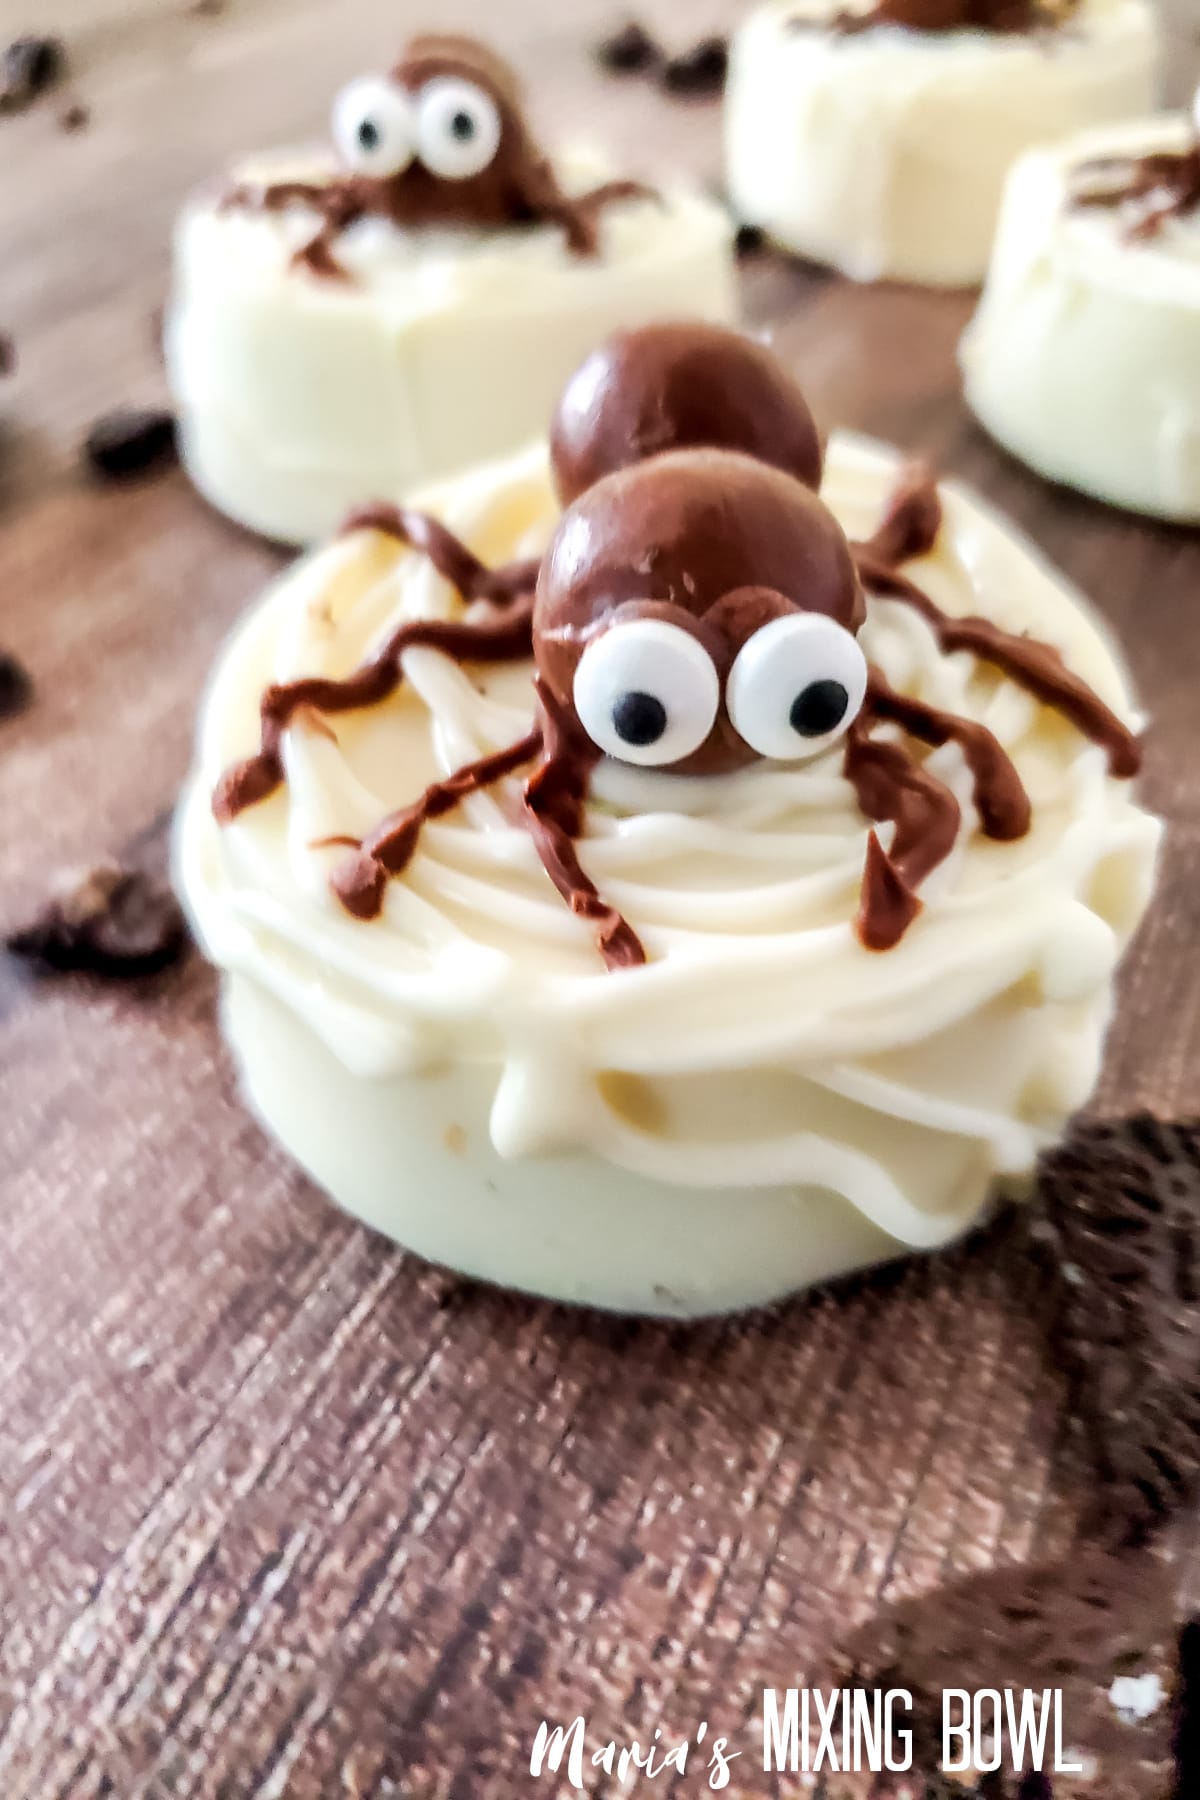
Step 5: Finish the Spider
Place the chocolate in a piping bag and snip off a small corner. Pipe 4 spider legs on each side of the malted milk balls and fill in the gap between the milk balls using the chocolate. Finally, add two dots of chocolate on the front of the spider’s face and secure an eye candy to each. Hold for a few seconds to secure. Serve at your Halloween gathering and enjoy!
📝Variations
Do you want to change up this spider oreos recipe and make it your own? Here are some ways that you can do that!
- Any Brown Round Candy – Use any of your favorite brown round candy varieties for the spider body.
- Dark Chocolate Oreos – Dark chocolate Oreos make an even more chocolaty flavor.
If you’re looking for more Halloween sweets, then check out this poison apple cake.
🥄 Equipment
You’ll only need a few simple pieces of equipment to make this recipe.
- 2 small microwave-safe bowls
- Spoon
- 2 piping bags
- Oreo candy mold
- Baking sheet or cookie sheet
🥫 Storage
You can store these cookies for about a week in an air-tight container at room temperature. We don’t recommend freezing these because the candy coating can sweat and crack while defrosting.
💭 Tips
This is one of the easiest decorated recipes you’ll ever make. It’s so easy, in fact, that we only have a couple of tips for you!
- Work with batches of melted candy to make it easier to work with. That way, you don’t have to worry about it hardening too much as you work.
- Allow at least an hour for your melted candy to set between each decoration.
- I like to use parchment paper or wax paper to protect my work service to prevent it from becoming super messy.
- If you are using white chocolate chips you might need to add little coconut oil or vegetable chocolate to your melted chocolate so that it turns out smooth.
- You could also make a lovely web on these cookies by drizzling some melted chocolate on top before you add the spider.
⁉️ FAQ
Do you have questions about this recipe? Here are the answers to the most commonly asked questions.
They’re a confectionery product designed to be melted and then used for decorating. They don’t require refrigeration to set, and they don’t need to be tempered because they aren’t chocolate.
No. Although they look similar, there is no chocolate in candy melts at all. In fact, their main ingredients are sugar and vegetable oil.
These molds are the easiest we’ve found for both molding and removing the coated Oreos.
They’ll keep for about a week in an air-tight container at room temperature.
🍽 More Recipes
Do you enjoy Oreos? Then, try these delicious recipes:
🧾Chocolate Covered Oreo Spiders
Want to make this recipe? Print the recipe card below, or pin this recipe, so you can find it later.
📌 PIN IT!!
Chocolate Covered Oreo Spiders
Equipment
- 2 small microwave-safe bowls
- Spoon
- 2 piping bags
- Oreo candy mold
- Baking sheet or cookie sheet
Ingredients
- 12 ounces white candy melts reserve 1/2 cup for piping on top to make the spiderweb
- Paramount Crystals
- 6 regular Oreos
- ¼ cup chocolate chips or brown candy melts
- Malted milk balls or other round candy
- Candy eyeballs
Instructions
- I like to work in sections and melt more candy as I need it. Melt some of the chocolate in the microwave by microwaving in 30 second increments, stirring in between each session. Remove bowl from microwave just before fully melted. Stir until smooth.
- Drop about ¼ cup of candy melt into the bottoms of the container. Place an oreo in the center of the holes and press down slightly. Don’t press too far that you’ll see it when you take them out of the containers. Spread more chocolate on top. You can just cover the cookie to use less candy melt and make more Spider candies, or you can fill it to the top of the container so that they are all consistently sized.
- Set aside for the candy to fully set, about an hour. Once the candy melt is set, you can remove them from the container.
- Melt about 1/4-1/2 cup of candy melt as you did before, and add about 1 teaspoon of paramount crystals to thin it out a bit. (you can add more if needed)
- Place the chocolate in a piping bag and cut a small hole at the tip. Drizzle the icing circles on the top of the candy, and then overlap some on the sides.
- While the chocolate is still melted, place the malted milk balls on top and allow the chocolate to firm up.
- Melt brown chocolate and add paramount crystals as needed, and transfer to a piping bag with a small hole cut into the tip. Pipe 4 spider legs on each side, and fill in the gap between the milk balls with chocolate.
- Add two dots of chocolate on the front of the spider’s face and add the eye candy. You may need to hold them for a few seconds to make sure they don’t slide down.
Disclaimer
Any nutritional data I provide is an approximation and actual dietary information can vary based on ingredients and proportion sizes.


One Comment