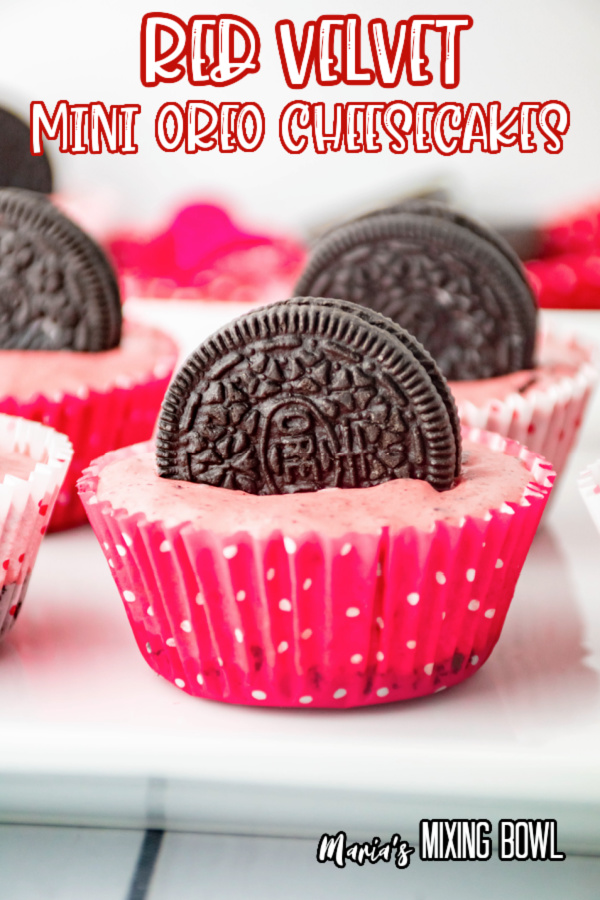
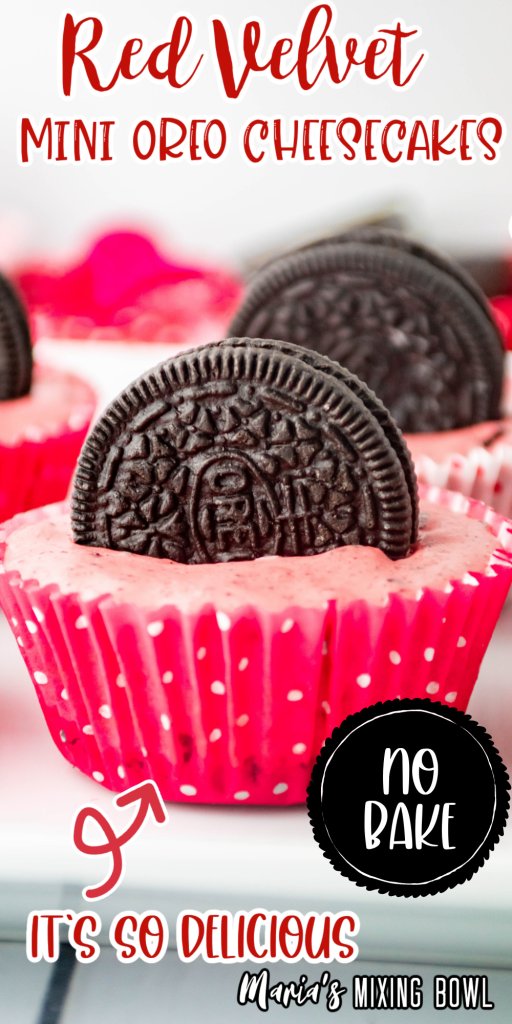
Red Velvet No Bake Mini Oreo Cheesecakes

These Red Velvet No Bake Mini Oreo Cheesecakes are as delicious as they are pretty. The flavors of Oreo cookies come together with rich cheesecake to create a dessert that is purely decadent and so easy.
In this house, we love our sweets. Of course, we make all kinds of breakfast, lunch, and dinner recipes, but the ones we have the most fun with are our dessert recipes. Desserts are just fun! They’re so colorful, and of course, they always satisfy that sweet tooth that my husband and I both have.
Our favorite kind of dessert tends to be the no bake variety. Oh, fancy cakes and pies are fun, and we make those, as well. However, a no bake dessert is so quick and easy, leaving us more time to enjoy our treats and each other rather than being in the kitchen. That’s one of the best parts of these no bake mini Oreo cheesecakes – aside from being delicious, of course.
No Bake Mini Oreo Cheesecakes
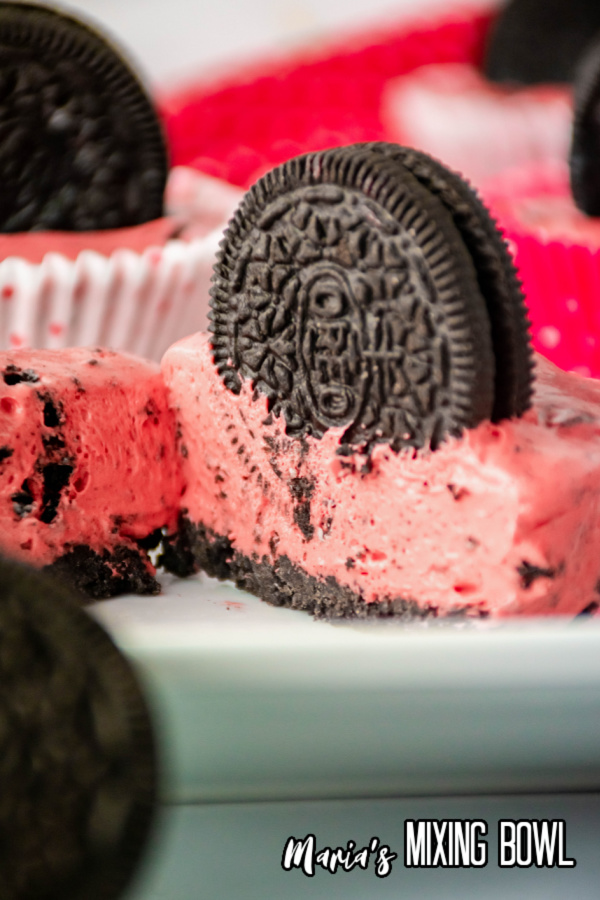
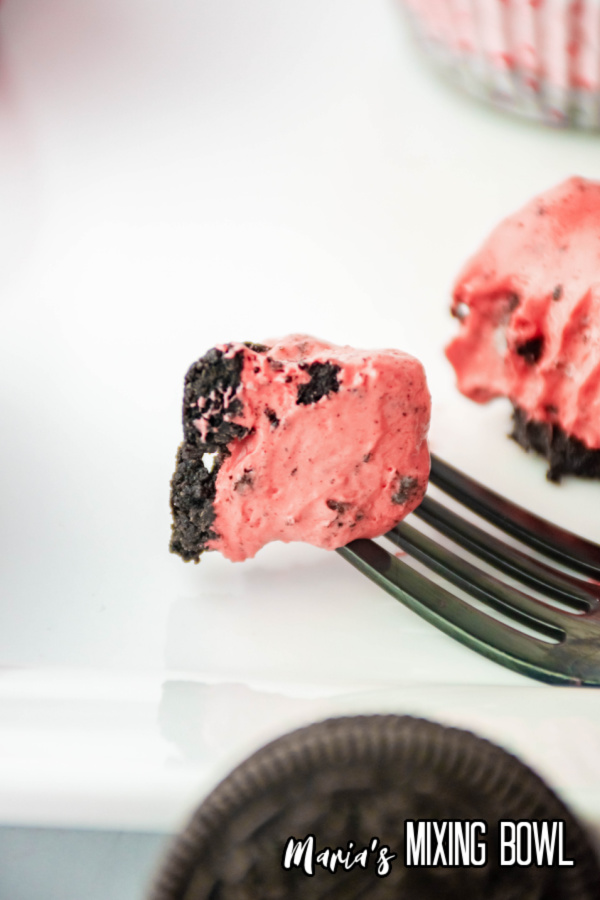
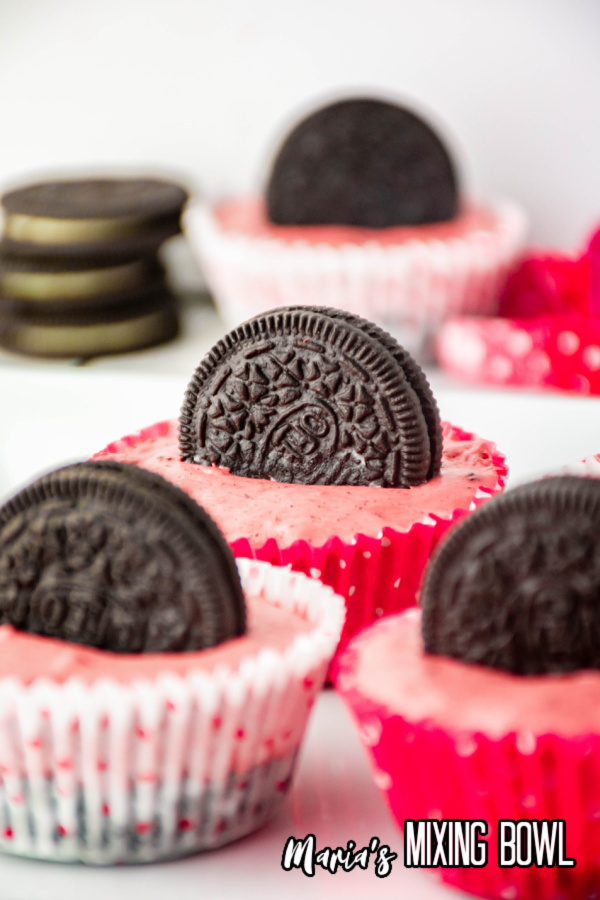
These delicious mini cheesecakes are super easy to make, and they’re absolutely delicious. An Oreo crust is topped with rich cheesecake and then decorated with an entire Oreo cookie. This recipe is absolutely divine. The creamy cheesecake pairs perfectly with the Oreo crust in much the same way that the cream filling of the cookie pairs with the wafers between which they’re sandwiched.
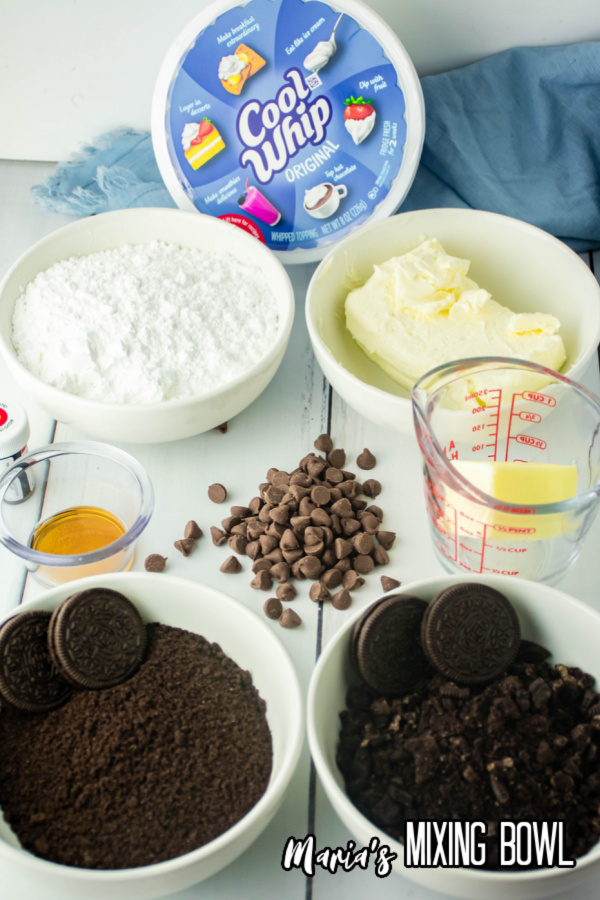
Ingredients
It only takes a few simple ingredients to make these delicious mini cheesecakes. You’ll most likely have most of the ingredients in your kitchen already, and the ones you don’t have are easily found at your local grocery store.
- Oreo baking crumbs
- Butter – melted
- Cream cheese – softened
- Vanilla extract
- Milk chocolate chips – melted
- Red food coloring
- Powdered sugar
- Whipped topping
- Oreo cookies – roughly chopped
**See the recipe card at the end of the post for quantities.
Instructions
Making these no bake mini Oreo cheesecakes is almost as easy as gathering up the ingredients. It’s all a matter of mixing and layering. That’s it!
Step 1: Prep
Set your cream cheese out to soften and prepare a muffin pan by adding cupcake liners to the cups.
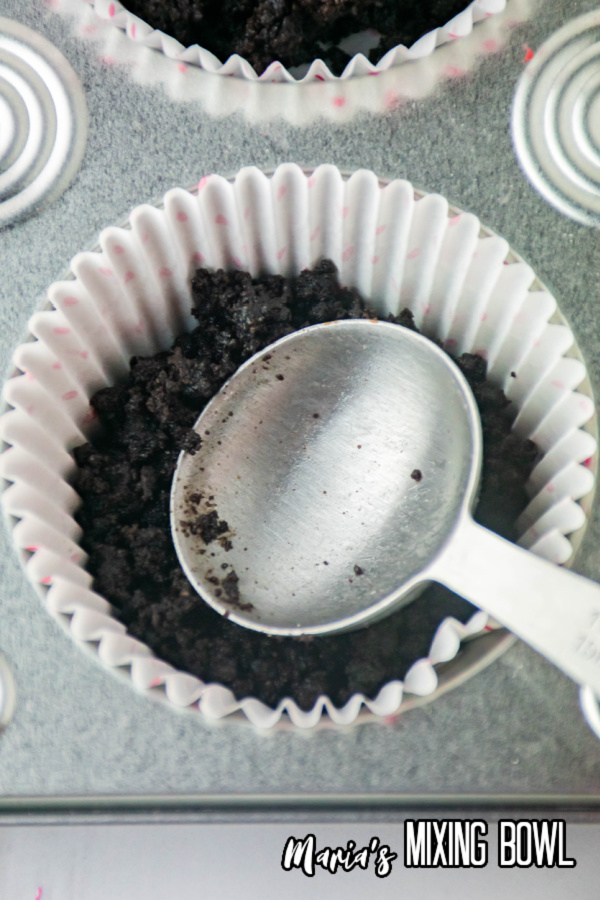
Step 2: Make the Oreo Crust
Melt the butter and mix it with the oreo baking crumbs in a mixing bowl until thoroughly combined. Then, press 1 1/2 tablespoons of the crust mixture into each cupcake liner. Use a spoon to firmly press down the mixture until it’s tightly compacted, then place the crusts in the refrigerator to chill while making the cheesecake filling.
Step 3: Cream the Cream Cheese
In a large mixing bowl, beat the cream cheese until smooth and creamy.
Step 4: Add Vanilla and Chocolate
Add the vanilla extract and melted chocolate, mixing until all ingredients are thoroughly combined.
Step 5: Add the Food Coloring
Add the food coloring until you reach your desired shade of red.
Step 6: Add Powdered Sugar
Add the powdered sugar to the mixture, 1/4 cup at a time, mixing between each addition until all the powdered sugar has been fully incorporated.
Step 7: Add the Whipped Topping
Once all the powered sugar has been incorporated, gently fold the whipped topping into the cream cheese mixture. Continue to carefully fold until the topping is fully incorporated and there are no white or pale streaks.
Step 8: Add the Chopped Oreos
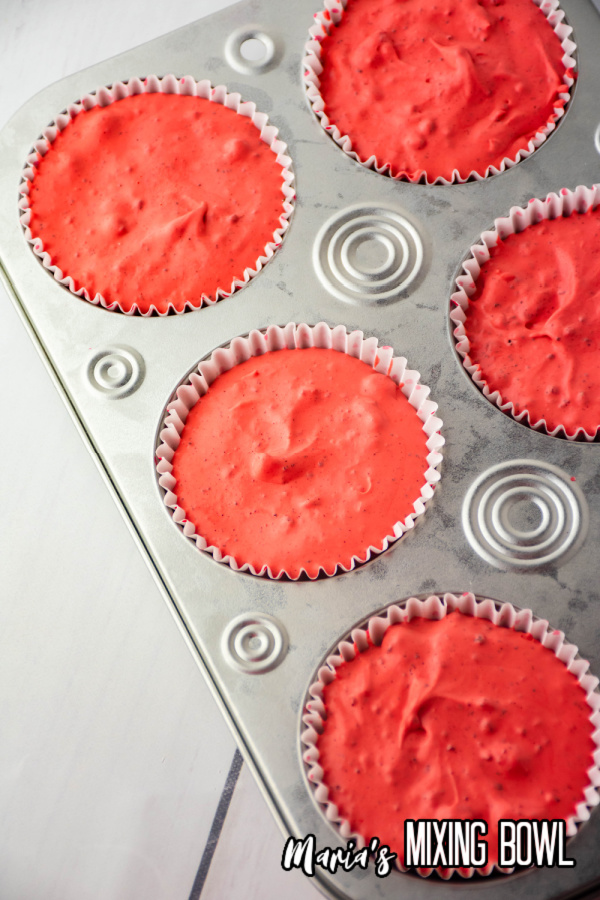
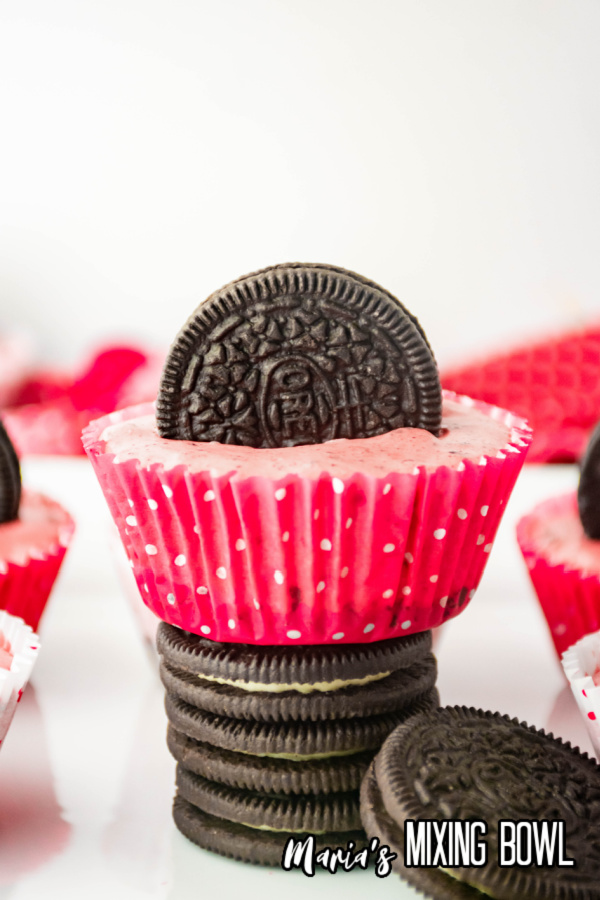
After the cheesecake mixture is fully combined, add chopped Oreos and gently fold once more to distribute them. Spoon the mixture over the Oreo crusts and garnish each mini cheesecake with an Oreo. Refrigerate for at least 3 hours then place an Oreo in each cheesecake. Or you can garnish with Oreo crumbs.
Hint: When incorporating the whipped topping be sure to gently fold it into the cream cheese. Don’t stir or you’ll lose the fluffiness of the cheesecake filling.
Storage
You can store these no bake mini Oreo cheesecakes in an air-tight container in the refrigerator for up to 5 days.
Tips
Although this recipe is incredibly straightforward, there are a few things to keep in mind to ensure that you make the best little cheesecakes possible.
Fully Softened Cream Cheese: The only way to get that super-smooth texture and a fully incorporated finished product is to ensure that your cream cheese is fully softened.
Fold, Don’t Mix: When incorporating the whipped topping, be sure you fold gently. Do not mix. If you mix the topping in, your cheesecake filling will lose all that wonderfully light and fluffy texture.
Firm Pressure: When pressing the Oreo crust down, don’t be afraid to really push it down. You want those crumbs to compress as much as possible so they don’t fall apart when you take the cheesecakes out of the wrappers.
More Oreo Recipes
If you love Oreos, we have some recipes that we think you’ll really enjoy.
PIN IT!!
No Bake Mini Oreo Cheesecakes FAQ
If you have questions about these mini cheesecakes, then look no further. The following FAQ answers all the most common questions about mini cheesecakes.
What’s the difference between cheesecake and no bake cheesecake?
The big difference is that there are no eggs in a no bake cheesecake, and it sets by chilling rather than baking.
Why is my cheesecake crust crumbly?
The usual culprit is not enough butter. The butter is the binding agent, so if you didn’t add enough butter, the crust won’t stay whole. It can also be because you didn’t pack the crust firmly enough.
Why is my cheesecake lumpy?
If you use cold or semi-cold cream cheese, you’ll end up with a lumpy batter and a cheesecake that is gritty rather than smooth.
How long are these good?
These will keep in an airtight container for up to 5 days in the refrigerator.
Can I freeze these cheesecakes?
Yes. Simply open-air freeze them on a baking sheet lined with parchment paper, then wrap them tightly in cling wrap and place them in an air-tight, freezer-safe container for up to a month.
Try These No Bake Mini Oreo Cheesecakes Today
These no bake mini Oreo cheesecakes are so tasty and so easy to make. With a combination like that, you should definitely give them a try. Whip up a batch of these rich, hand-held desserts, and we know you’ll find yourself making them again and again.
MORE RECIPES YOU WILL LOVE:
Baileys Strawberries and Cream Cheesecake
Hot Cocoa Cheesecake
Double Chocolate Cupcakes
Slow Cooker Raspberry Zinger Cake
Red Velvet No Bake Mini Oreo Cheesecakes
Ingredients
- 1 cup Oreo baking crumbs
- 4 Tablespoon Butter- melted
- 8 oz. Cream cheese- room temperature
- ½ teaspoon Vanilla extract
- ¼ cup Milk chocolate chips- melted
- Red food coloring
- 2 cups Powdered sugar
- 8 oz. Whipped topping
- 10 Oreo cookies- roughly chopped
- 12 Oreo cookies
Instructions
- Start by preparing the crust by adding the Oreo baking crumbs and melted butter into a bowl and mixing until the butter is evenly distributed.
- Prepare a muffin/cupcake pan with cupcake liners.
- Add 1½ Tablespoon of the crust mixture into each cupcake liner.
- With a spoon, firmly press down on the mixture until tightly compacted into the bottom of the liner. Repeat with the rest of the crusts.
- Place the crusts in the refrigerator to chill while making the cheesecake filling.
- Using a large mixing bowl, beat the cream cheese until smooth and creamy.
- Add in the vanilla extract and melted chocolate. Mix until the chocolate is fully incorporated
- Add in the food coloring until you get your desired shade of red.
- Next, add in the powdered sugar ¼ cup at a time, mixing in between each time.
- Once all the powdered sugar is mixed in, add in the whipped topping. Carefully fold the whipped topping into the cream cheese mixture.
- Once the mixture is clear of white or pale streaks, add in the chopped Oreos.
- Fold the Oreos into the cheesecake mixture.
- Once the filling is ready, take out the crusts from the refrigerator. Place 4 Tablespoons of the cheesecake filling into each cupcake liner.
- Once each liner is full, place the cheesecakes into the refrigerator to chill for at least 3 hours.
- Once the cheesecakes have set, take out of the refrigerator and top with whipped cream and Oreo crumbs or just an Oreo.
- Serve cold and enjoy!
Notes
- If you can not find Oreo baking crumbs, simply just separate Oreo cookies and remove the cream from the middle. Use a food processor to get the Oreos finely crushed. Follow the same directions for the butter and packing process.
- I prefer to chill my mini cheesecakes over night as it makes sure the cheesecakes are fully set when served.
- Store in an airtight container in the refrigerator for up to 5 days.
Disclaimer
Any nutritional data I provide is an approximation and actual dietary information can vary based on ingredients and proportion sizes.


