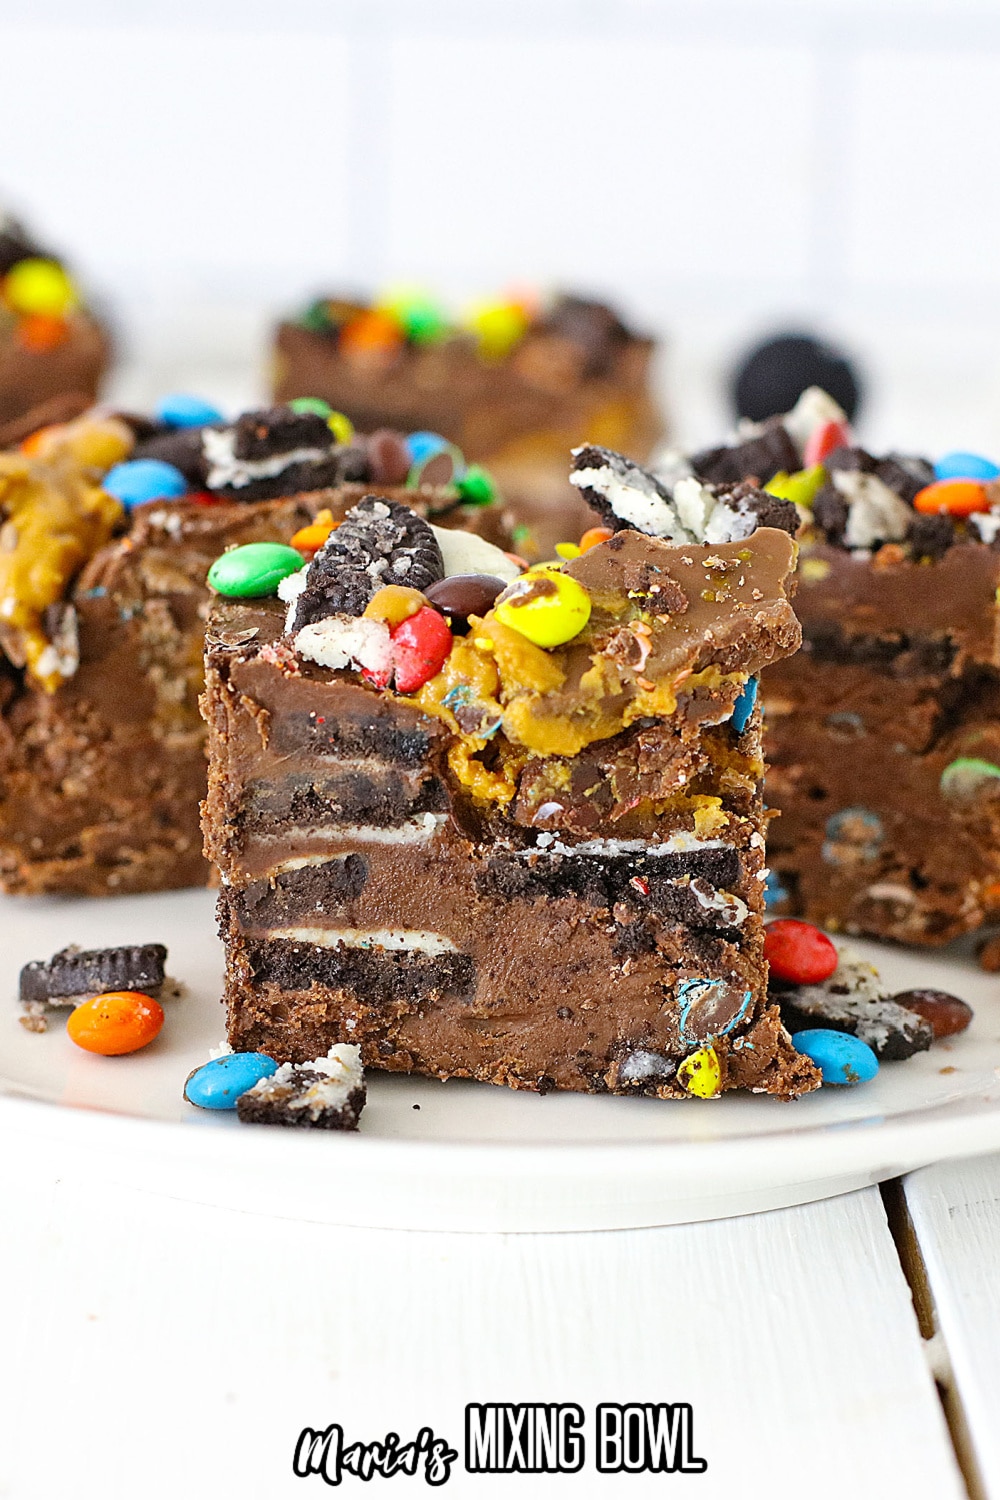
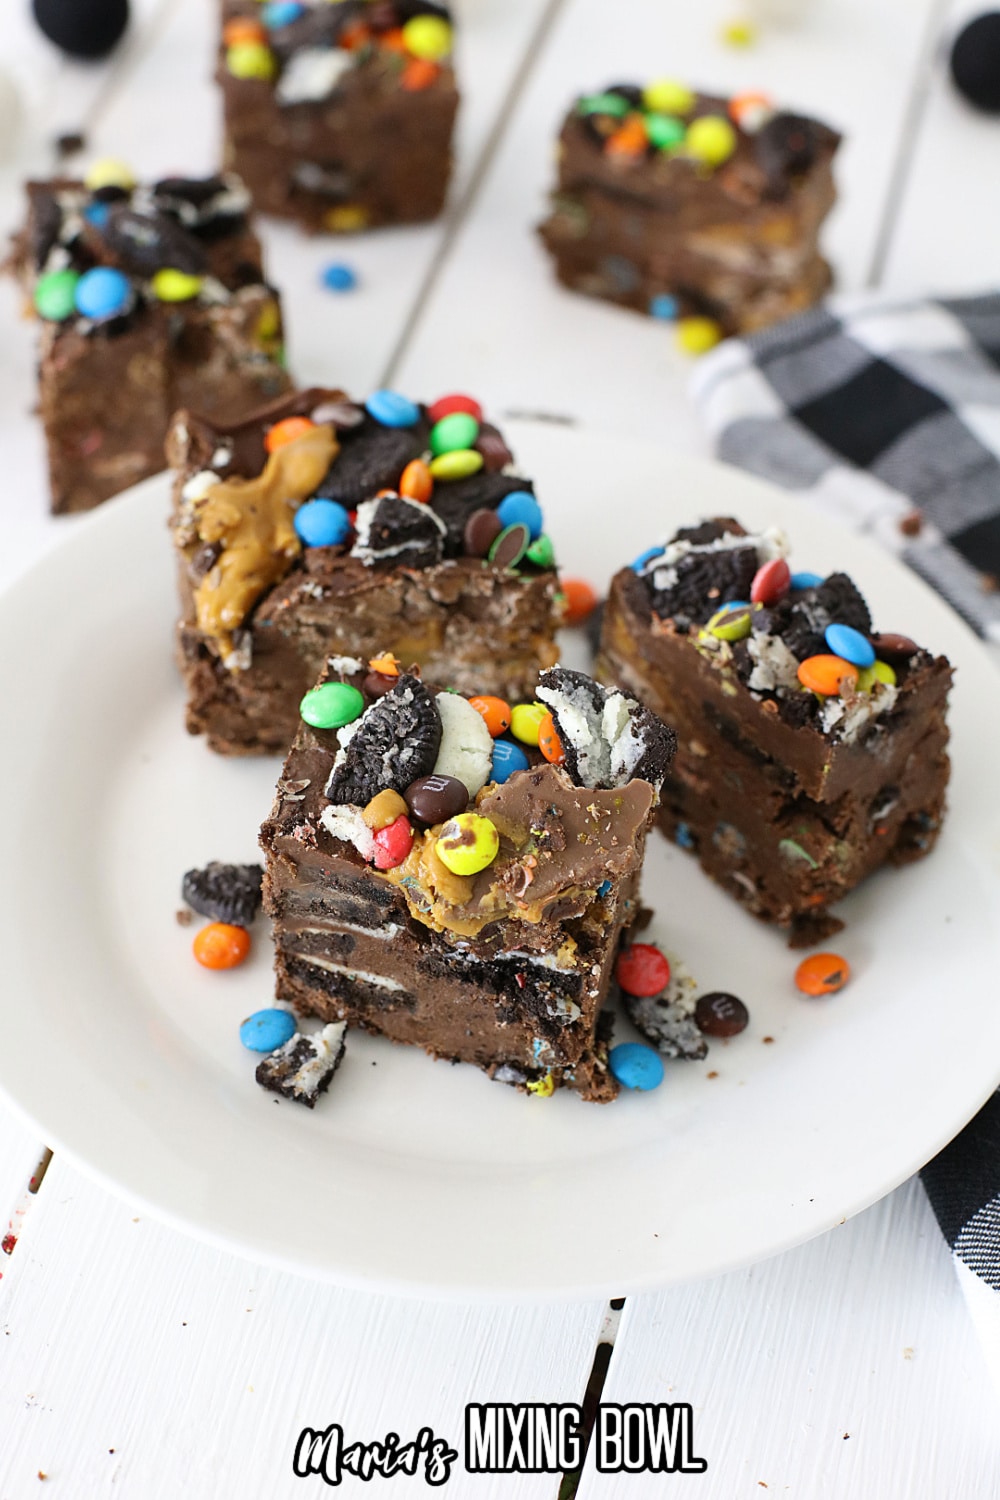
Loaded Peanut Butter Cup Fudge

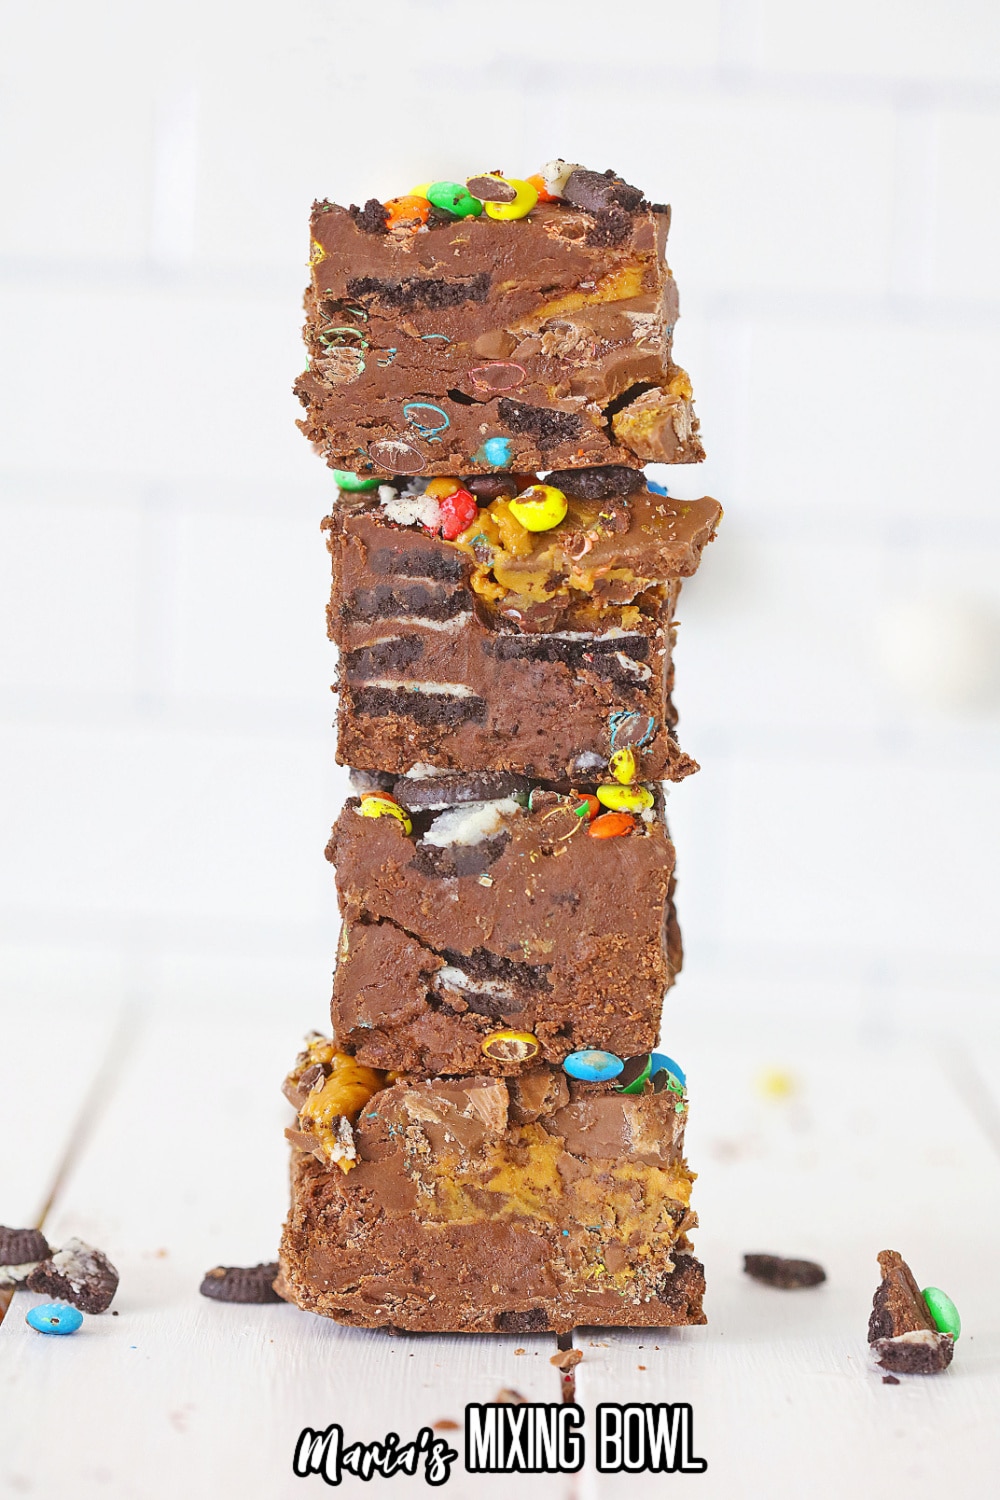
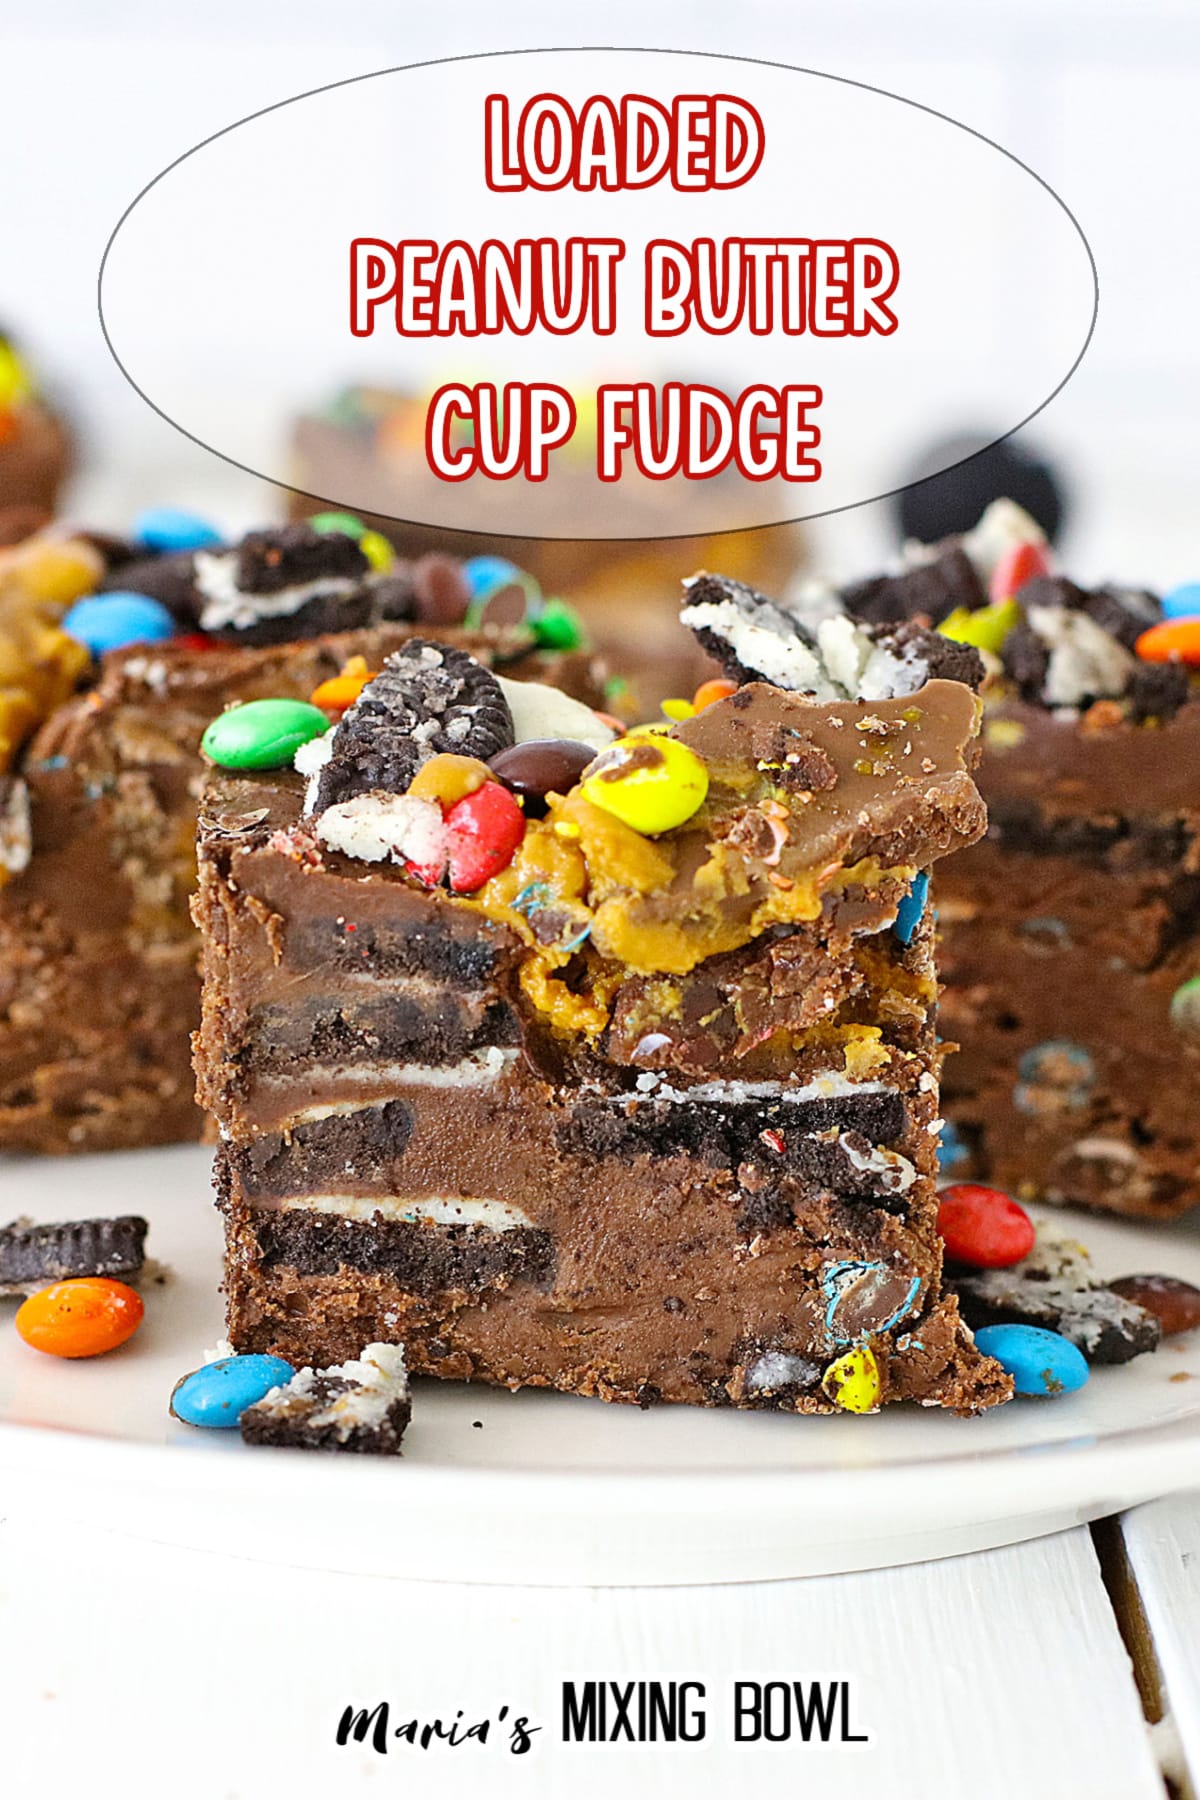
This homemade Loaded Peanut Butter Cup Fudge is rich chocolate fudge that is filled to the brim with chopped peanut butter cups, crushed Oreo cookies, and Mini M&M’s. You can’t go wrong with this simple no-bake dessert.
We love fudge in our house because it’s so easy to make! This Peanut Butter Cup Fudge requires just a few ingredients that you may already have on hand. The best part is that you don’t even need to turn on the stove.
Table of contents
❤️ Why You’ll Love This Recipe
- It’s simple and easy to make.
- This no-bake dessert will satisfy any sweet tooth.
- Rich, creamy chocolate fudge filled with peanut butter cups, crushed Oreo cookies, and Mini M&M’s.
- And it’s perfect for gifting or entertaining guests.
🛒Ingredients
You only need a handful of simple ingredients to help you make this sweet treat. One great thing about this recipe is that all of the ingredients are easy to find at your local grocery store so you don’t have to worry about expensive hard to hard-to-find ingredients.
- Chocolate Bark
- Sweetened Condensed Milk
- Peanut Butter Cups
- Crushed Mini Oreo Cookies
- Mini M&M’s
See the recipe card below for quantities.
🔪 How to Make Loaded Peanut Butter Cup Fudge
Making this no-bake peanut butter cup fudge is so simple. Just follow the step-by-step directions below or in the recipe card at the bottom of the post and you will have a delicious dessert to share with your family and friends in no time at all.
Step 1: Melt the chocolate
In a large microwave-safe bowl, melt the chocolate at 15-second intervals, until completely melted, and stir until smooth.
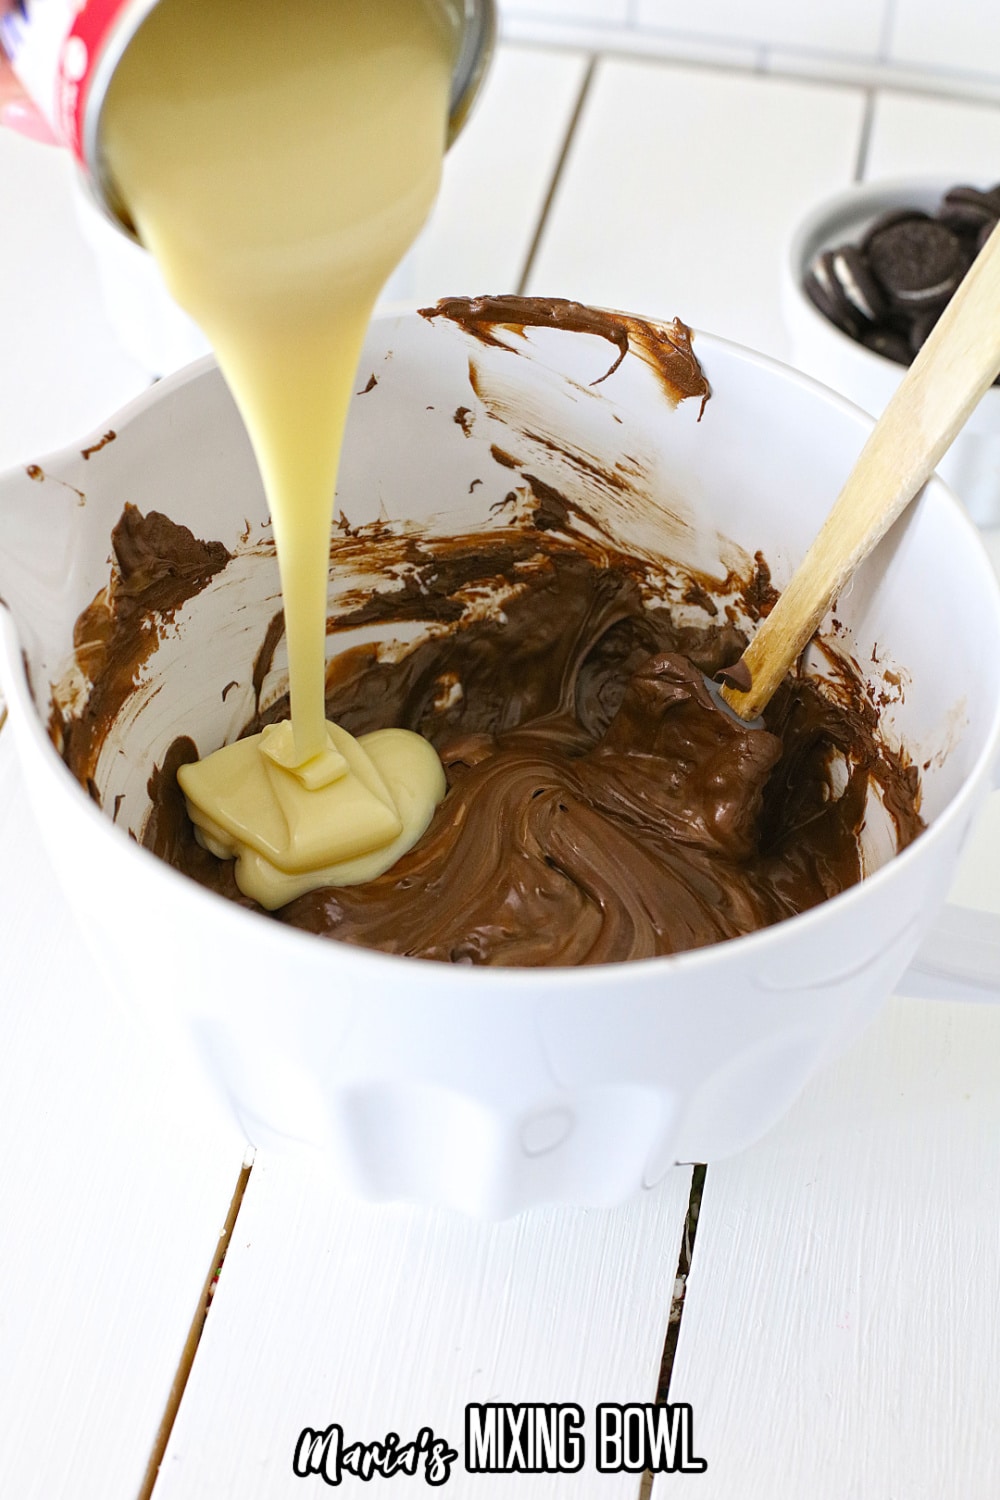
Step 2: Add in the condensed milk
Add the can of sweetened condensed milk, and stir until smooth.
Step 3: Fold in the additions
Break the Peanut Butter Cups in half, and add to the chocolate mixture. Add the crushed Oreos, and the mini M&M’s, and stir all ingredients until blended.
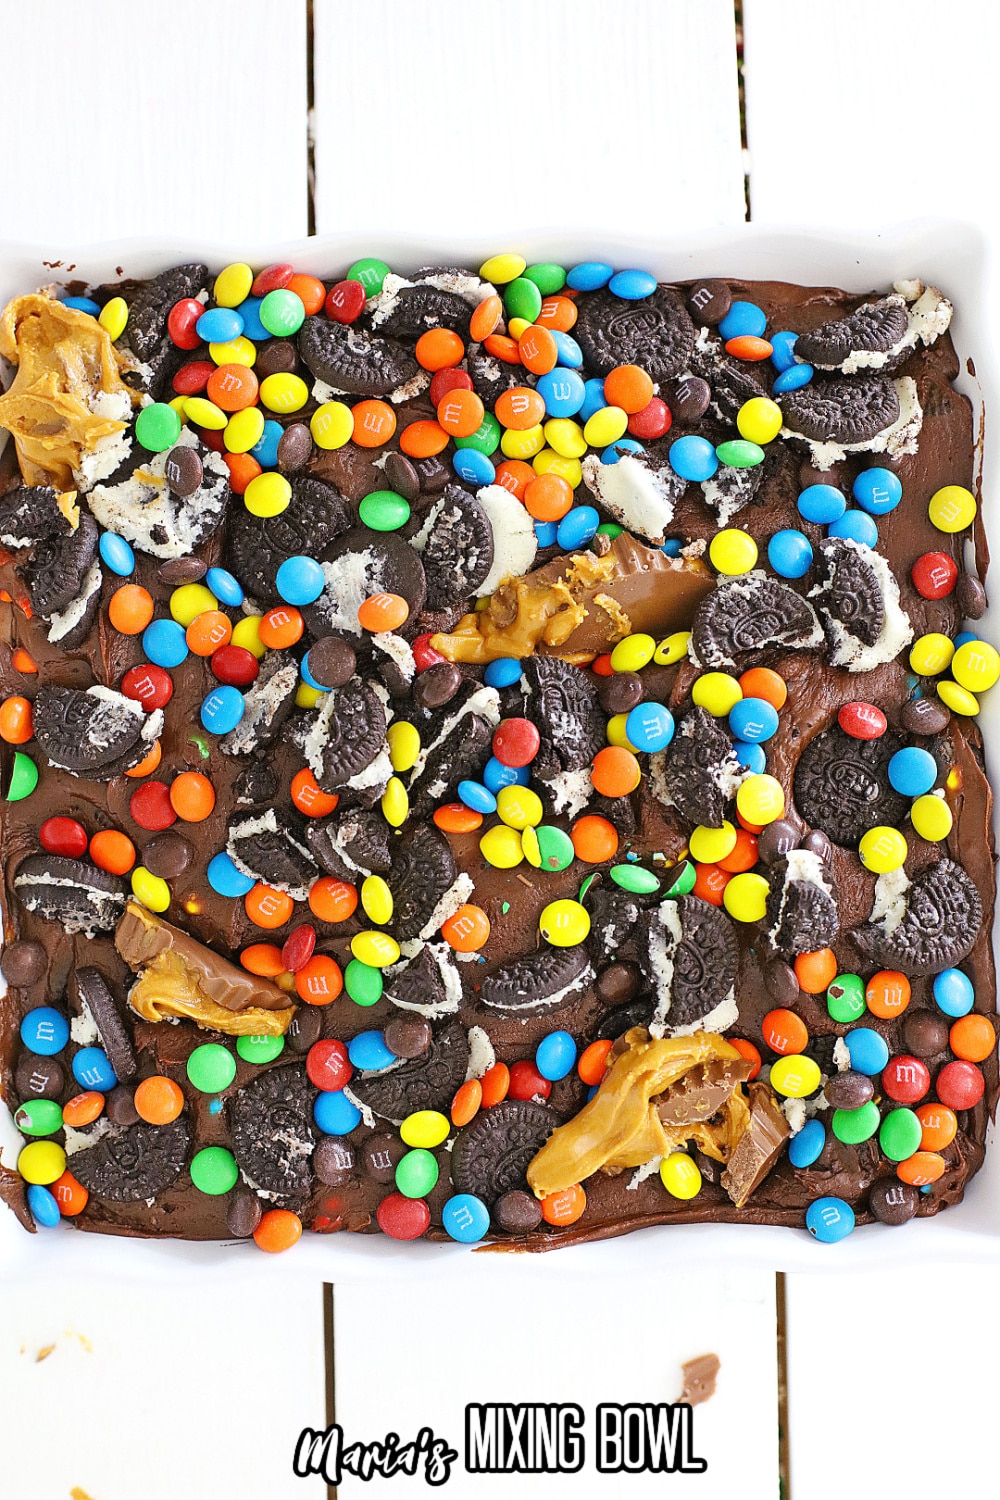
Step 4: Spread in the pan
Spray an 8 X 8 pan with cooking spray, and line it with Parchment paper. And, pour the Fudge into the pan, and spread smooth and even.
Step 5: Chill
Place the pan in the refrigerator, overnight for best results. When ready to serve, cut in small squares, serve, and Enjoy!
📝Variations
Do you want to change up this recipe and make it your own? Here are some ways that you can do that!
- Chocolate: Try using different types of chocolate such as semi-sweet, dark, or milk chocolate.
- Additions: Swap out the peanut butter cups for Reese’s Pieces, white chocolate chips, or chopped nuts.
- Cookies: Use other types of cookies like graham crackers or Nutter Butter cookies.
If you love making fudge then you may also enjoy this Carrot Cake Fudge recipe.
🥄 Equipment
You will only need a handful of kitchen tools to help you make this peanut butter cup fudge recipe. These are just basic tools so you could already have most of them on hand already in your kitchen.
- microwave safe large bowl
- 8×8 baking dish
- parchment paper
- rubber spatula
🥫 Storage
Store the fudge in an airtight container in the fridge for up to one week. You can also freeze it for up to 3 months. Be sure to store it in an airtight container and wrap it tightly with plastic wrap before freezing.
💭 Tips
Here are a few tips that you can use to ensure that this fudge turns out perfectly every time that you make it.
- Allow the chocolate to cool slightly but not harden before you add in the cookies.
- Make sure you check the chocolate often while it’s in the microwave. You don’t want it to scorch.
- Let the fudge chill overnight for the best results this will allow it to be set up completely.
- To make cutting easier, dip a sharp knife in hot water and slice with it.
⁉️ FAQ
Do you have questions about this recipe? Here are the answers to the most commonly asked questions.
If your fudge doesn’t harden that most likely means that you added too much condensed milk. Make sure to follow the recipe.
Yes, I recommend that you make sure to store your fudge in an airtight container and place it in the fridge so that it stays fresh longer.
Parchment paper is essential because it will prevent the fudge from sticking to the pan. And, allow you to remove it for easy and clean cutting.
🍽 More Fudge Recipes
Do you enjoy fudge? If so, try these delicious recipes:
📌 PIN IT!!
🧾Recipe Card
Want to make this recipe? Print the recipe card below, or pin this recipe, so you can find it later.
Loaded Peanut Butter Cup Fudge
Equipment
- large bowl
- Rubber spatula
- 8×8 baking dish
Ingredients
- 24 ounces Chocolate Bark
- 14 ounces Sweetened Condensed Milk
- 8 Peanut Butter Cups
- 1 cup crushed mini Oreo’s
- ½ cup mini M&M' more for sprinkling on top
Instructions
- In a large Microwave safe bowl, melt the chocolate at 15 second intervals, until completely melted, and stir until smooth. Add the can of sweetened condensed milk, and stir until smooth.
- Break the Peanut Butter Cups in half, and add to the chocolate mixture.
- Add the crushed Oreo’s, and the mini M & M’s, and stir all ingredients until blended.
- Spray an 8 X 8 pan with cooking spray, and line with Parchment paper.
- Pour the Fudge into the pan, and spread smooth and even.
- Put the pan in refrigerator, overnight for best results.
- When ready to serve, cut in small squares, serve, and Enjoy!
Notes
Disclaimer
Any nutritional data I provide is an approximation and actual dietary information can vary based on ingredients and proportion sizes.


