Red Velvet Cake Balls

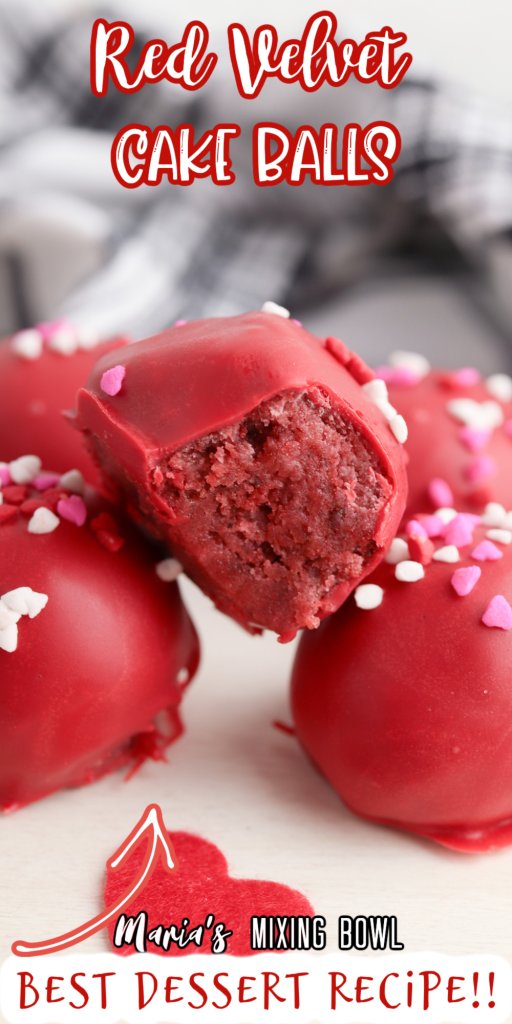
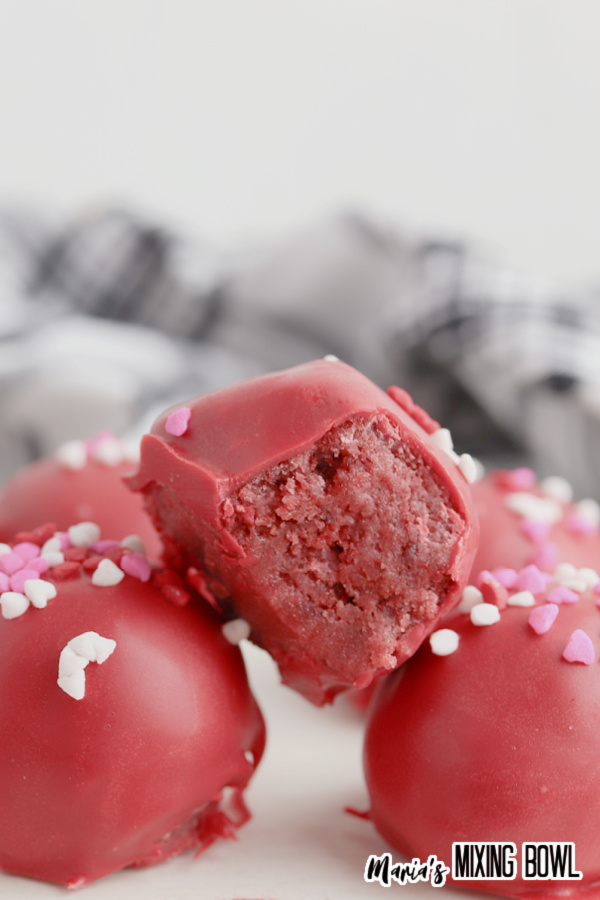
Red Velvet Cake Balls are not only perfect for Valentine’s Day but for any day! Change the candy melts to a different color or use melted white or milk chocolate and different sprinkles to make this recipe all year long! It’s that good and so easy.
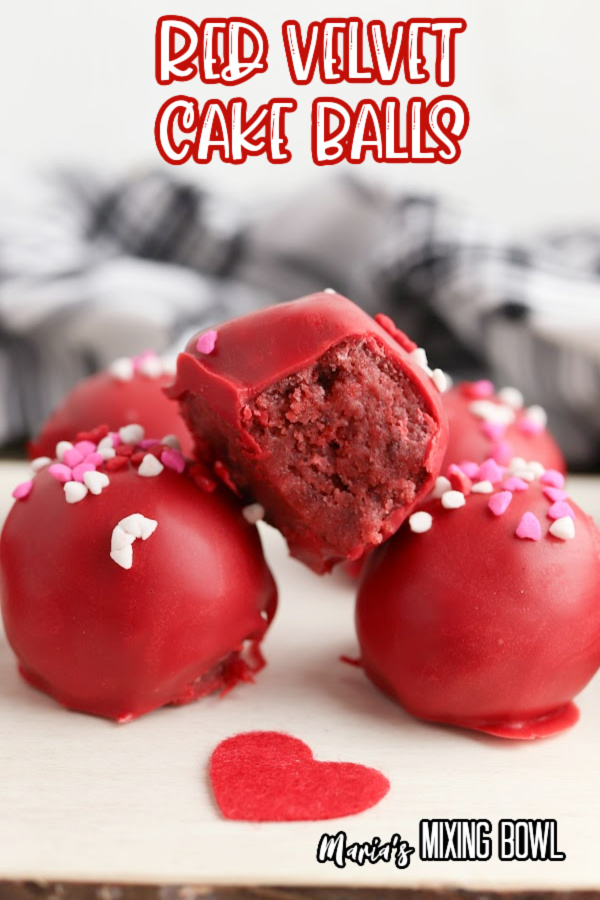
Valentines Day is coming up, and if you’re looking for a fun recipe to surprise your family, friends, or that special someone, then you’ve come to the right place. We make all kinds of fun sweets for Valentine’s Day, but one of our favorites is these cake balls. They’re incredibly simple to make, and they’re super adorable. They’re the perfect sweet for the family or to package up as gifts for the special people in your life.
Red Velvet Cake Balls
These cake balls are just about the easiest thing you’ll ever make, but they look so fancy. It’s the perfect combination. In just minutes, you can have a batch of these cute, tasty snacks. It uses red velvet cake mix, cream cheese posting, and red candy melts. That’s it!
These simple ingredients, however, come together to create a sweet treat that is far greater than the sum of its parts. Even better, everyone who receives them will be so happy to have been gifted something handmade by you with love. Everyone wins!
Ingredients
As I just said, it only takes a handful of ingredients to make this delicious recipe, and you’ll find them all easily in the baking section of your grocery store.
- Red velvet cake mix, prepared according to the box instructions
- Cream cheese frosting
- Red candy melts
- Sprinkles
**See the recipe card at the end of the post for quantities.
Instructions
As you might expect with a recipe like this, it’s incredibly easy to make these red velvet cake balls. It’s a simple, straightforward recipe.
Step 1: Bake the Cake
Prepare and bake the cake mix according to the package directions in any pan you choose. Allow the cake to cool completely.
Step 2: Combine the Cake and Frosting
Once the cake has cooled, scoop it into a bowl and add the cream cheese frosting. Then, stir the two together until they are well combined and begin to stick together.
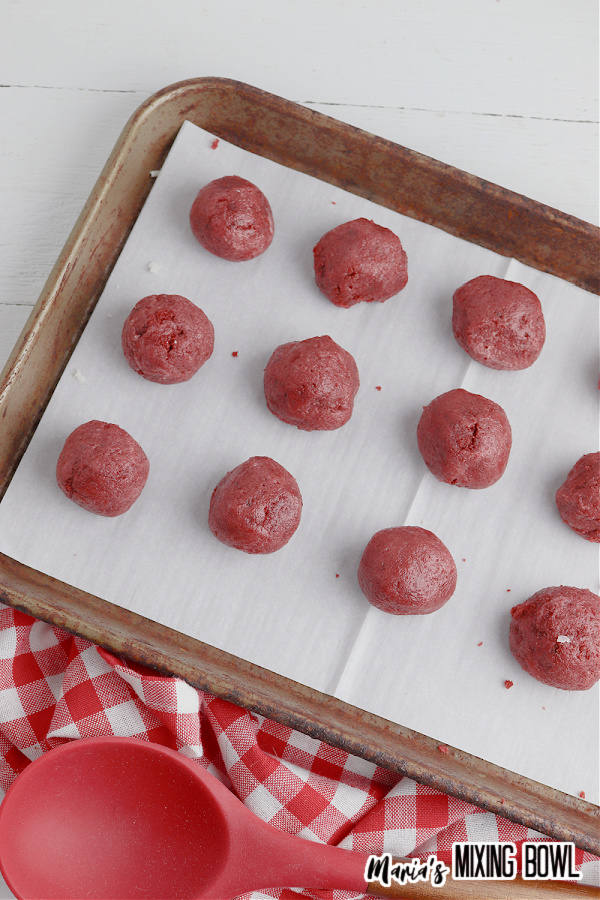
Step 3: Make the Cake Balls
Using a 1-inch cookie scoop, scoop out all the batter. Roll each scoop into a ball between your hands and place the ball on a parchment or wax paper-lined baking sheet. Repeat until you’ve made all of the cake balls, then place the balls in the refrigerator to cool for at least two hours.
Step 4: Coat
When ready to decorate that cake balls, melt the red candy melts according to the package instructions. Next, coat each cake ball by placing it on top of a fork, and spooning the melted red candy over the cake ball while holding it over the bowl of melted red candy.
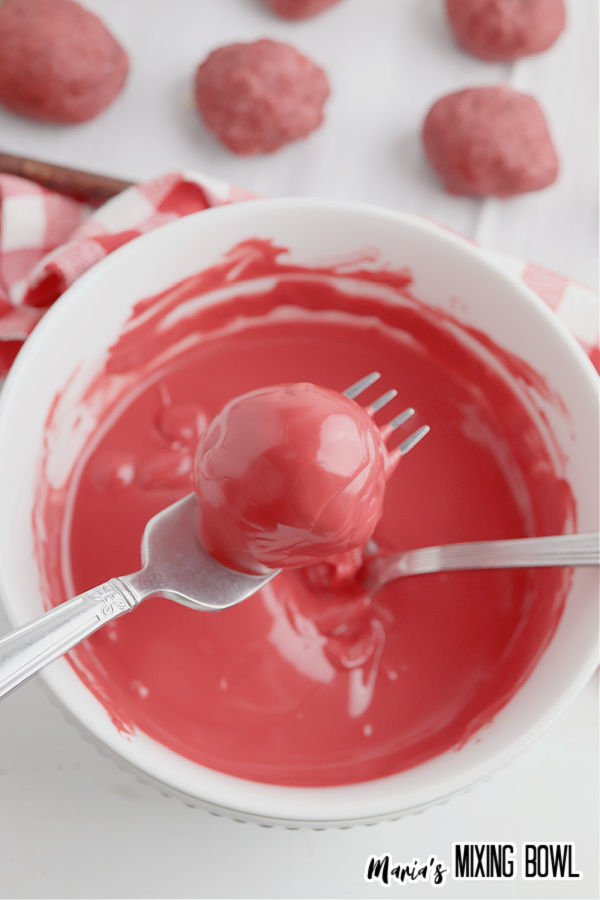
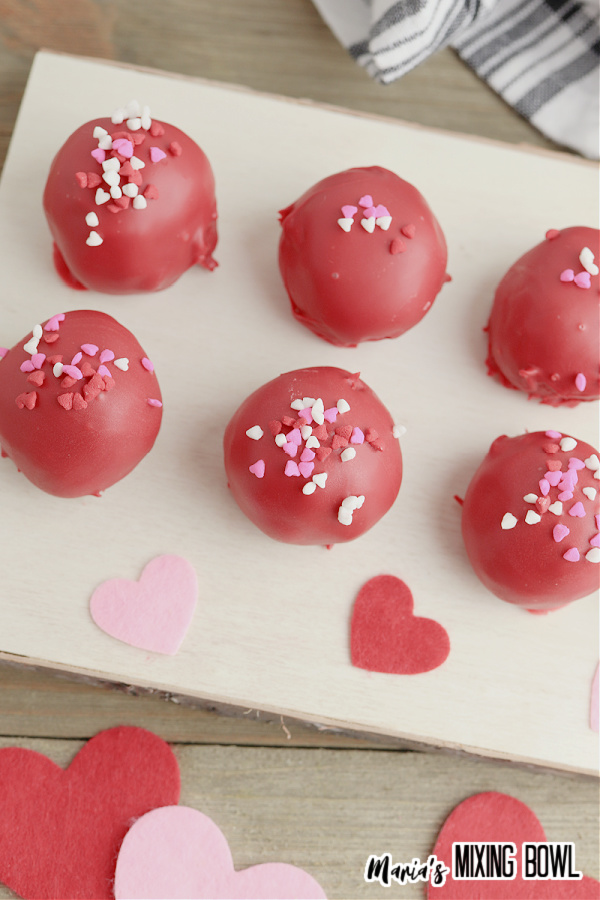
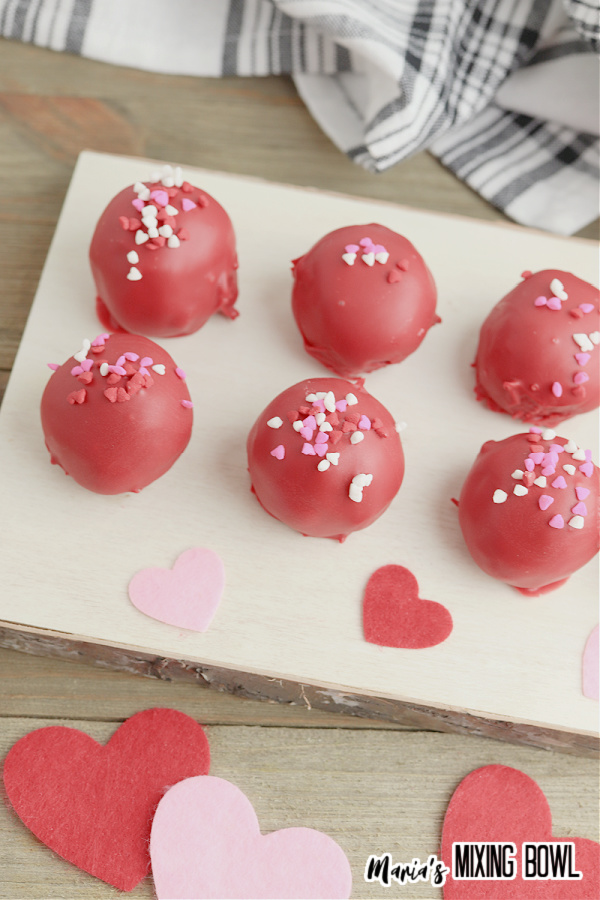
After thoroughly coating the cake ball, tap the handle of the fork on the side of the bowl to knock off any excess chocolate. Transfer the coated cake ball back to the baking sheet and immediately decorate it with sprinkles. Repeat until all cake balls are coated and decorated.
Hint: Lightly tap the handle of the fork. It only takes a light tap to remove the excess candy.
Storage
You can store these red velvet cake balls in an air-tight container in the refrigerator for 5 – 7 days. For longer storage, you can freeze them for up to 6 weeks.
PIN IT!!
Tips
Even a recipe as simple as this one has little things you can do to take it from good to great. These tips are incredibly easy, but they can make your life easier and your cake balls better.
Fully Chill the Cake Balls: Always be sure your cake balls are fully chilled before applying the red candy coating. This helps the coating cool faster and stick to the cake balls better.
Don’t Dip the Cake Balls: It can be a tempting idea to simply place a cake ball on top of the fork and dip the whole thing in the melted candy but don’t do it. You’ll end up with too much candy coating, or worse, lose the cake ball in the bowl.
Store the Cake Balls in a Layer: Never pile the cake balls on top of one another. It might seem like it would be okay with their outer coating, but it can lead to sweating.
More Cake Mix Recipes
If you love turning cake mix into something remarkable, then we have some more recipes that we think you’ll enjoy.
Lazy Black and White Cake Mix Cookies
Red Velvet Cake Balls FAQ
If you have questions about these cake balls, then we have answers. The following FAQ answers all the most common questions about cake balls.
Where did cake balls originate?
Cake balls are simply cake pops sans popsicle sticks. Cake pops were invented in 2008 by Angie Dudley, a blogger from Georgia.
How long are cake balls good?
Cake balls will last in the refrigerator for 5 – 7 days. You can freeze them for up to 6 weeks.
How do you store cake balls?
Place them in a single layer in an air-tight container and store them in the refrigerator.
How do you freeze cake balls?
Place the cake balls on a cookie sheet lined with parchment paper and open-air freeze them. Then transfer them to an air-tight, freezer-safe container or heavy-duty freezer bag.
Why are my cake balls falling apart?
If you used too little frosting, the balls won’t hold together. They also won’t hold together if you used too much frosting. Cake ball consistency should be that of play dough.
Try These Red Velvet Cake Balls This Valentine’s Day
These red velvet cake balls make the perfect Valentine’s Day treat. They’re super easy and super adorable, and who doesn’t love cake balls? With a combination like that, it’s worth giving them a try. We guarantee that anyone who receives them is going to love them.
MORE RECIPES YOU WILL LOVE:
Red Velvet Cocktail
Hot Cocoa Cheesecake
Bourbon Buttercream Sugar Cookies
Double Crumble Apple Crisp
Red Velvet Cake Balls
Ingredients
- 1 box red cake mix, prepared according to box instructions
- 2 containers cream cheese icing
- 1 package red candy melts
- Sprinkles
Instructions
- Prepare and bake the cake mix in any type of pan. Allow to cool completely.
- Scoop the baked cake into a bowl and add both containers of cream cheese icing. Stir until the cake and icing are well combined and begin to stick together.
- Use a 1-inch cookie scoop to scoop out the batter. Roll it into a ball between your hands and place the balls on a parchment or wax paper lined baking sheet. Continue rolling until all the cake has been used.
- Place the baking sheet in the refrigerator to chill for at least two hours.
- When ready to decorate, melt the red candy melts according to the package instructions.
- Place one of the cake balls on top of fork. Holding the fork over the bowl of red candy, spoon the melted chocolate over the top of the ball until it’s fully coated. Lightly tap the handle of the fork on the side of the bowl to knock off the excess chocolate, then transfer the coated cake ball back to the baking sheet. Immediately decorate with sprinkles.
- When all the cake balls are coated in chocolate, return the pan to the refrigerator to chill for an additional 30 minutes, until the chocolate has hardened.
Disclaimer
Any nutritional data I provide is an approximation and actual dietary information can vary based on ingredients and proportion sizes.


I just want to give you 5⭐ for giving credit to the lady who invented Cake Pops/Balls ! You don’t see much of that kind of Honesty in these recipe sites! If they’re not trademarked that is!
I will definitely be trying your recipe! Thanks 😊
I hope you enjoy the recipe! It’s such an easy one to make and always delicious! 🙂