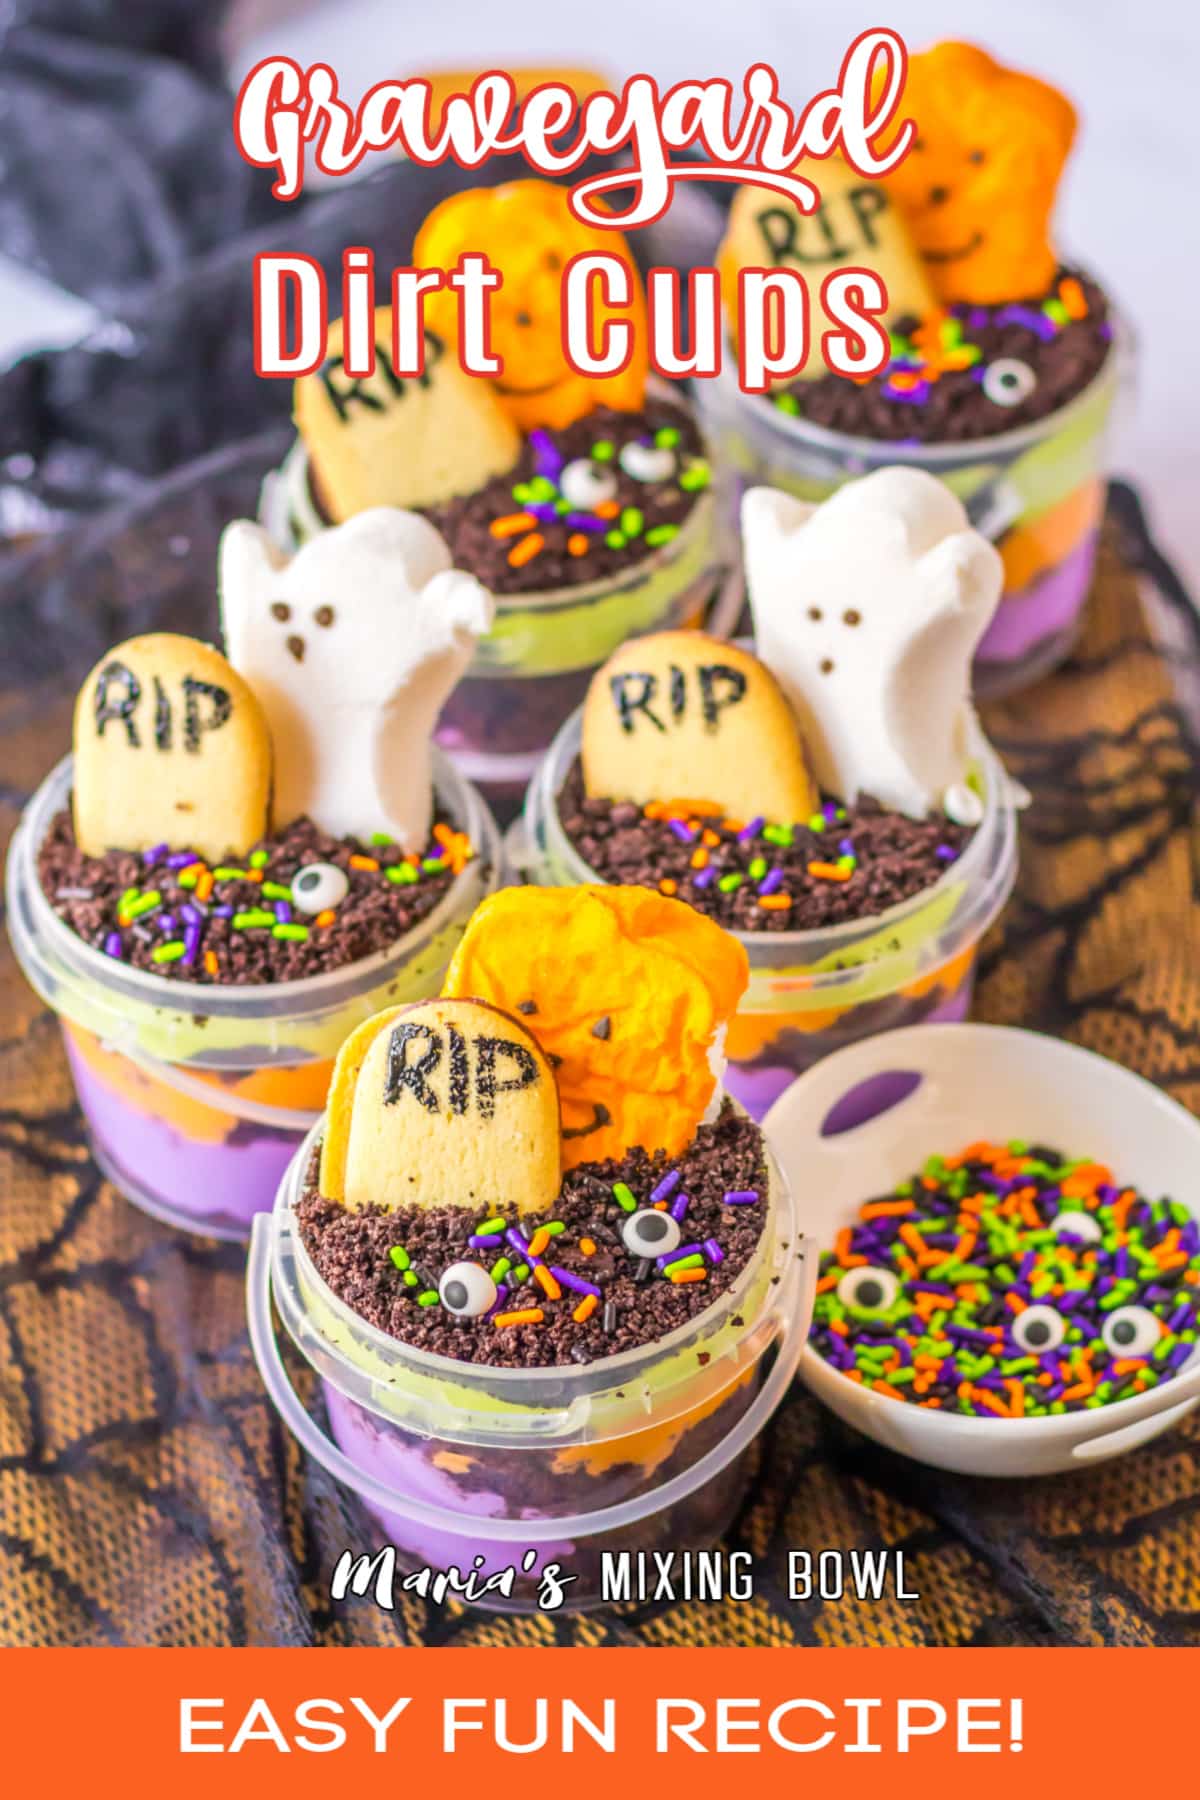
Graveyard Dirt Cups

These Graveyard Dirt Cups are a fun and delicious treat that the whole family will love! With only a few simple ingredients, you can create these spooky treats for Halloween! The kids will love them!
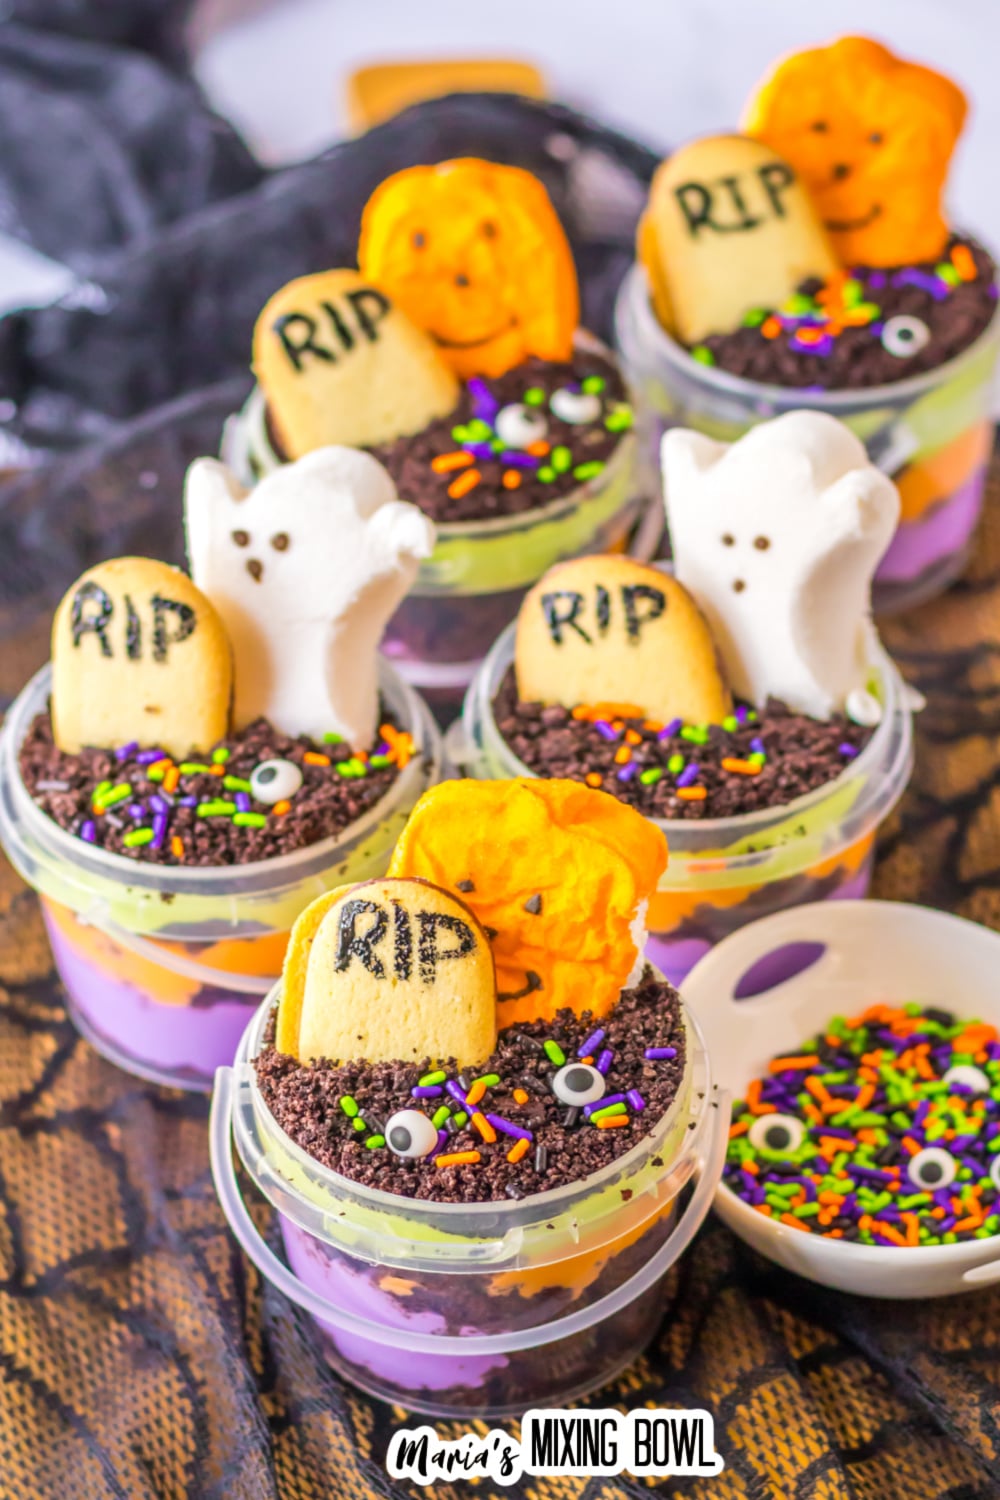
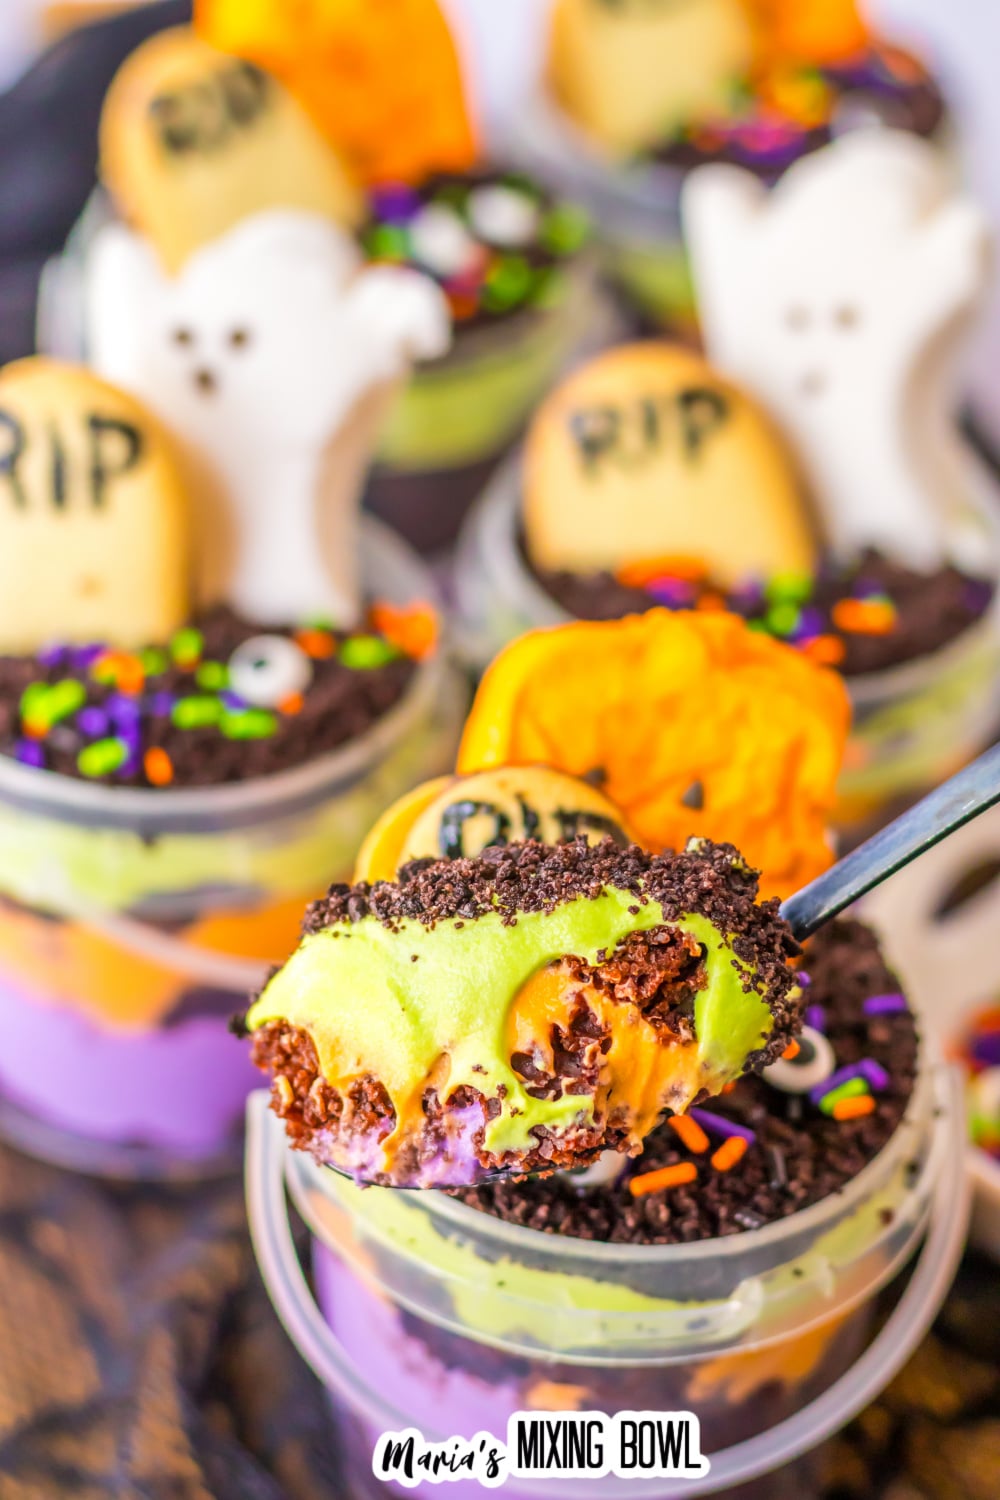
I’m not a big fan of creepy crawlies, but these Graveyard Dirt Cups are just too cute to pass up! The combination of chocolate cake, pudding, crushed Oreos, and fun Peeps make for a tasty and fun graveyard. Plus, it’s a great way to get the kids involved in making a fun Halloween treat.
Table of contents
❤️ Why You’ll Love This Recipe
- These Graveyard Dirt Cups are a fun and delicious treat that the whole family will love!
- Only a few simple ingredients are needed to make these spooky treats for Halloween.
- The kids can get involved in making this fun and creative dessert.
🛒Ingredients
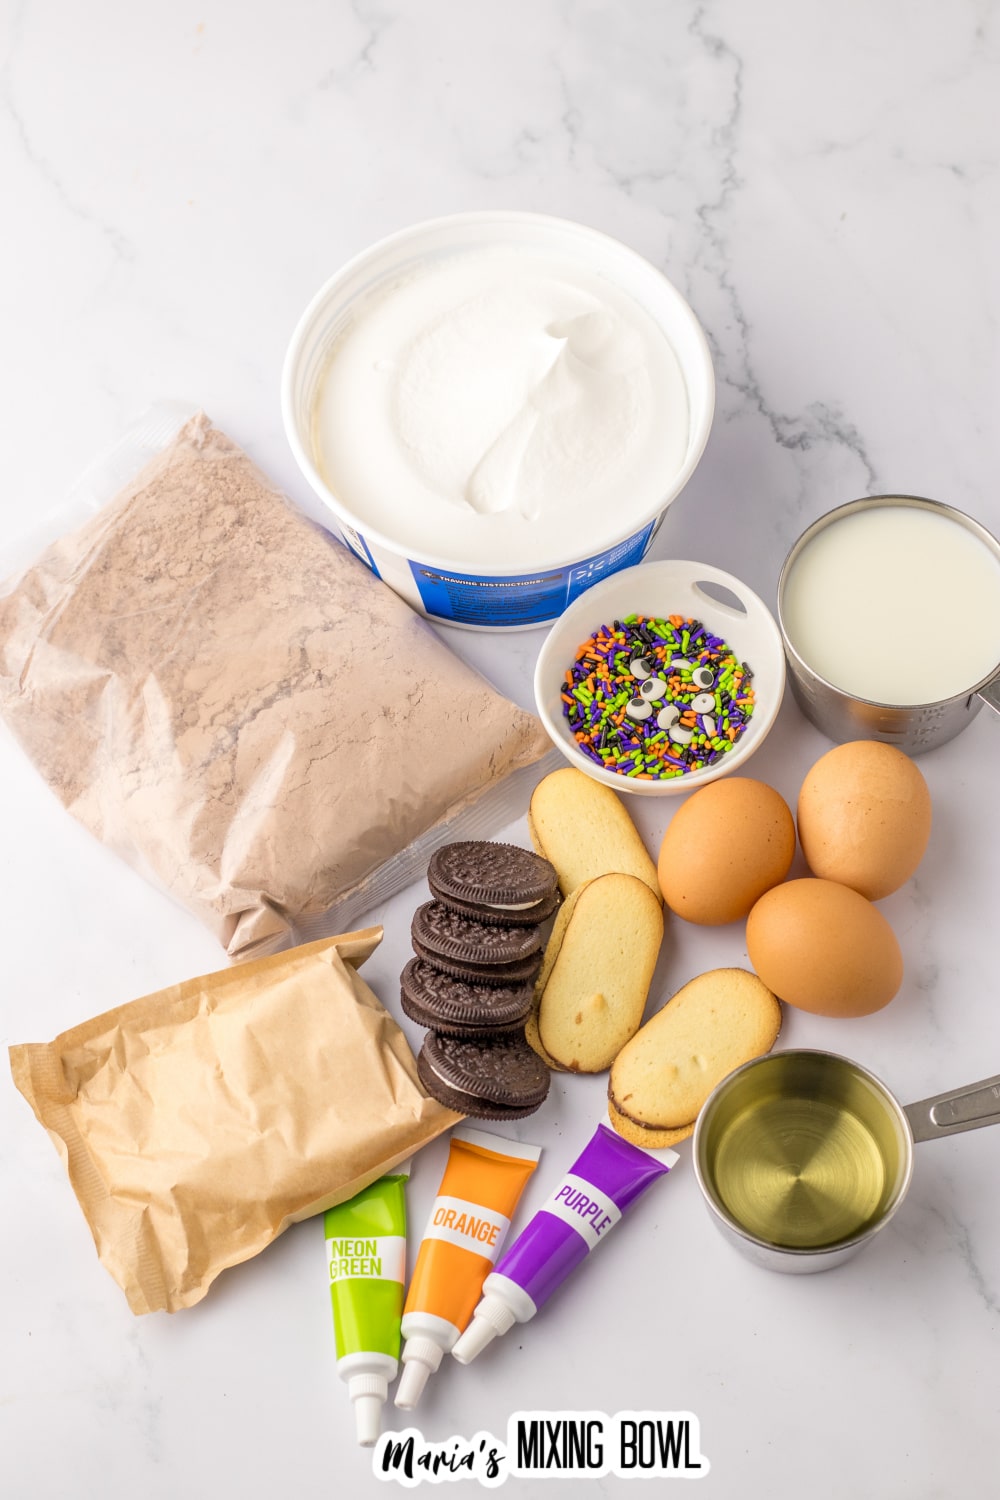
You only need a few simple ingredients to help you make this delicious recipe. Gather these ingredients on your next trip to the grocery store to enjoy these spooky treats!
- Devils food cake
- Water, oil, and eggs the box calls for
- white chocolate instant pudding
- cold milk
- whipped topping
- Neon green, orange, and purple food coloring
- Oreo cookies
- Milano cookies
- Halloween candy and sprinkles for decor
See the recipe card below for quantities.
🔪 How to Make Graveyard Dirt Cups
Making these individual desserts is so simple. Just follow these step-by-step directions here or in the recipe card at the bottom of the post and you will have a festive Halloween treat in no time at all.
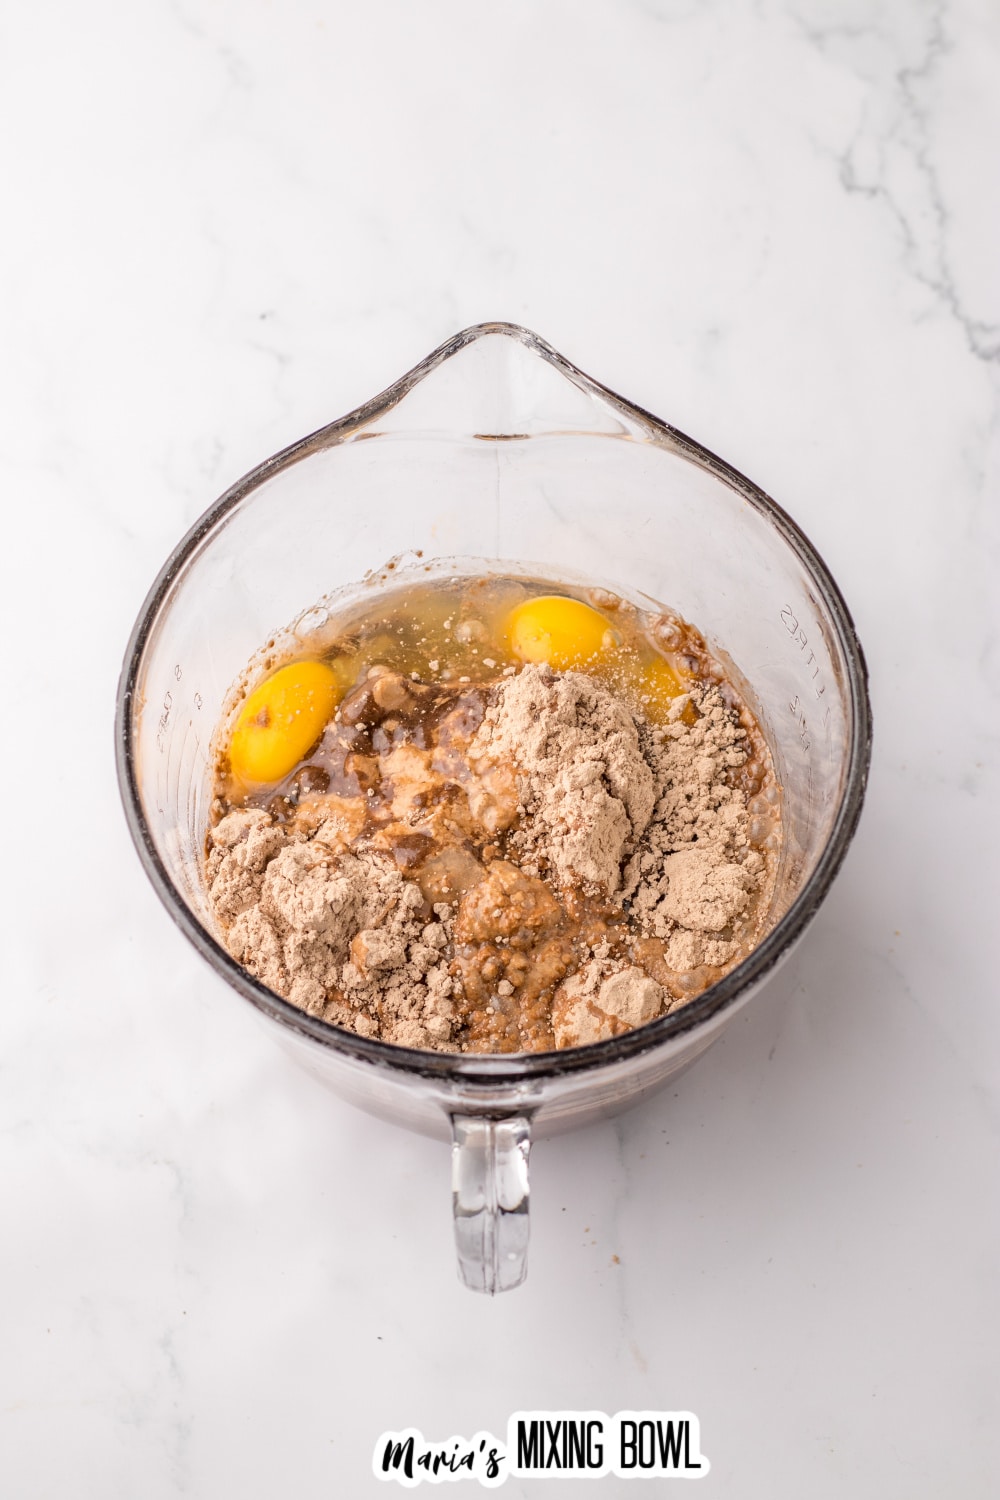
Step 1: Preheat the oven and make your cake mix
Preheat your oven to 350 degrees. And, then in a large bowl combine the cake mix and the water, oil, and eggs the box calls for.
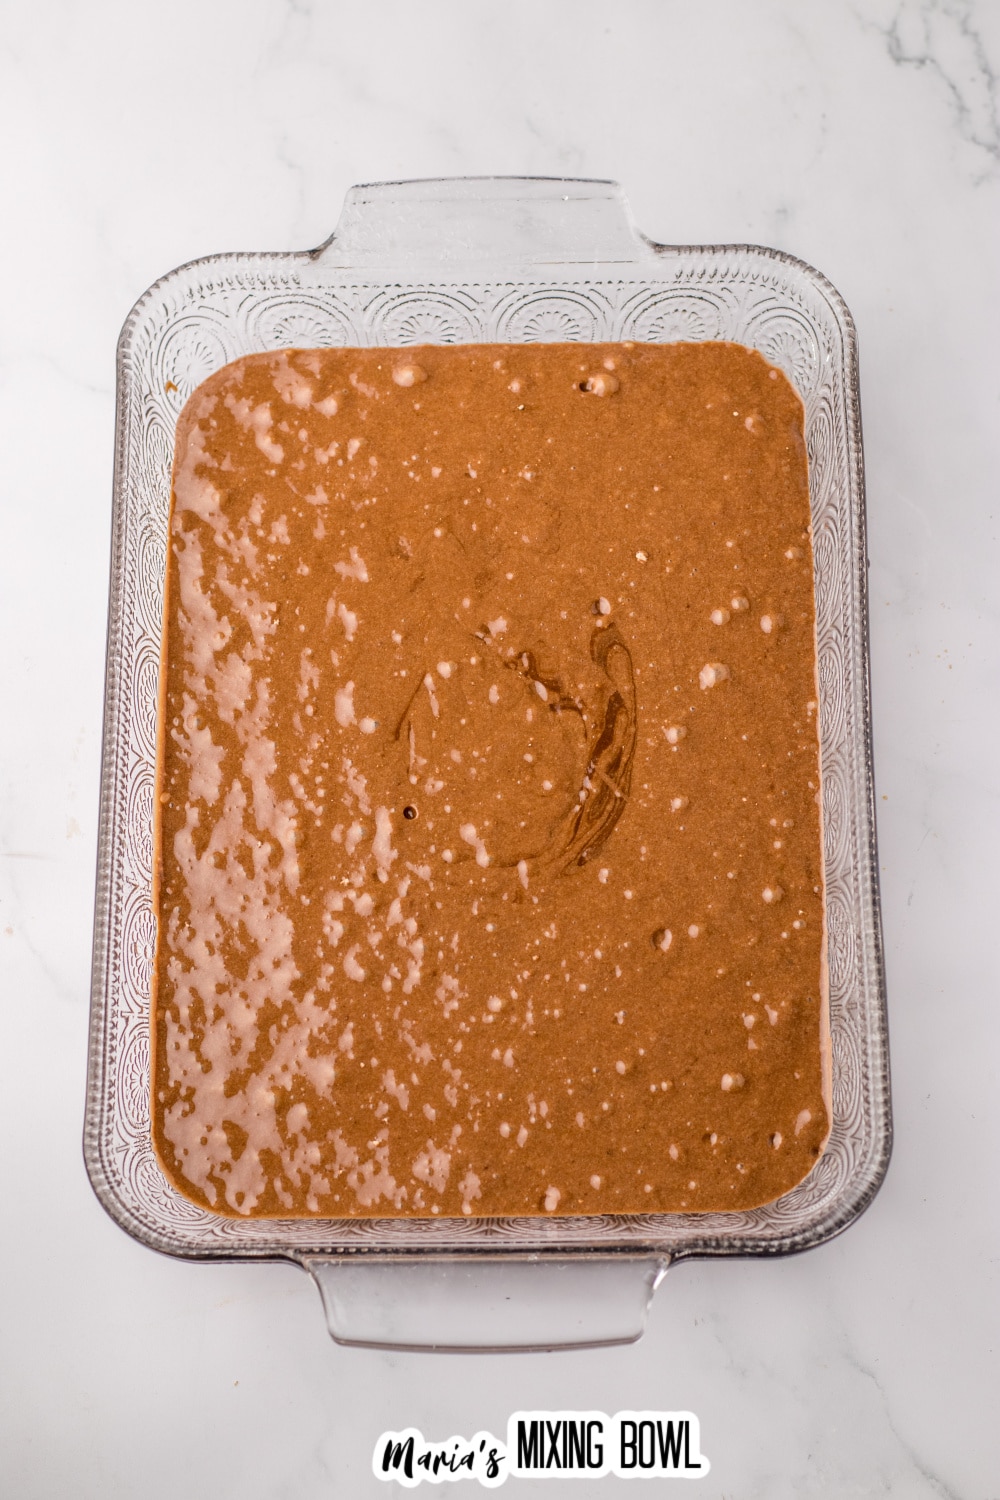
Step 2: Bake the cake
Pour the cake batter into a prepared 9×13 baking dish. Then, bake for 30-35 minutes or until a toothpick inserted comes out clean.
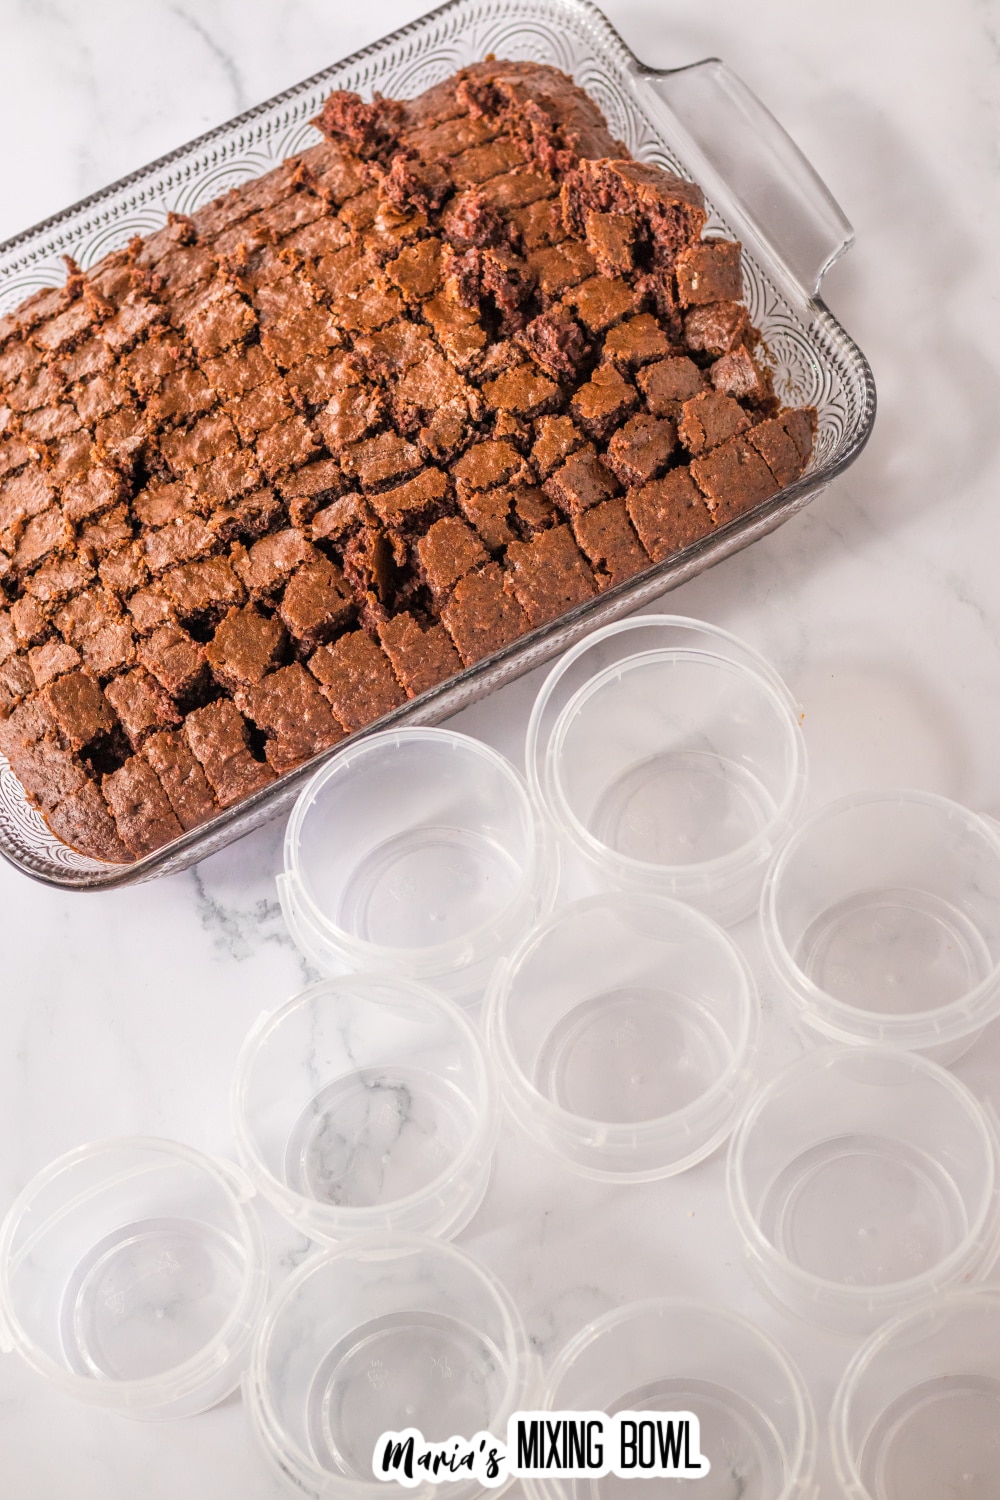
Step 3: Cut and cool the cake
Slice into bite-size squares. And then set aside to cool.
Step 4: Make the pudding
Combine the pudding with the milk and whisk. Then fold in the whipped topping. Separate the filling into 3 bowls and color each bowl with one of the food colorings.
Step 5: Start to build the cups
Into your buckets place a little of the cake. Next a layer of one of the puddings. Repeat the layers so you have 3 layers of pudding, each a different color.
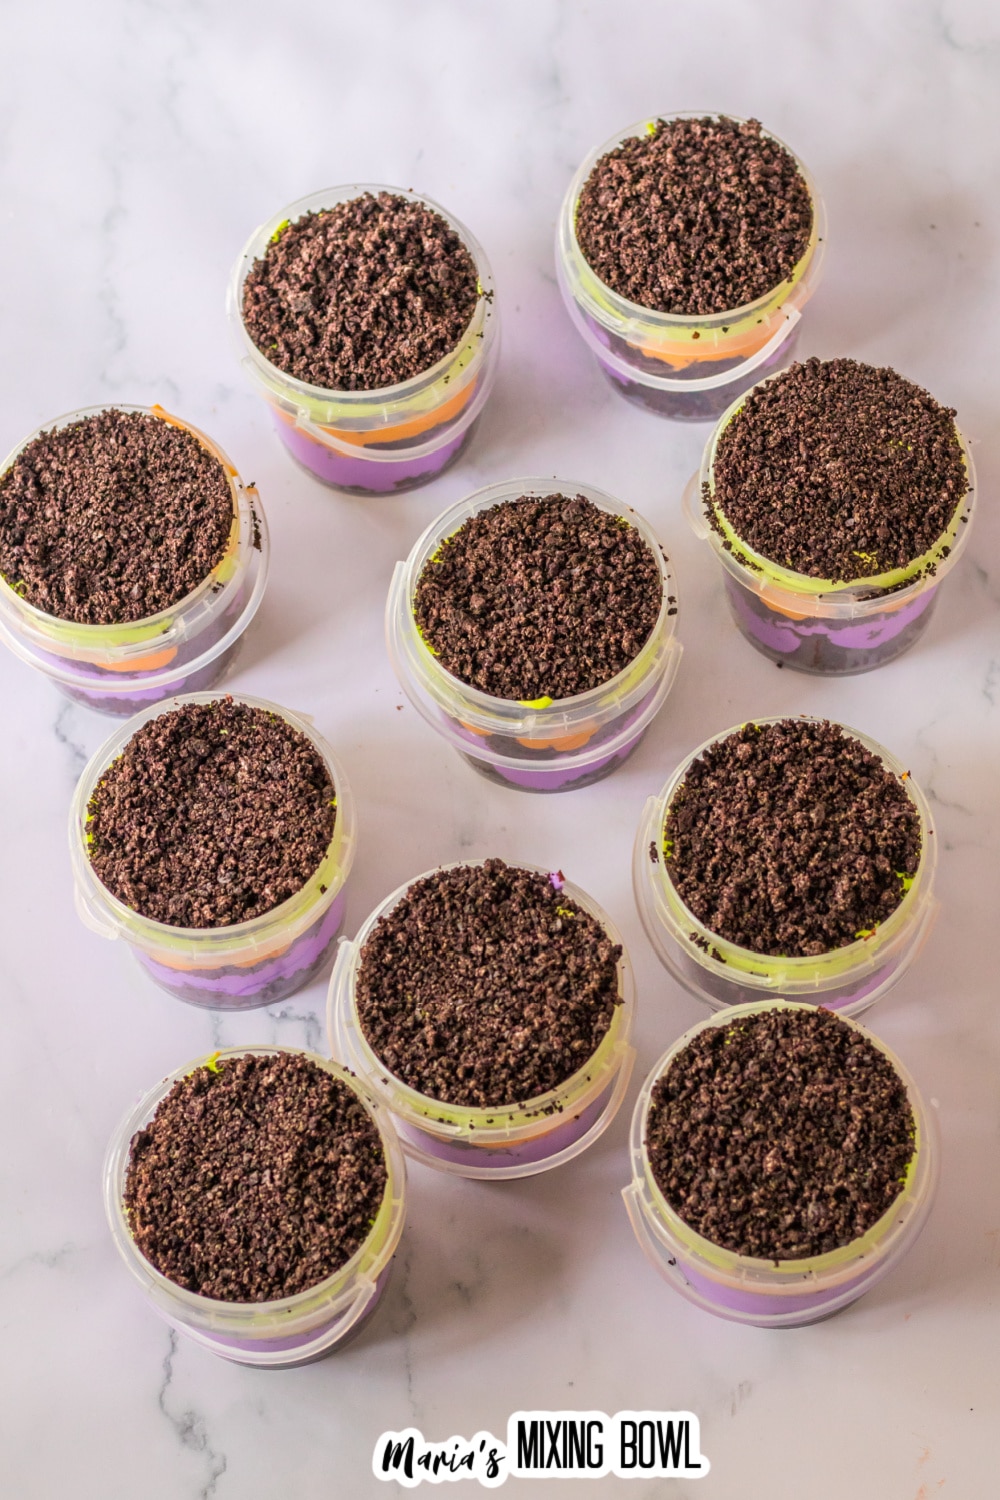
Step 6: Top with cookie crumbs
Top each one evenly with the cookie crumbs.
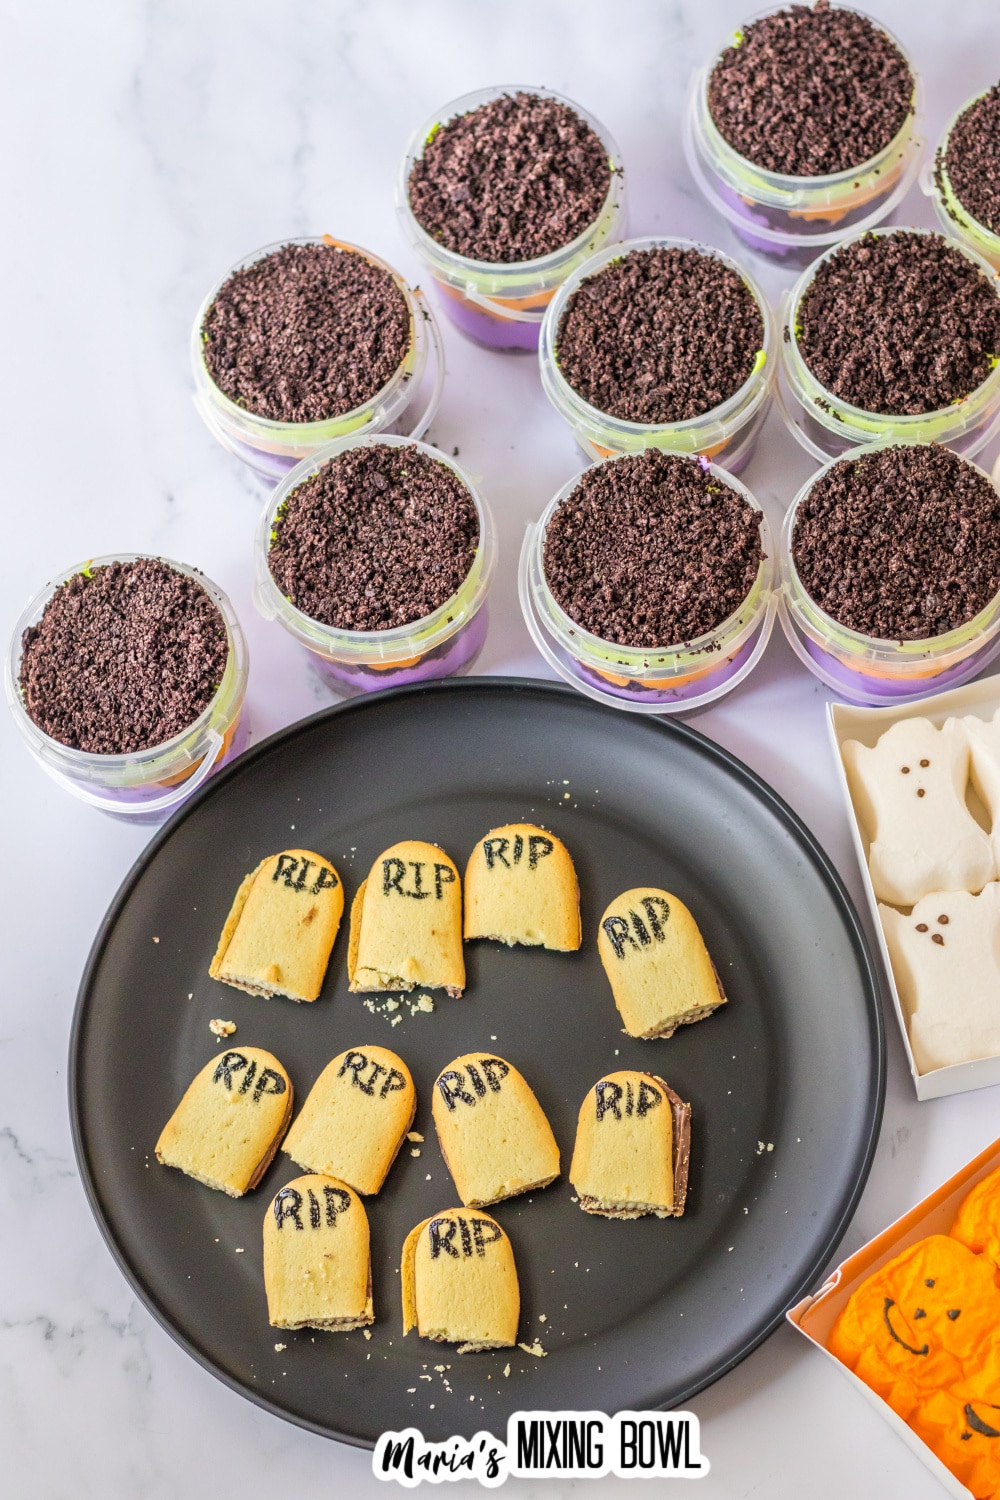
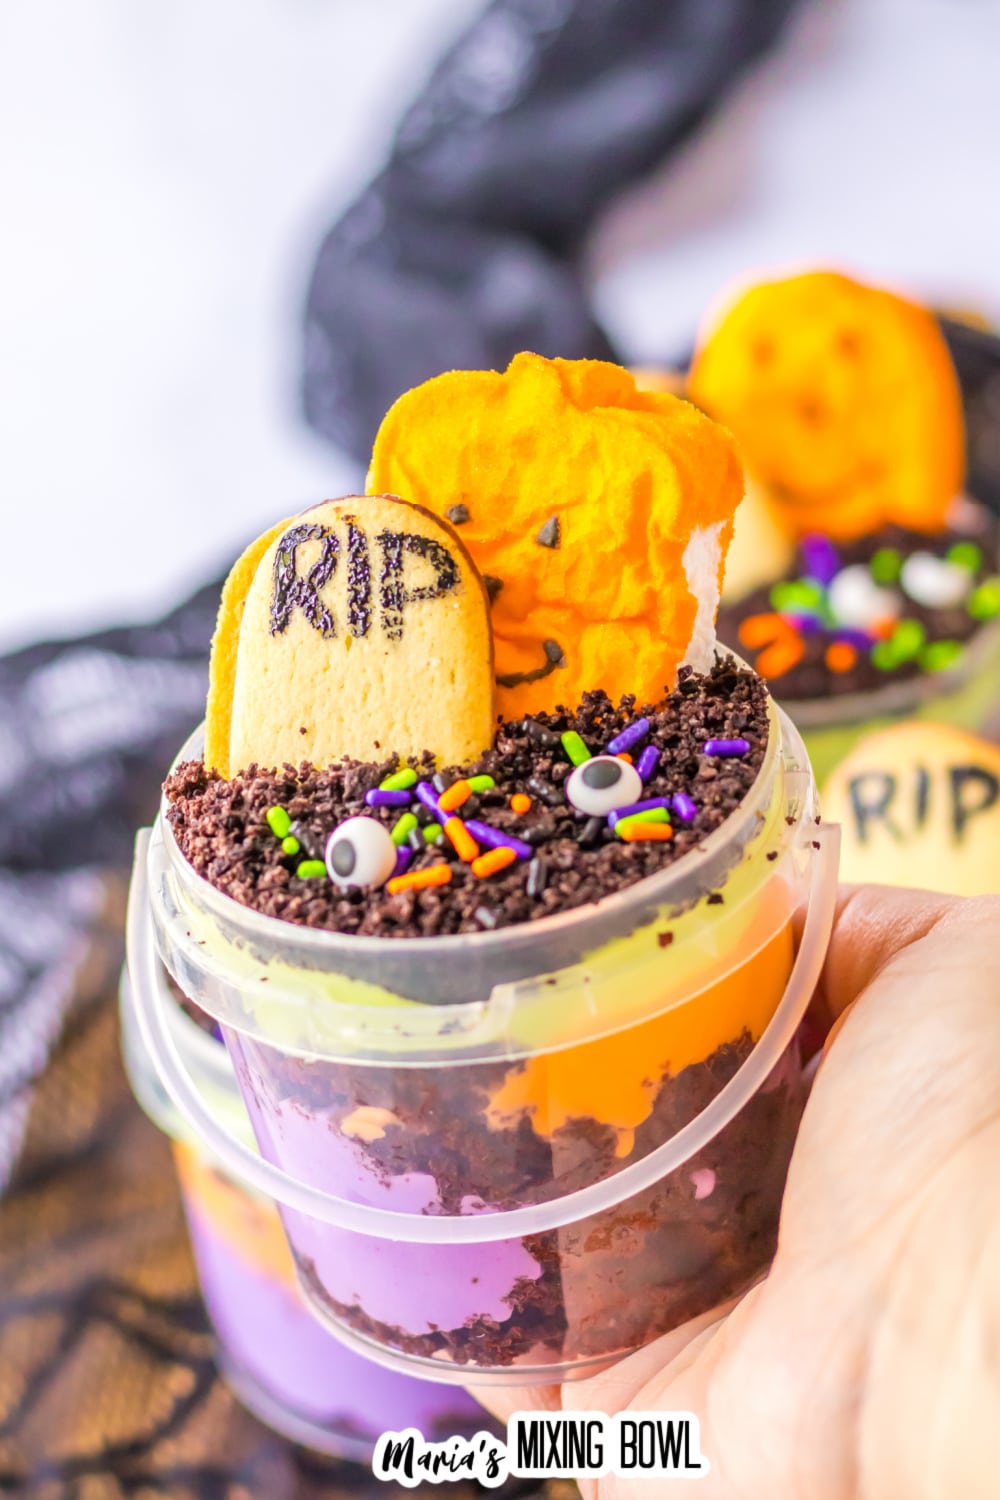
Step 7: Make the tombstones
Cut the bottom of the Milano cookie off. Using food coloring and a little paint brush you can paint on the cookies R.I.P and such.
Step 8: Decorate the buckets and chill
Decorate the buckets with the gravestones, candy, and sprinkles. And, refrigerate for an hour. Serve!
📝Variations
Do you want to change up this recipe and make it your own? Here are some ways that you can do that!
- Add some gummy worms or other candy for a more creepy effect.
- Use different colors of food coloring to create a unique graveyard scene.
- Swap out the pudding and use chocolate mousse instead.
If you are looking for more fun and delicious Halloween recipes you may also enjoy this Halloween Pumpkin Cheesecake recipe.
🥄 Equipment
You only need a few pieces of equipment to help you make this fun Halloween Dessert recipe:
- 8-ounce clear buckets
- mixing bowls
- hand mixer
- 9×13 cake pan
🥫 Storage
Store leftover cups in the fridge for up to three days. Make sure that you place them in an airtight container or wrap the cups with plastic wrap to keep them fresh.
💭 Tips
Here are a few tips that you can use to help you make this delicious.
- You can use vanilla or cheesecake pudding if you like.
- Decorate with little gummi worms or candy skulls too, anything to make these spooky.
- If you don’t have clear buckets, you can use mason jars or any other clear container.
⁉️ FAQ
Do you have questions about this recipe? Here are the answers to the most commonly asked questions.
Yes! These Graveyard Dirt Cups can be made 1-2 days in advance
Of course! Feel free to get creative and use different types of candy or sprinkles for decoration.
You can grab these buckets at craft stores or from online retailers.
🍽 More Halloween Recipes
Do you enjoy Halloween recipes? If so, try these delicious recipes:
📌 PIN IT!!
🧾Recipe Card
Want to make this recipe? Print the recipe card below, or pin this recipe, so you can find it later.
Graveyard Dirt Cups
Equipment
- 8 ounce clear buckets
- 9×13 baking dish
- mixing bowls
- Hand mixer
Ingredients
- 15.25 ounces devils food cake plus the ingredients listed on the box.
- 6.8 ounces white chocolate instant pudding
- 4 cups cold milk
- 8 ounces whipped topping
- Neon green, orange, and purple food coloring orange and purple food coloring
- 1 ½ cups crushed oreo cookies
- 10 Milano cookies
- Halloween candy and sprinkles for decor
Instructions
- Preheat your oven to 350 degrees.
- In a large bowl combine the cake mix and the water, oil and eggs the box calls for.
- Pour the cake batter into a prepared 9×13 baking dish.
- Bake for 30-35 minutes or until a toothpick inserted comes out clean.
- Slice into bite size squares.
- Set aside to cool.
- Meanwhile prepare the pudding.
- Combine the pudding with the milk and whisk.
- Fold in the whipped topping.
- Separate the filling to 3 bowls and color each bowl with one of the food colorings.
- Into your buckets place a little of the cake.
- Next a layer of one of the puddings.
- Repeat the layers so you have 3 layers of pudding, each a different color.
- Top each one evenly with the cookie crumbs.
- Cut the bottom of the Milano cookie off.
- Using food coloring and a little paint brush you can paint on the cookies R.I.P and such.
- Decorate the buckets with the gravestones, candy and sprinkles.
- Refrigerate for an hour.
- Serve!
Notes
Disclaimer
Any nutritional data I provide is an approximation and actual dietary information can vary based on ingredients and proportion sizes.


