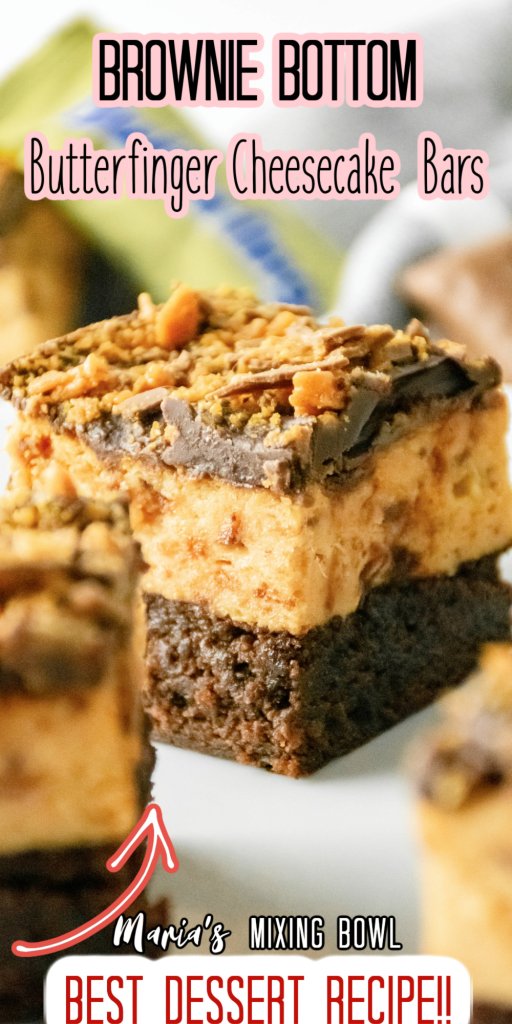
Brownie Bottom Butterfinger Cheesecake Bars
These Butterfinger Cheesecake Bars are loaded with the delicious chocolate and peanut butter flavors we all love in our Butterfinger bars. They even have crushed Butterfingers!
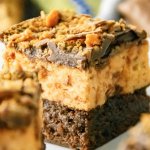
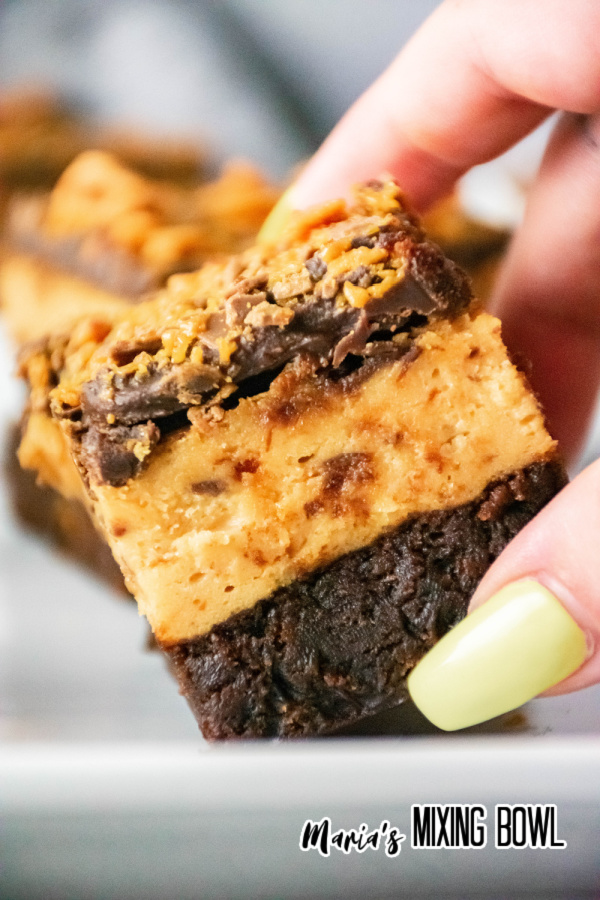
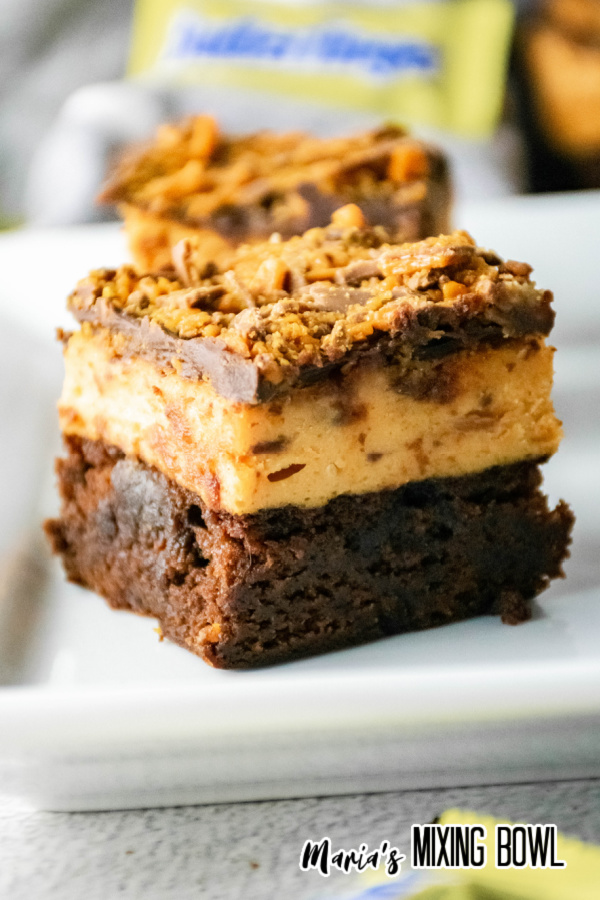
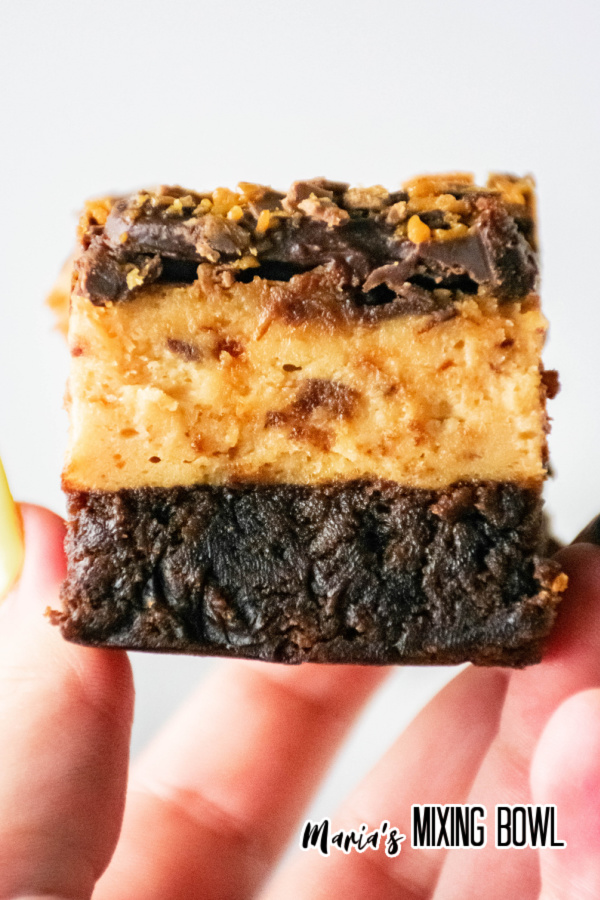
The only thing better than cheesecake is cheesecake loaded with Butterfingers. Actually, scratch that. One thing could be better. Cheesecake loaded with butterfingers with a brownie bottom. We’re serving up a whole love of deliciousness with this tasty cheesecake bar recipe today.
Who doesn’t love cheesecake bars? We don’t know anyone who would turn them down. Also, we don’t know many people who would turn away brownies. We put both of those together along with delicious Butterfinger bars to create this decadent cheesecake bar recipe that’s perfect for dessert, parties, or just when you get the craving.
Butterfinger Cheesecake Bars with Brownie Bottom
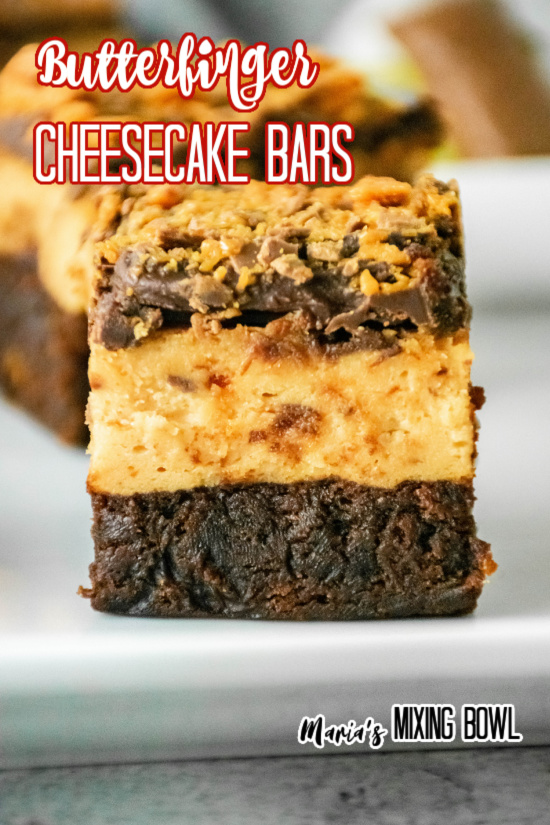
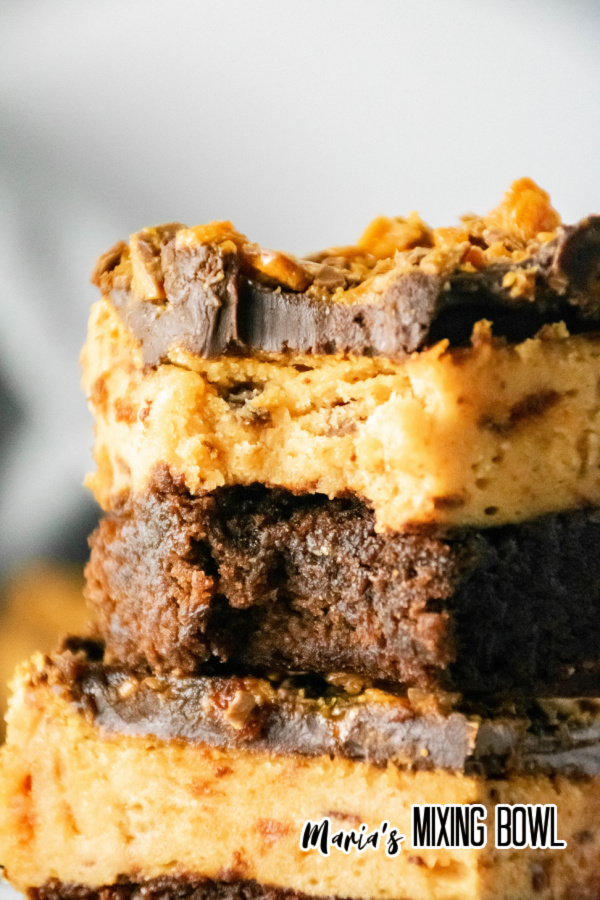
If this recipe doesn’t satisfy your sweet tooth, nothing will. It all starts with a rich brownie base. Then we add a peanut butter cheesecake layer full of crushed Butterfinger. Then, it’s all topped with chocolate ganache and more Butterfinger pieces. It’s a rich, delicious cheesecake recipe that is loaded with peanut butter and chocolate flavor.
Brownie Bottom Butterfinger Cheesecake Bars Ingredients
It only takes a handful of simple ingredients to make these cheesecake bars. You’ll find everything you need easily at your local grocery store.
- Brownie mix
- Room temperature cream cheese
- Granulated sugar
- Eggs
- Vanilla extract
- Marshmallow fluff
- Peanut butter
- Crushed mini Butterfingers
- Semi-sweet chocolate chips
- Heavy cream
**See the recipe card at the end of the post for quantities.
Brownie Bottom Butterfinger Cheesecake Bars Instructions
This is a relatively simple recipe to make. It only takes a few steps to make it. Just follow the instructions, and you’ll be just fine.
Step 1: Make the Brownie Bottom
Prepare the brownie mix according to the package directions and bake in a 9×9 baking dish. Remove from the oven and allow the brownie to cool just enough to touch. Then, use a spoon to gently press the brownie, compacting it slightly.
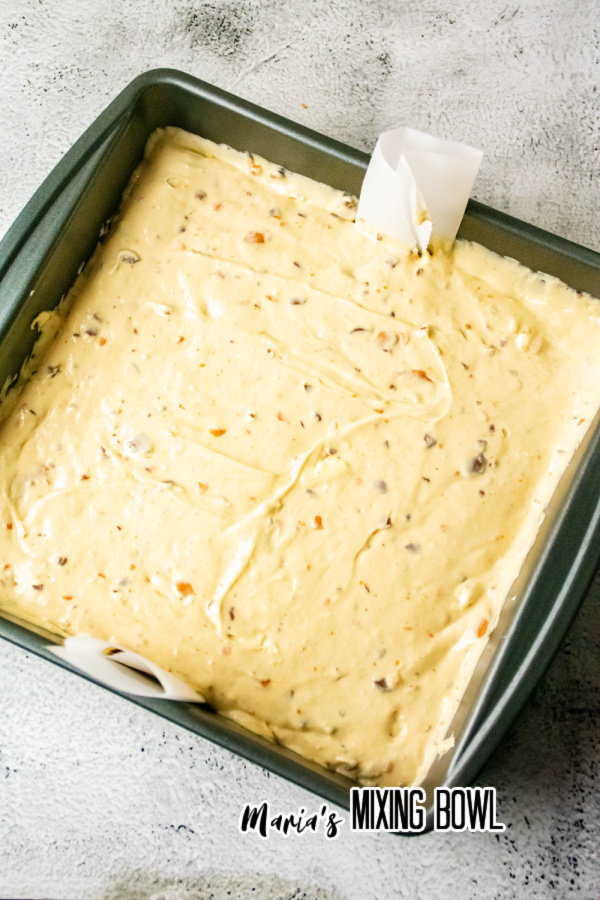
Step 2: Make the Cheesecake Batter
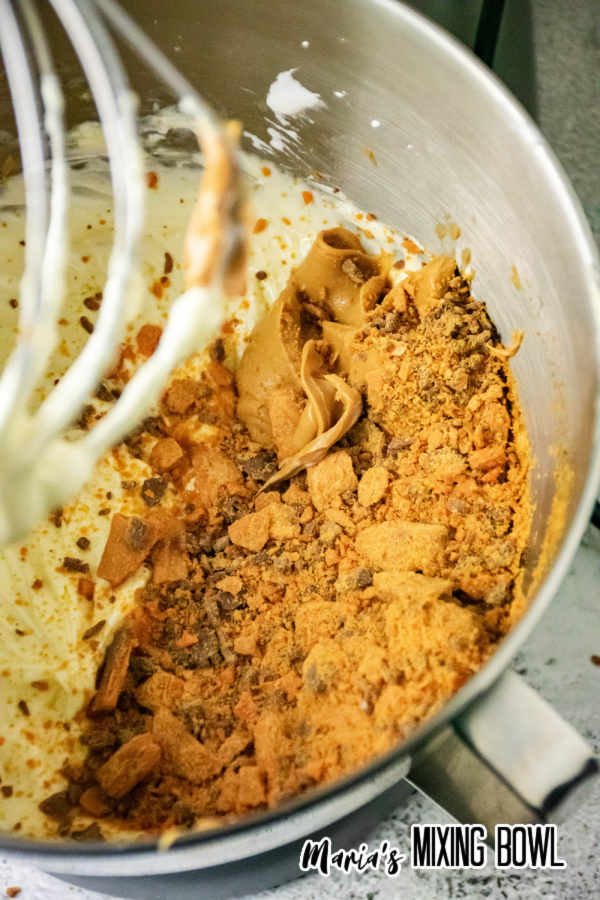
Beat the cream cheese and sugar in a mixing bowl until smooth and creamy. Then, add eggs and vanilla extract and beat again. Add the marshmallow fluff and mix. Finally, add the peanut butter and crushed Butterfingers and mix until fully incorporated and streak-free.
Step 3: Bake
Pour the cheesecake batter over the brownie base and smooth it out evenly. Then, bake for 20 minutes at 350 degrees. After 20 minutes, reduce the heat to 200 degrees and bake for another 30 minutes. Do not open the oven door.
Step 4: Cool
After baking, turn off the oven and leave the cheesecake inside it for 10 minutes. Then remove the cheesecake and allow it to cool to room temperature.
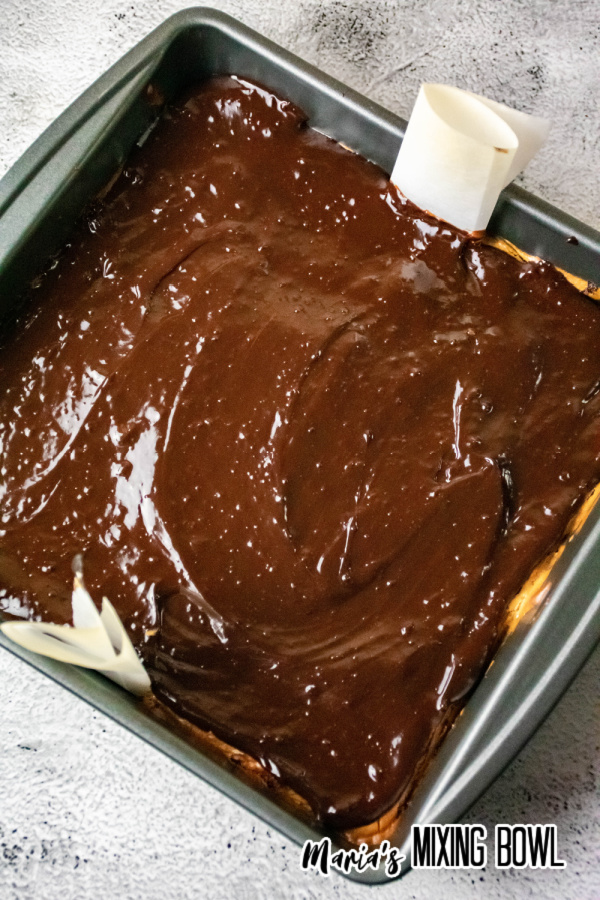
Step 5: Make the Ganache
Place the chocolate chips and heavy whipping cream in a microwaveable bowl and microwave for a minute. Mix until shiny and silky smooth. If the ganache is lumpy or dull, microwave for another 30 seconds.
Step 6: Finish the Cheesecake Bars
Spread the ganache evenly over the cheesecake. Then, sprinkle more crushed Butterfinger over it. Cover and chill for at least 3 hours. Once chilled cut into squares. Serve.
Hint: To prevent cracking, do not open your oven door at any point until it’s time to remove the cheesecake.
Equipment
You’ll only need a few simple pieces of equipment to make this recipe.
- Measuring cups and spoons
- Mixing bowl
- Hand mixer
- Microwaveable bowl
- Baking dish
Brownie Bottom Butterfinger Cheesecake Bars Tips
If you want these cheesecake bars to be as pretty as possible, there are a couple of things to remember.
Never open the oven door: Don’t open the oven door until it’s time to remove the brownies. This prevents cracking.
Ganache is always shiny: If our ganache isn’t shiny, it’s not done. Heat it until it’s silky and shiny when mixed.
Adequate chilling is key: Chill your cheesecake for a minimum of 3 hours to ensure that it’s nice and solid when you slice it.
Storage
Store this cheesecake for 3 to 5 days in an air-tight container in the refrigerator.
PIN IT!!
More Cheesecake Recipes
If you’re a fan of all things cheesecake then we have some recipes that we think you’re going to love.
Coconut Dream Cookies Cheesecake
Red Velvet No-Bake Mini Oreo Cheesecakes
Raspberry Cheesecake Cookie Bars
Brownie Bottom Butterfinger Cheesecake Bars FAQ
If you have questions about these cheesecake bars, then read on. The following FAQ answers the most commonly asked questions bout this recipe.
How long will these bars last?
They’ll keep for 3 to 5 days in an air-tight container in the refrigerator.
What’s the difference between baked and no-bake cheesecake?
Baked cheesecakes use eggs and are baked in the oven with a water bath or, in lieu of a water bath, with the temperature slowly lowered over time. No-bake cheesecakes have no eggs and set by chilling.
Is baked or no-bake cheesecake better?
That’s a little like asking if chocolate cake or chocolate brownies are better. Both are amazing! Baked cheesecake is creamier and smoother, but no-bake cheesecake is easier to make and has its own fluffy texture.
Where was cheesecake invented?
Ancient Greeks invented cheesecake in the 5th century.
Try These Brownie Bottom Butterfinger Cheesecake Bars
These delicious Butterfinger cheesecake bars are loaded with peanut butter, Butterfinger pieces, and a rich brownie bottom. They’re absolutely delicious and easier to make than you’d think. Give them a try, and we know you’ll love them as much as we do.
MORE RECIPES YOU WILL LOVE:
Banana Pudding Cheesecake Bars
Coconut Dream Cookies Cheesecake
Nutella Cheesecake Brownies
Carrot Cake Recipe
Mini Lime Pies
Amish Sugar Cookies
Butterfinger Cheesecake Bars
Equipment
- Measuring Cups and Spoons
- Mixing Bowl
- Hand mixer
- Microwaveable Bowl
- Baking dish
Ingredients
- 1 box Brownie mix
- 16 ounce Cream cheese- room temperature
- ¼ cup Granulated sugar
- 2 Eggs
- 1 teaspoon Vanilla extract
- ½ cup Marshmallow fluff
- ¼ cup Peanut butter
- 15 mini Butterfingers- crushed 10 for the filling and 5 for the topping
- 1 cup Semi-sweet chocolate chips
- ¼ cup Heavy cream
Instructions
- Prepare the brownie mix as the instructions are listed on the box.
- Bake in a prepared 9×9 pan following the temperature and time instructions on the box.
- Once baked, allow it to cool enough to touch.
- Using a large spoon, lightly press down on the brownie to compact it down slightly.
- Preheat the oven to 350 degrees Fahrenheit.
- To start the filling, place the cream cheese and sugar into a mixing bowl.
- Beat until smooth and creamy. Add in the eggs and vanilla extract.
- Once well combined, add in the marshmallow fluff and mix.
- Add in the peanut butter and the crushed Butterfingers cheesecake filling mixture and mix until fully incorporated and the mixture is streak free.
- Pour over the brownie and spread evenly.
- Bake for 20 minutes.
- Once the 20 minutes are up, without opening the oven door, reduce the heat to 200 degrees and bake for an additional 30 minutes.
- Once finished baking, turn the oven off leaving the cheesecake inside for 10 minutes.
- Remove and allow the cheesecake to come to room temperature.
- Once at room temperature, make the chocolate ganache.
- Place the chocolate chips, heavy whipping cream. Microwave for 1 minute and mix until shiny and silky smooth.
- If the ganache is lumpy or matte looking after mixing for a minute, place back in the microwave for an additional 30 seconds.
- Pour the ganache over the cheesecake and spread evenly.
- Once the chocolate has been spread, sprinkle the remaining Butterfinger crumbs evenly across the chocolate.
- Cover the cheesecake, and place in the refrigerator for at least 3 hours.
- Once chilled, take out and cut into 16 squares. Serve and enjoy.
Notes
Disclaimer
Any nutritional data I provide is an approximation and actual dietary information can vary based on ingredients and proportion sizes.


There is no coffee mentioned in the ingredients, yet it says to add the remaining coffee to the ganache???
Hi Sandy there is no coffee added to this recipe. Could have been a glitch. But no coffee in either the bars or ganache.